Tag: keep

  • How to Keep Twists From Unraveling at the Ends

    How to Keep Twists From Unraveling at the Ends

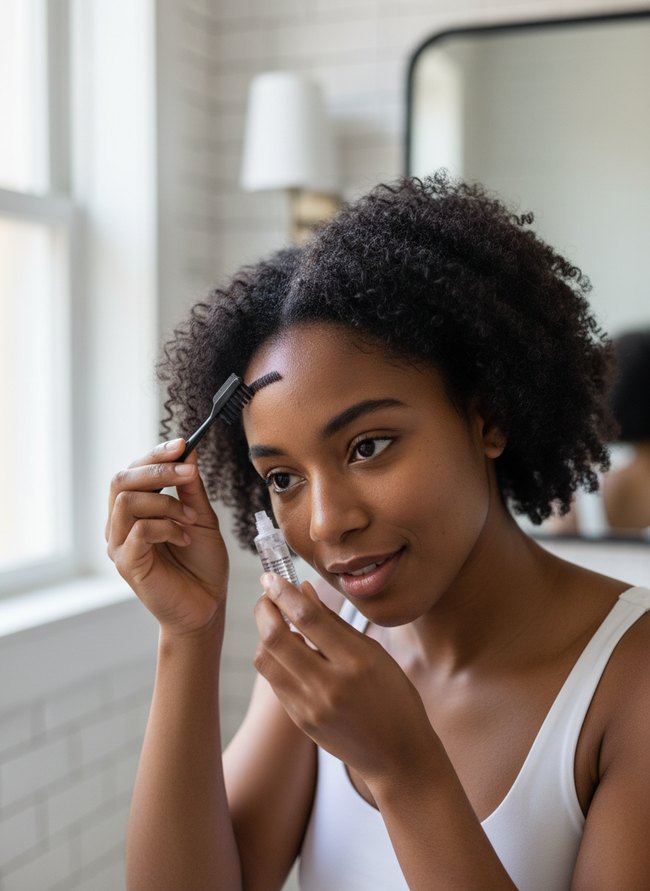
    Loose ends on freshly styled twists can feel frustrating. Many people struggle with keeping carefully crafted hair twists neat and secure. Hard work deserves to stay looking sharp, with clean, defined sections. Frizzy, unruly hair twists often happen because of missing key steps during the twisting process. Knowing the right techniques makes a difference for long-lasting twists. Proper product choice also helps secure the ends against friction and daily movement. The protective style should look polished for days, without constant touch-ups. A few simple adjustments to the routine will stop annoying flyaways. The hair ends will stop unraveling.

    1. Secure Loop End Twist

    Secure Loop End Twist

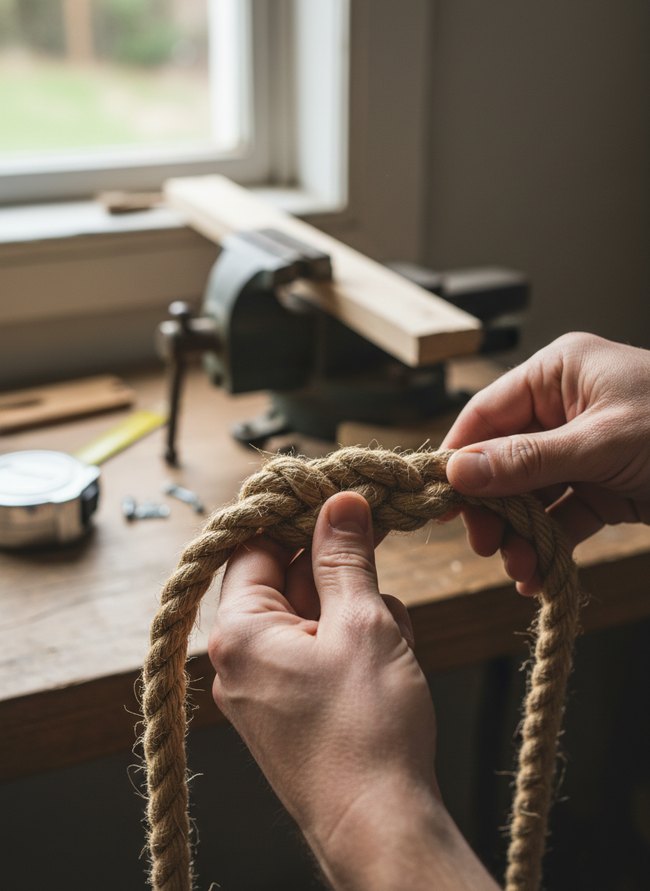
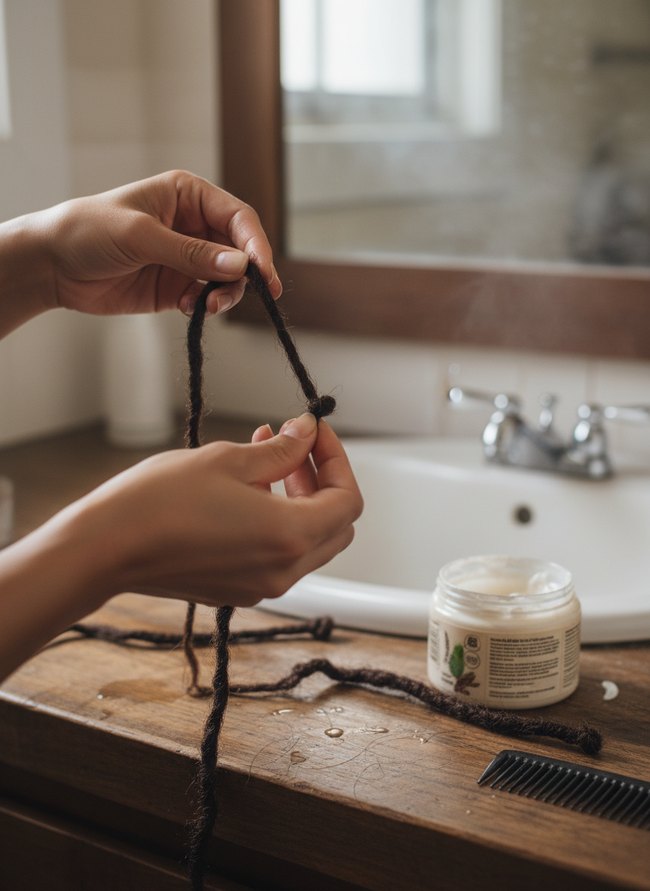
    Bare hands hold a thick brown rope, skillfully weaving strands to form a secure loop. The tight knot demonstrates how to keep twists from unraveling, creating a strong, finished end. Practice the simple technique to make rope projects last longer.

    2. Braided Cordage Finish

    Braided Cordage Finish

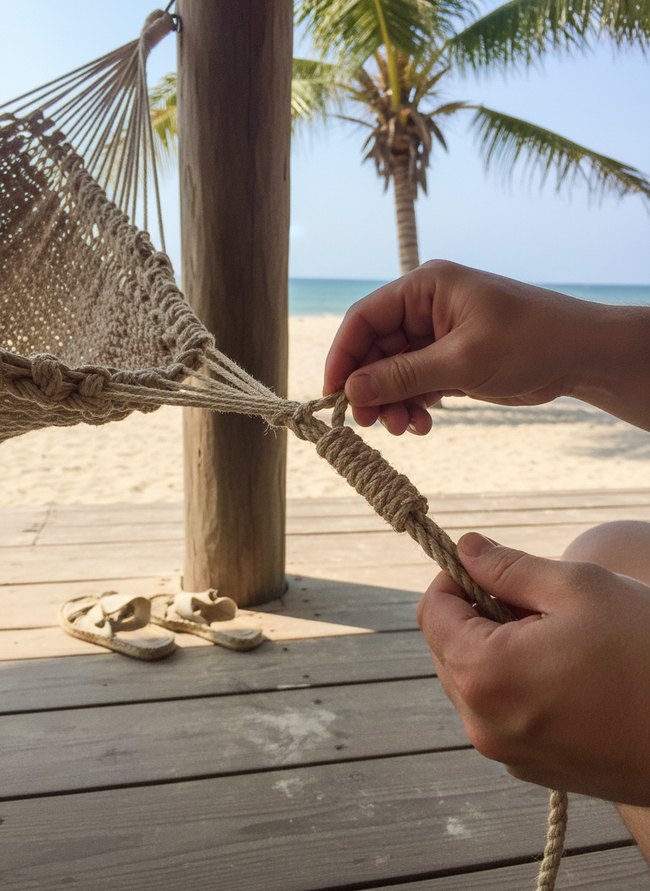
    Hands carefully braid thick beige rope that forms part of a hammock, keeping the cordage neat. The method shows a clever way to keep twists from unraveling by wrapping a small cord around the main rope. A wooden deck and sandy beach provide a relaxed background for this practical knot-tying demonstration. Braiding offers a strong, decorative finish for any rope project.

    3. Heat-Set Fiber Twist

    Heat-Set Fiber Twist

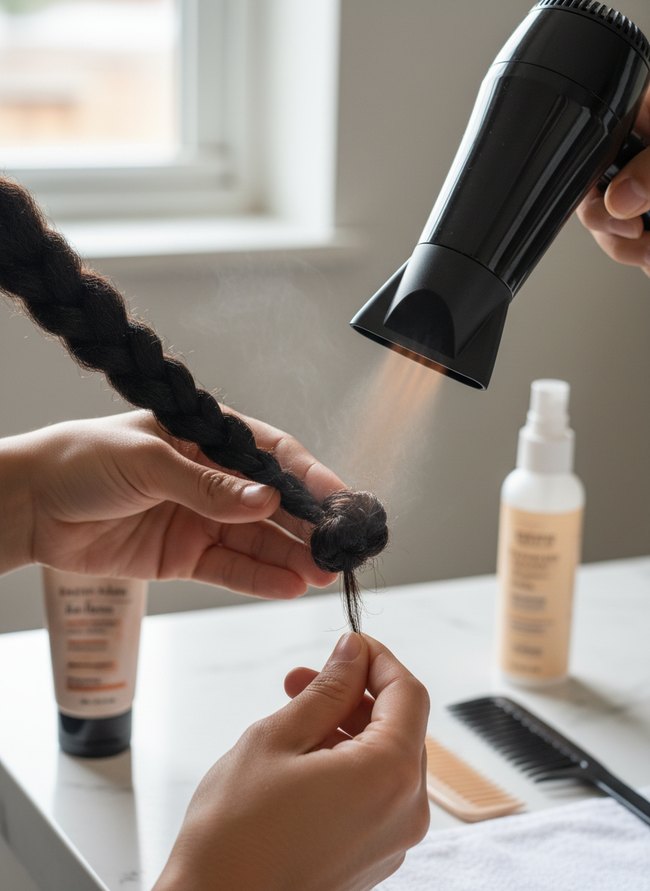
    A person’s hands hold a dark braided twist, with a black hairdryer directing warm air onto the knotted end. Small wisps of steam rise from the hair, showing how heat helps set the twist and prevent unraveling. Heat keeps twists from unraveling, ensuring a longer-lasting style.

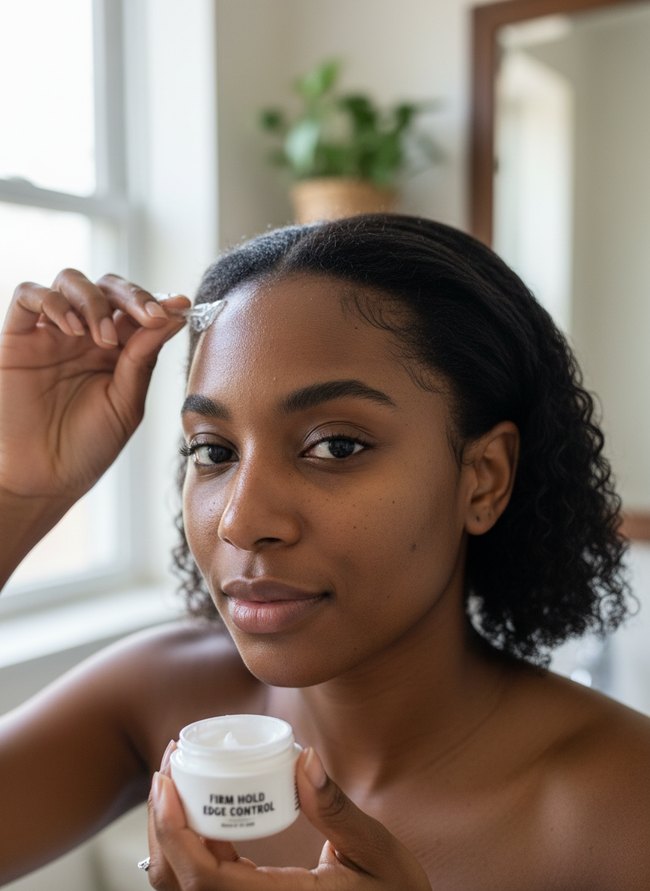
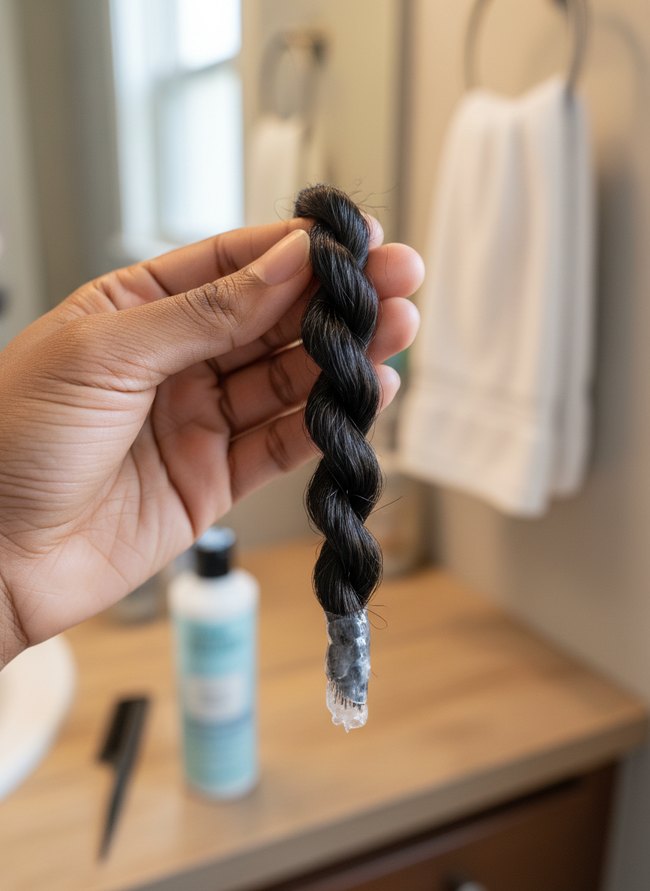
    4. Resin Capped Strand

    Resin Capped Strand

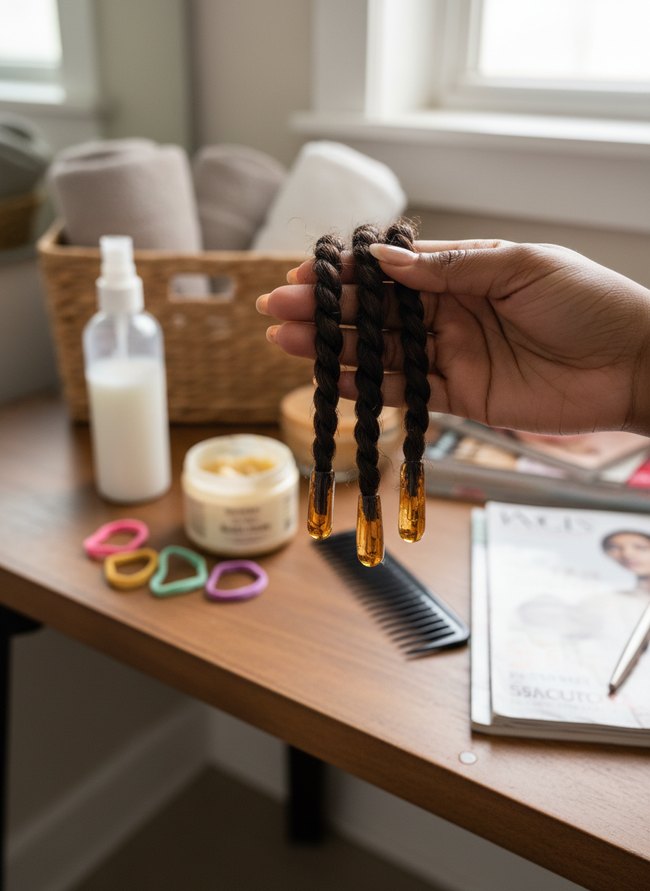
    A hand displays three dark brown twisted hair strands, each with a clear amber resin cap. A wooden surface holds a white spray bottle and a jar of yellow hair product. The method helps keep twists from unraveling with a polished finish.

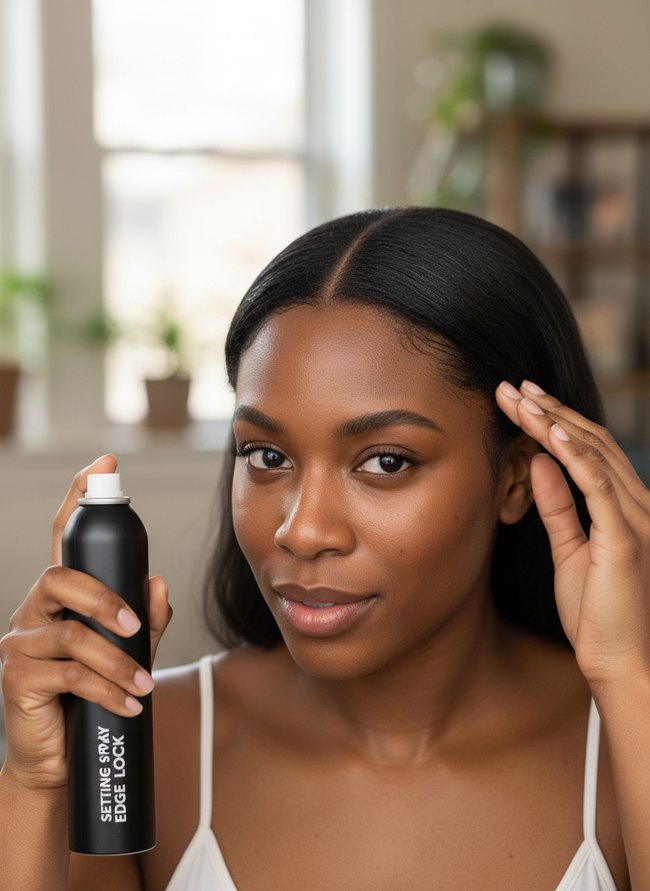
    5. Crimped Metal Casing

    Crimped Metal Casing

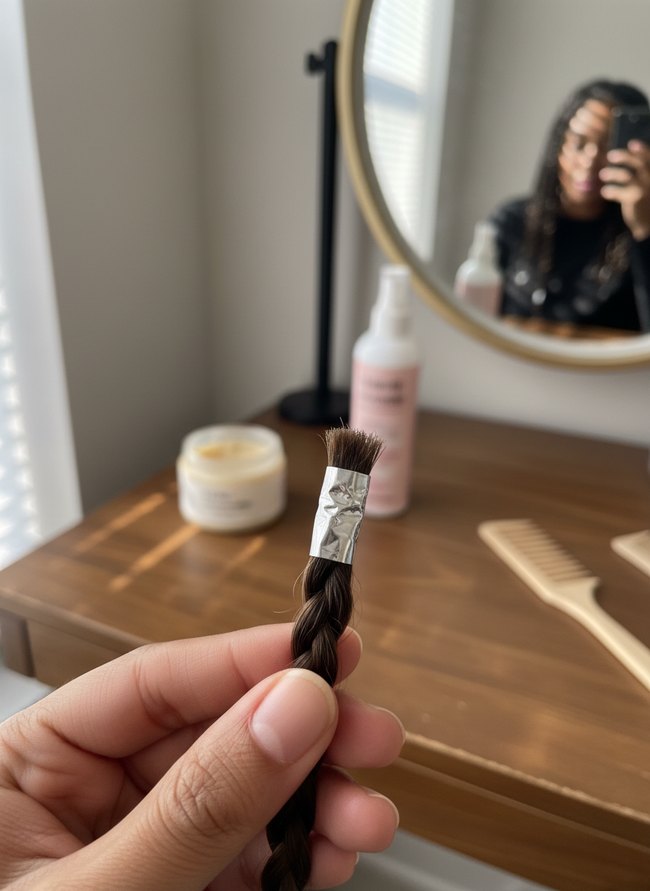
    A hand holds a dark brown twisted braid, with a small silver foil crimp securing the end. A wooden dresser top sits in the background, holding a round gold mirror, a white spray bottle, and a small white jar. The crimped metal casing helps keep twists from unraveling by holding the hair strands tight. Aluminum foil can secure the ends of your braids.

    6. Tightly Wound Coil

    Tightly Wound Coil

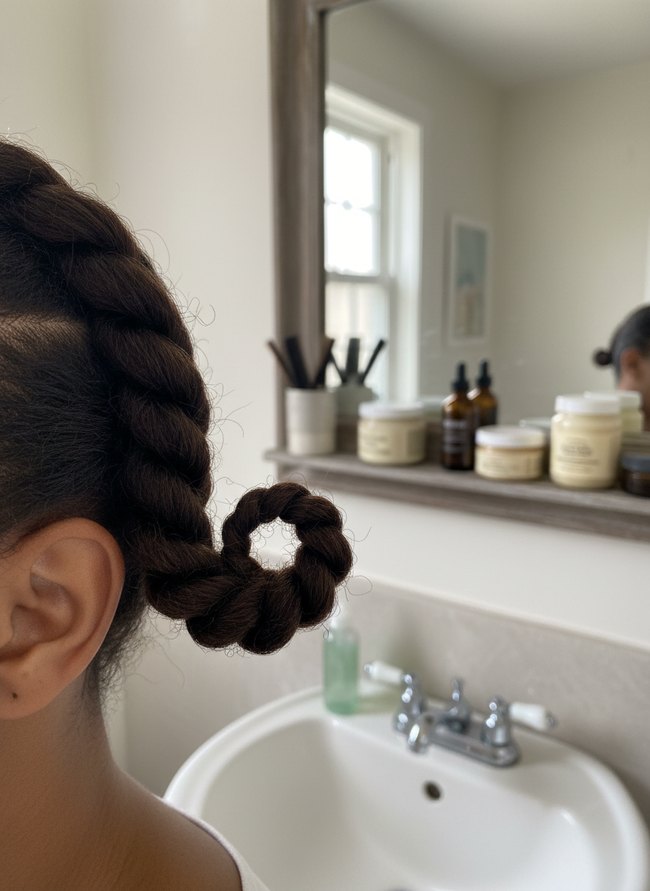
    A dark brown hair twist coils tightly into a small, round ring against the head. The clever technique shows how to keep twists from unraveling by securing the end directly to the twist’s base. Hair stylists achieve this look by wrapping the end of a finished twist around itself and pinning it down.

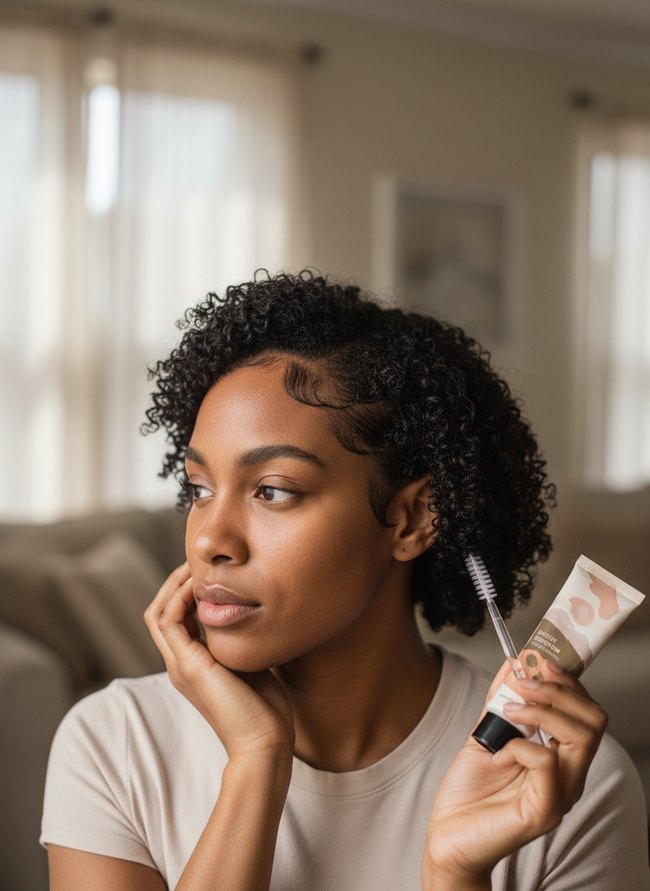
    7. Wrapped Thread Technique

    Wrapped Thread Technique

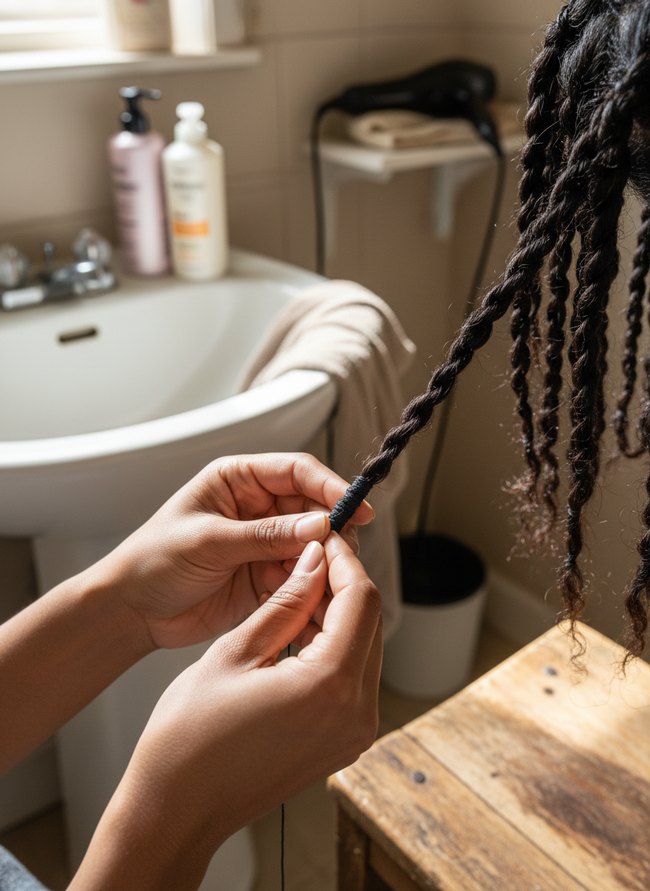
    Dark hands carefully wrap a section of dark twisted hair with black thread, creating a secure end. Natural light from a nearby window illuminates the process, showing the neat wrapping technique. The simple method demonstrates how to keep twists from unraveling, giving you long-lasting styles.

    8. Adhesive Bonded Tip

    Adhesive Bonded Tip

    A dark brown hand holds a thick black hair twist with clear, shiny adhesive at its end. The adhesive firmly secures the twist, demonstrating one effective way to keep twists from unraveling. A light blue bottle of hair product and a black comb rest on the warm wooden countertop in the background. Applying a small amount of adhesive to twists provides extra hold and prevents frustrating fraying.

    9. Knotted Strand Sealing

    Knotted Strand Sealing

    A person’s hands gently tie a dark brown twisted hair strand into a small knot, keeping the twist from unraveling. Many other hair twists lie on a warm brown wooden countertop, some with small knots already formed at their tips. A white ceramic sink and a chrome faucet sit behind the knotted strands, ready for use. Learning how to keep twists from unraveling at the ends with a simple knot helps your style last longer.

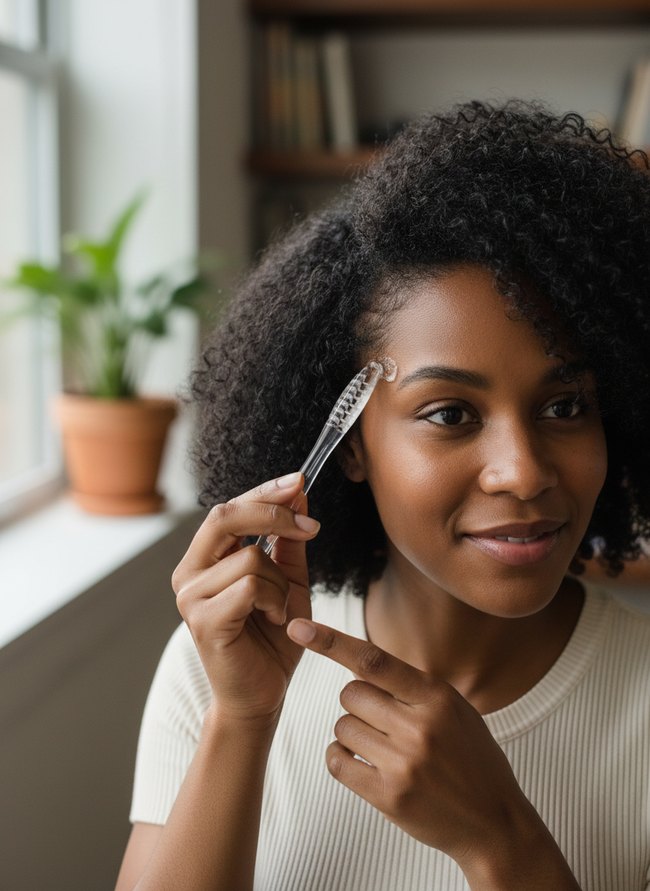
    10. Melted Polymer Junction

    Melted Polymer Junction

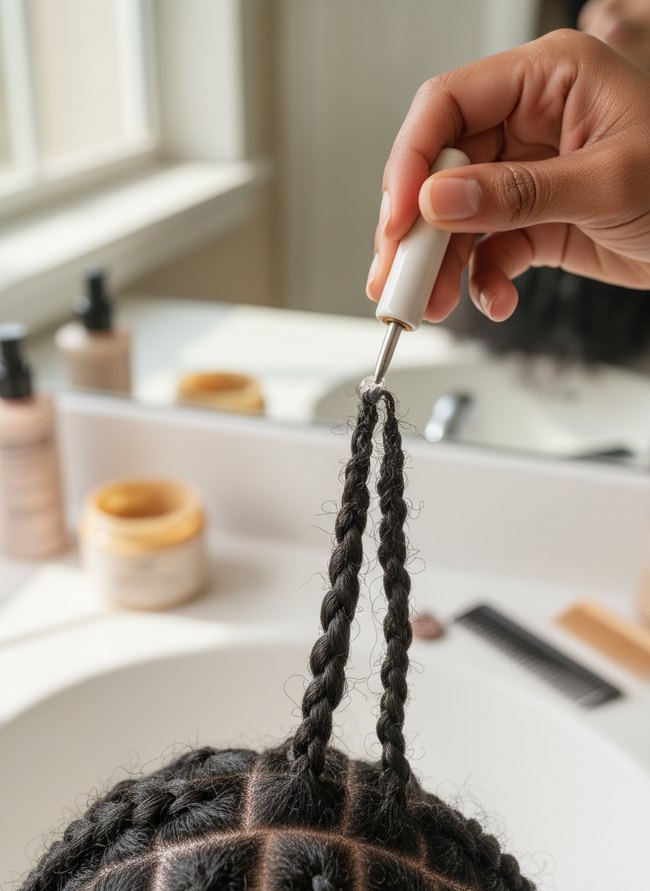
    A dark brown hand holds a white-handled tool with a clear plastic tip against two black braided twists. The small tool seals the ends, showing a clever method for keeping twists from unraveling. A similar heated tool creates a lasting seal on hair twists.

    11. Glued Fabric Edge

    Glued Fabric Edge

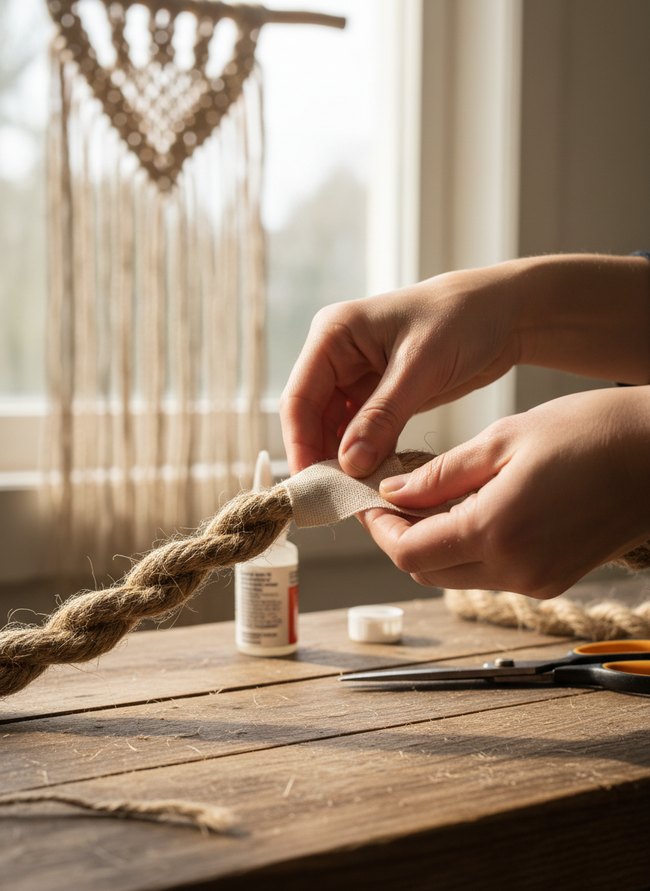
    Two hands wrap a beige fabric strip around the thick, braided jute rope. A white bottle of craft glue sits on the rough wooden table next to the rope, showing how to keep twists from unraveling with a strong adhesive. The method secures the ends of any twisted fiber project.

    12. Reinforced Whip Stitch

    Reinforced Whip Stitch

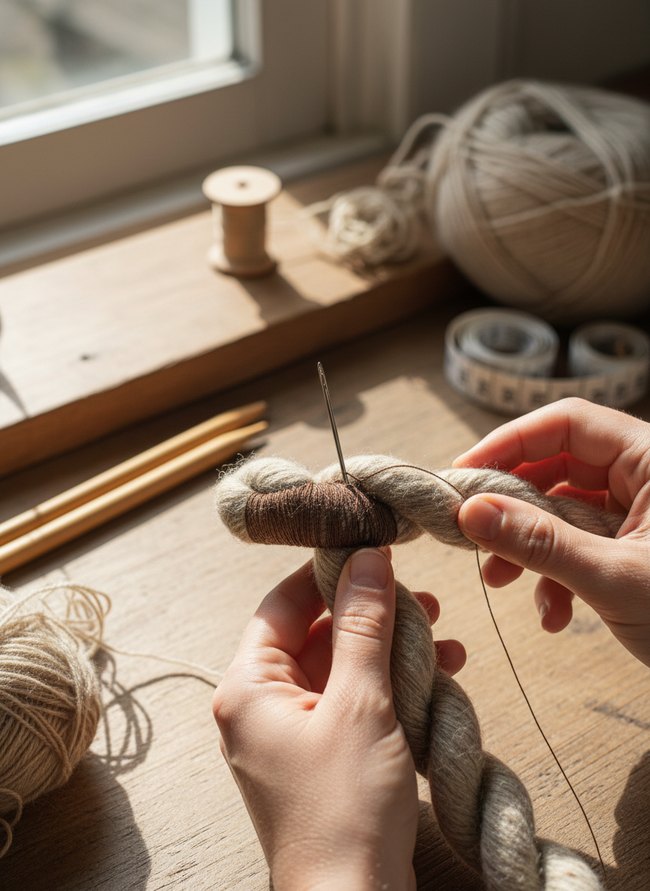
    A person’s hands hold two beige yarn twists, with a brown thread wrapped tightly around one section. A shiny silver needle pierces the yarn, showing how to keep twists from unraveling with a whip stitch. The whip stitch secures yarn twists with a contrasting thread for a neat, strong finish.

    Choosing the Right Fastening Method for Different Rope Materials

    Waxed cotton rope demands a tight knot to hold its braided texture. A simple overhand knot secures the ends of jute or sisal rope, preventing fraying. Natural fibers like thick cotton or hemp absorb moisture, making heat-based sealing methods ineffective. You can use a small dab of clear craft glue on the ends of thin polyester cord. Twisted nylon rope responds well to a quick pass with a hot knife, melting the individual strands together into a firm, fused tip. Polypropylene rope, a slick plastic material, holds its twist with a quick blast from a heat gun, creating a clean, sealed finish. For a rustic display, consider wrapping the ends of a chunky manila rope with thin, dark twine. Braided synthetic ropes, like those with a glossy sheen, require a strong adhesive like marine-grade epoxy to prevent unraveling. Wool rope, with its soft, fuzzy texture, benefits from a tightly wound thread wrap in a contrasting color. A tight splice works wonders for thick, multi-strand climbing rope. Small brass crimps offer a stylish, permanent closure for delicate silk ropes.

    When to Reinforce: Identifying High-Stress Twist Points

    Your hands will find the back sections of twists always loosen first. Friction from headrests or clothing on a car seat can rub the delicate strands. A pillowcase, especially one made of rough cotton, creates serious stress on your braided styles overnight. Observe the small, frizzy halo that forms around the nape of your neck; that fuzzy texture signals unraveling has begun. Tight ponytails or tall buns pull at the root of a twist, stressing the hair near your scalp. Frequent manipulation with your fingers, like twirling a single twist, weakens the strand’s integrity. Twists around your face, like two-strand twists framing your temples, experience constant motion. These front sections brush against glasses, scarves, or collars. Sweat from exercise also breaks down the hair’s hold. Consider a silk bonnet for sleep. A satin scarf helps protect your hair’s coils. Gentle care extends the life of your fresh style significantly.

    Which Idea Will You Try First?

    That’s 12 different takes on how to keep twists from unraveling. The best ideas above are usually the smallest moves — one material, one layout shift, one piece of furniture in the right place. Pick whichever room feels closest to your space and start there before tackling the rest.

    Found an idea worth keeping? Save this post to your Pinterest board so it’s waiting for you when you’re ready to start your own project.

  • How to Keep Your Edges Laid Through an Outdoor Wedding

    How to Keep Your Edges Laid Through an Outdoor Wedding

    Outdoor weddings offer a unique charm. Your fresh, slick hair with sharp, sculpted edges needs protection from summer sun, humid breezes, and random dust. Wind whips around, trying to mess up your clean hairline and tiny baby hairs. A shiny, smooth finish for your temple line demands specific attention before you even step outside. Soft, glossy gel can turn into a sticky mess without the right foundation. You want your front strands to stay flat, not curl up. The tips will help you keep the edges laid all day, no matter the weather, so your dark, defined frame looks good for every photo. Getting the style right takes a few solid moves.

    1. Humidity-Proof Edge Serum

    Humidity-Proof Edge Serum

    The clear glass bottle of humidity-proof edge serum promises lasting hold for your hair. A woman with dark, curly hair holds up the small bottle, showing its black pump top and orange label. Squeeze a pea-sized amount onto your fingertips, then gently smooth the serum over your hairline to keep edges laid all day.

    2. Sweat-Resistant Edge Gel

    Sweat-Resistant Edge Gel

    The woman’s dark hair shows small white product flecks around her temple. Apply a thin layer of sweat-resistant edge gel to your hairline for a secure hold. A soft brush will gently smooth baby hairs into your desired pattern.

    3. Waterproof Edge Pomade

    Waterproof Edge Pomade

    The woman’s dark curly hair shows off perfectly laid edges along her forehead. A wide white tub of waterproof edge pomade sits on a light wooden counter beside a small black brush. A tiny bit of pomade on your brush will gently shape your baby hairs for a smooth, polished finish.

    4. Firm Hold Edge Control

    Firm Hold Edge Control

    A woman applies clear gel to her dark hairline with a small plastic tool. The white plastic jar in her hand shows “Firm Hold Edge Control.” Gently smooth a small amount onto baby hairs for a sleek, long-lasting finish.

    5. Weatherproof Edge Styling

    Weatherproof Edge Styling

    Tiny dark curls frame the woman’s forehead, swept into smooth, defined waves. A clear plastic brush and an opaque beige tube of product help you create the controlled swirls. Use a strong-hold gel and a small brush to sculpt your edges, then let the product dry completely for an all-day hold.

    6. All-Day Edge Fix

    All-Day Edge Fix

    A neat center part with smooth, dark hair offers a clean look, showing how to keep edges laid all day. The close-cropped view highlights the flat hair at the hairline and temples, proving an effective edge control method. You can achieve the sleek style by using a firm-hold gel and a fine-tooth comb.

    7. Secure Edge Wrap

    Secure Edge Wrap

    A transparent plastic tool with small teeth gently presses clear gel onto the dark curly hair at the woman’s temple. Apply a tiny dot of your favorite edge control product, then use a small, clear edge brush to smooth the hair down. Brush the edges in the direction you want them to lay.

    8. Non-Slip Edge Scarf

    Non-Slip Edge Scarf

    A black ribbed scarf holds the model’s dark hair flat against her forehead. The soft fabric will keep edges laid all day without any slipping. For the best hold, choose a scarf with a wide band.

    9. Setting Spray Edge Lock

    Setting Spray Edge Lock

    A black woman holds a matte black spray can with white text near her temple, showing how to keep edges laid all day. Her dark hair is parted down the middle, with a sleek, flat finish. Gently spray a light mist of the setting spray onto your hairline to lock in your styled edges. Avoid applying too much product directly to your scalp.

    10. Outdoor Wedding Edges

    Outdoor Wedding Edges

    The woman’s dark curls show a smooth, defined edge along her hairline, ready for an outdoor wedding. Her hair has a deep side part with a sleek, low bun at the back. A strong-hold gel or pomade keeps edges laid all day, especially in warm, humid weather.

    11. Bridal Edge Prep

    Bridal Edge Prep

    The small black brush carefully smooths dark curly strands across your forehead. A clear vial of edge control gel helps keep hair edges laid all day, even on a sunny wedding day. Apply a tiny amount of gel with the brush, then shape your hairline.

    12. Long-Lasting Edge Method

    Long-Lasting Edge Method

    A small clear mascara wand with a black plastic handle holds the secret to keeping edges laid all day. The tool applies a clear gel to your baby hairs, smoothing them into place with precision. A similar clear brow gel or a specialized edge control product achieves this sleek, long-lasting hold.

    Humidity Horrors: Preventing Edge Reversion in Outdoor Settings

    Most people think a thick layer of edge control gel will seal their delicate hairline. That sticky, heavy product just creates a gooey mess. A light, water-resistant pomade provides a much better hold for fine hairs. Many women apply their pomade directly to dry, brushed edges. This method often leads to a crunchy, stiff finish that flakes under warm sunlight. Instead, mist your baby hairs with a gentle, alcohol-free setting spray before adding any product. The fine spray creates a protective, flexible barrier. Next, press a small, pea-sized amount of clear pomade onto your damp, black edges. Work the pomade into the hair with a soft, natural-bristle brush. Then, secure the newly laid, shiny edges with a silk scarf for at least twenty minutes. The smooth silk presses the hair flat against your brown skin. Finally, remove the scarf just before your outdoor wedding begins. This technique keeps your edges laid without the dreaded reversion.

    Sweat & Smudge Solutions: Protecting Your Laid Edges During a Warm Outdoor Ceremony

    Many people believe a thick layer of edge control will stop sweat from lifting their edges. However, too much product creates a slick, heavy barrier that sweat simply pushes right through. A light hand with your favorite gel prevents a gooey mess. Most folks dab at their forehead with a napkin when sweat beads form. Instead, a small, plush makeup sponge pressed gently along your hairline absorbs moisture without disturbing your carefully sculpted baby hairs. You see others wiping their entire face with a tissue. Your black silk scarf, tied snugly around your hairline for ten minutes before the ceremony, creates a protective barrier. This simple step allows your edges to really set, forming a resilient, sweat-proof shell. Some stylists recommend spraying hairspray directly onto the finished style. A fine mist of setting spray, applied to a cotton ball, then dabbed along the hairline, offers a superior, long-lasting hold. The cotton ball ensures precise application, avoiding any sticky residue on your forehead.

    Which Idea Will You Try First?

    That’s 12 different takes on how to keep edges laid all day. The best ideas above are usually the smallest moves — one material, one layout shift, one piece of furniture in the right place. Pick whichever room feels closest to your space and start there before tackling the rest.

    Found an idea worth keeping? Save this post to your Pinterest board so it’s waiting for you when you’re ready to start your own project.