Hands easily craft a textured look without complicated braiding techniques. Many people want a new hairstyle but feel overwhelmed by intricate steps. Simple twists offer a fantastic starting point for anyone wanting to experiment with their hair. A two-strand twist creates a polished, rope-like pattern down the side of your head. The technique builds a solid foundation for more complex styles later on. Learning how to twist hair unlocks a world of creative options. We will explore several straightforward twists for beginners.
1. Simple Two Strand Twist

A young woman with dark braids reads a book in a library setting. Her simple two-strand twists are chunky and frame her face softly. The twists for beginners give a relaxed look, perfect for everyday wear.
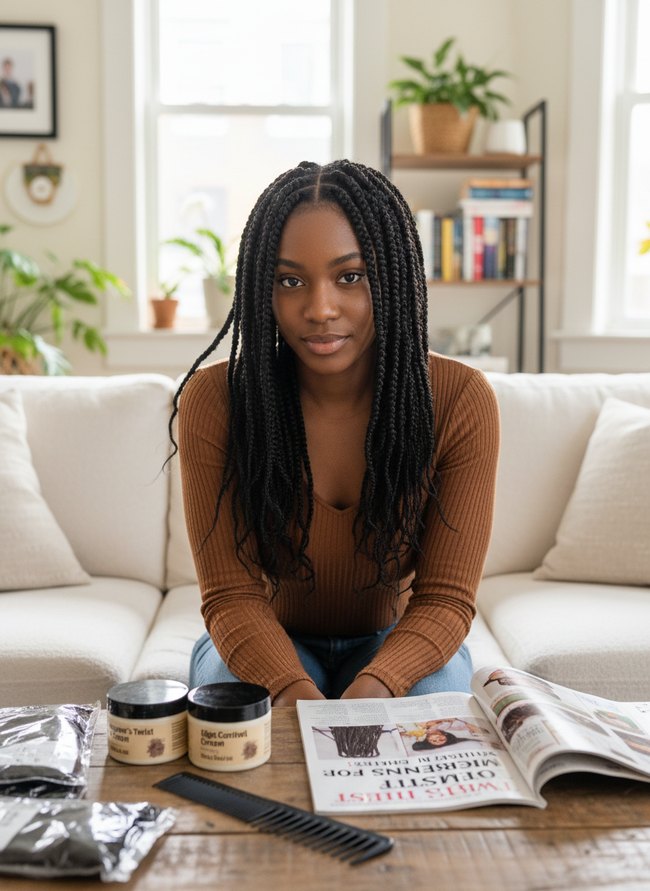
2. Beginner Flat Twist Styles

A woman with long black twists smiles directly at the camera, showing off a clear middle part and neat sections. The twists fall past her shoulders, resting on a gray ribbed sweater. Neat parts can make a flat twist style look professional.
3. Easy Rope Twist Design
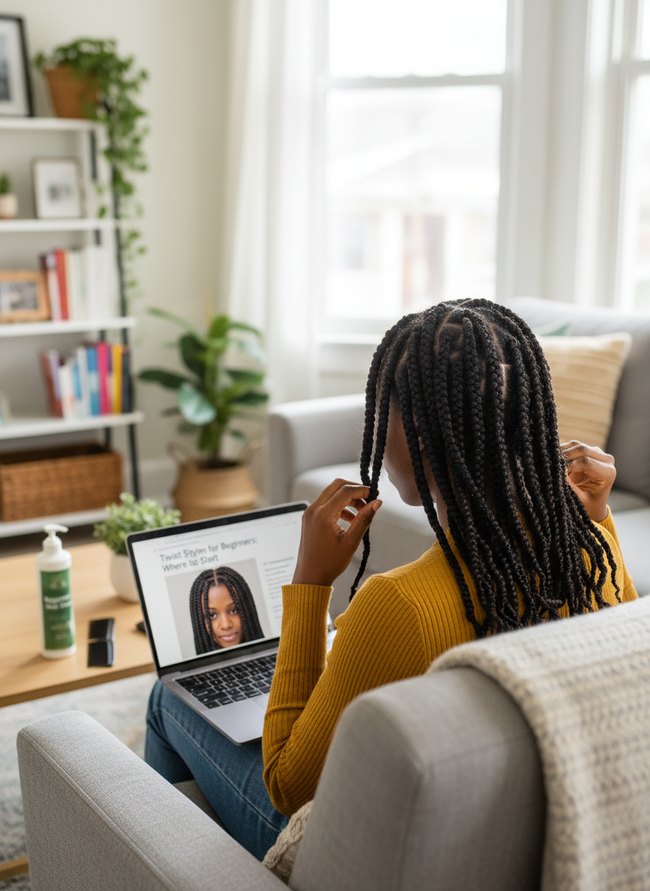
A person with long, dark rope twists sits on a light gray sofa, looking at a laptop computer. The screen shows another person with similar twists, illustrating how to get this neat style. The twists hang freely, offering a simple, versatile look.
4. Starter Senegalese Twists

A woman with long, dark twists sits on a floral sofa, looking towards a sunlit window. Her thick, black Senegalese twists fall past her shoulders, showing a neat part along her scalp. The twists for beginners are simple to style, offering a comfortable and lasting look.
5. Basic Mini Twist Braids
Long black twists fall over a woman’s shoulders, framing her face. The uniform twists for beginners show neat, even sections on her scalp. A fine-tooth comb and hair product can achieve the clean look by parting the hair precisely.
6. Classic Havana Twist Look

Black Havana twists fall around the woman’s shoulders, framing her face with thick, dark ropes. Her bright, happy smile shines in warm sunlight coming from a large window. The twists offer a great protective style that looks good and is easy to care for.
7. Gentle Kinky Twist Method

Long, dark brown twists frame the woman’s face, falling past her shoulders with a soft, kinky texture. The laptop screen shows a guide for twists for beginners, displaying a similar textured hairstyle. A simple method gives you a full, natural-looking style.
8. Faux Loc Twist Novice
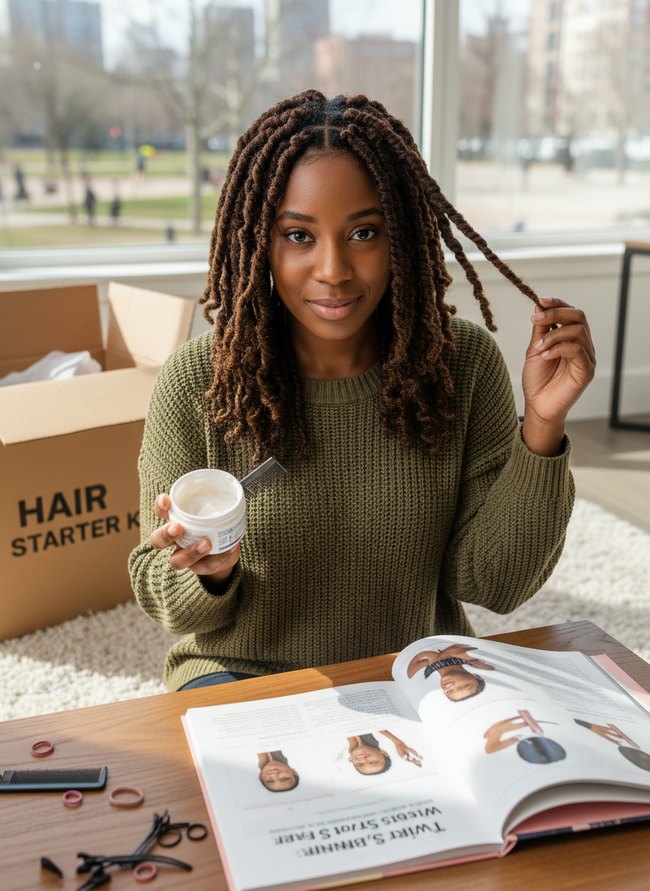
The woman’s rich brown twists showcase a neat, uniform texture, with one long strand pulled gently to the side. She holds a white jar of creamy product and a small black comb, ready to work on her beginner twists. Twist journeys begin by gathering all the right tools beforehand.
9. Protective Marley Twist Style
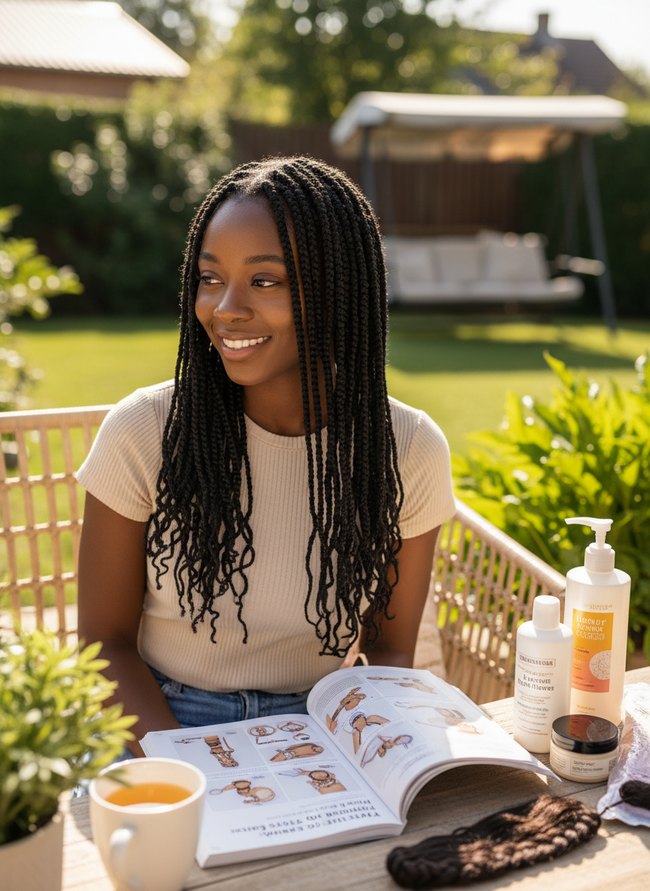
The young woman’s long, dark Marley twists cascade past her shoulders, showing a neat part down the middle of her scalp. Her facial expression is bright as she looks off to the right, sitting at an outdoor wooden table with a white mug and an open book. The protective style offers a great option for twists for beginners who want a low-maintenance look.
10. Crochet Twist Beginner Friendly

Warm brown crochet twists frame the woman’s face, falling past her shoulders with a soft, curly texture. Neat square parts along her dark scalp show a clean, well-maintained style. The twists offer a fantastic option for beginners, providing a low-maintenance hairstyle.
11. Effortless Passion Twist

Dark twists fall past her shoulders, showing a simple, stylish look. Passion twists are a fantastic choice for beginners, offering a soft texture and a natural, wavy pattern. You can easily achieve this relaxed, appealing style with minimal effort.
12. Goddess Twist Basic Technique
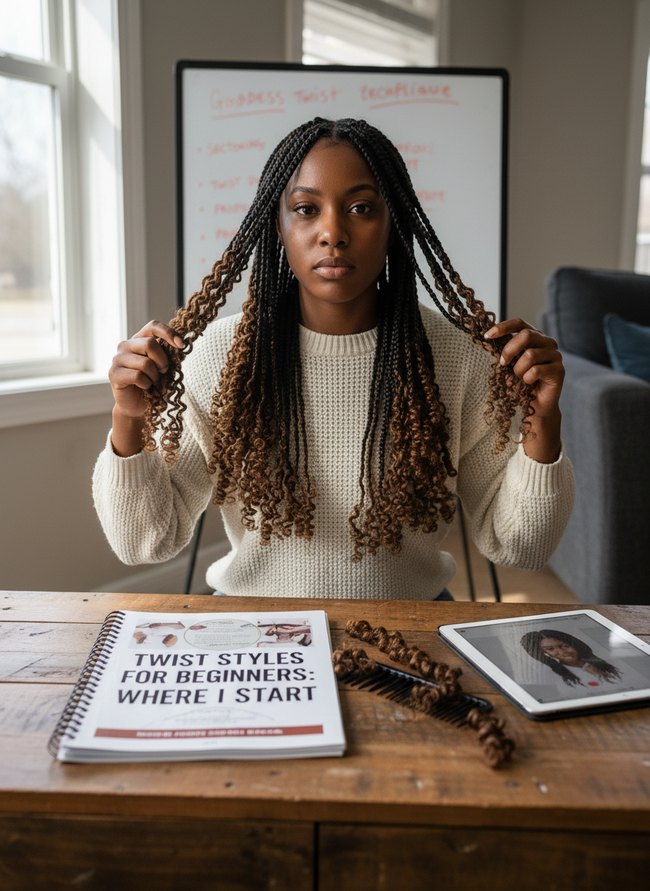
A young woman holds two dark brown goddess twists, each featuring a curly, honey-toned end. Her long, dark hair shows many uniform twists, framing her face and draping over her light cream sweater. The textured twists give a great example of the style’s natural movement and bounce.
Twist Direction: Clockwise or Counter-Clockwise?
Twisting strands clockwise brings coils closer to your scalp. Many stylists call this a right-hand twist. Counter-clockwise turns push the twist away from your head. That movement creates a fuller, looser texture. Your hair’s natural growth pattern often favors one direction. Following that natural grain reduces tension on your delicate scalp. A single, tight, four-inch corkscrew twist will feel more secure twisting with the grain. You can easily find your hair’s preferred spin. Gently rub a small, two-inch section of dry hair between your thumb and forefinger. Observe the direction your hair naturally spins into a small, tight rope. That specific rotation is your hair’s natural twist direction. For a softer, less defined look, you may choose to go against the grain. However, this method might increase scalp tension. Practice both methods on a few half-inch sections of your hair. See how the finished twists feel.
Pre-Twist Prep: Products and Techniques for Lasting Definition
Damp hair provides the best canvas for durable twists. First, mist your dark brown hair with a water bottle until it feels cool and pliable. A leave-in conditioner then coats each strand with a thin, milky film. Next, a dollop of curl cream, about the size of a black olive, works into your hair from root to tip. This cream gives hold. After that, divide your head into clean, square sections, using a metal-tipped comb. Each section should be small, perhaps one square inch. Then, apply a clear, firm-hold gel to each twisted section for extra grip. Your fingers can feel the product spread evenly. Begin twisting close to the scalp. A tight base prevents unraveling. Make sure each twist receives consistent tension down its entire length. This careful prep ensures your finished twists show off crisp, long-lasting definition.
Which Idea Will You Try First?
That’s 12 different takes on twists for beginners. The best ideas above are usually the smallest moves — one material, one layout shift, one piece of furniture in the right place. Pick whichever room feels closest to your space and start there before tackling the rest.
Found an idea worth keeping? Save this post to your Pinterest board so it’s waiting for you when you’re ready to start your own project.