Tag: lace

  • Glueless Wig vs Lace Front: Which Is Better for Beginners

    Glueless Wig vs Lace Front: Which Is Better for Beginners

    One afternoon, your favorite hair influencer glided across the screen, her honey-toned curls bouncing with effortless movement. You might have watched her ten-minute video, trying to figure out how she made styling look so easy. Picking out your first wig brings a stack of questions, especially when terms like “glueless” and “lace front” pop up. Most new wig wearers want a natural look without a big fuss. The article helps break down the main differences between a glueless wig and a lace front so you can pick the right one for your head shape and daily routine. We will walk through the key features of each wig type.

    1. Beginner Friendly Glueless Wear

    Beginner Friendly Glueless Wear

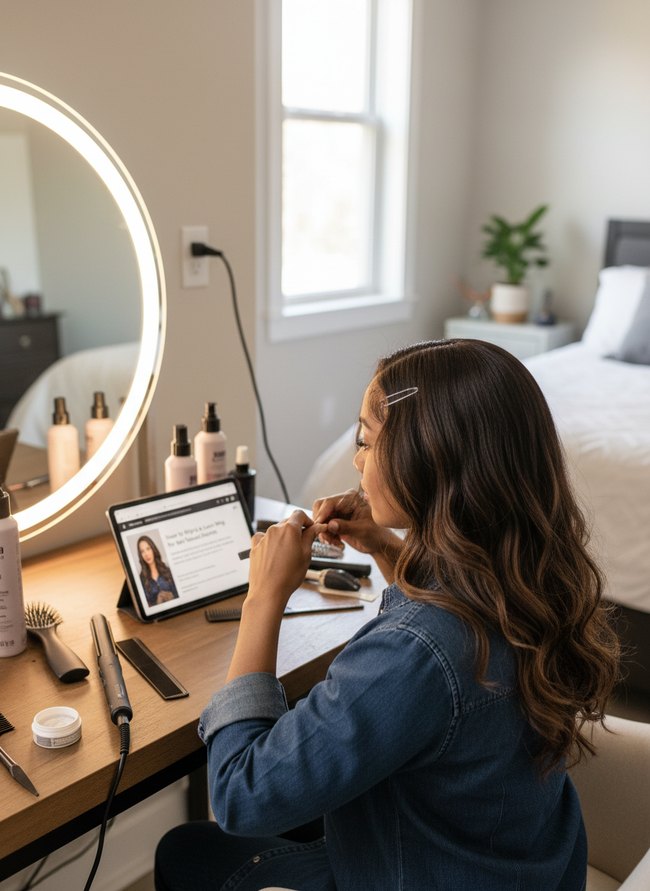
    A woman with long, dark wavy hair smiles while holding a strand of her own hair. Two brown glueless wigs on beige mannequin heads sit on a dark wooden table in front of her. The wigs feature natural, wavy styles, ready for quick wear without messy glues or tricky adhesives. The image clearly demonstrates the simple, ready-to-wear nature of the wig for easy styling.

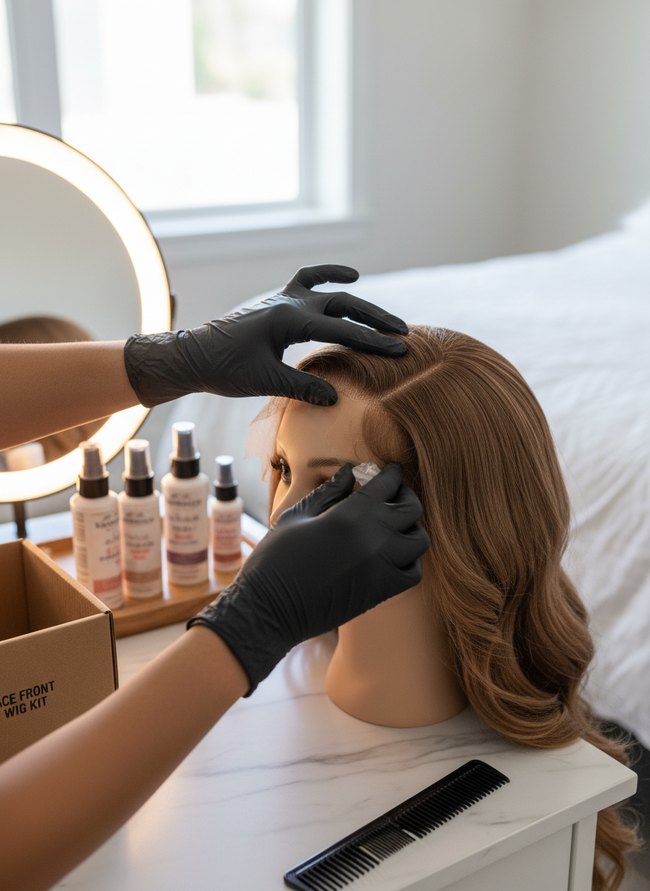
    2. Secure Lace Front First

    Secure Lace Front First

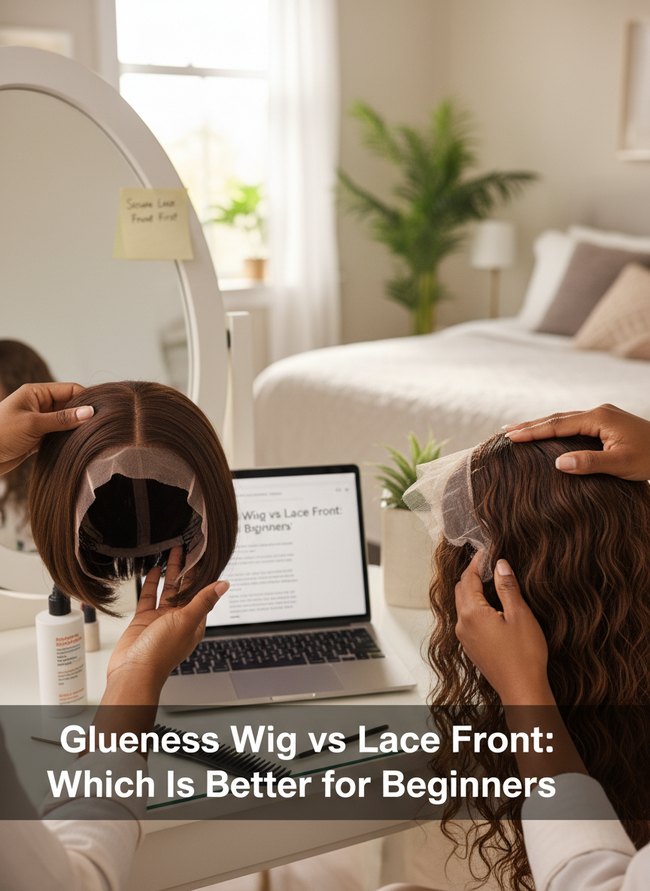
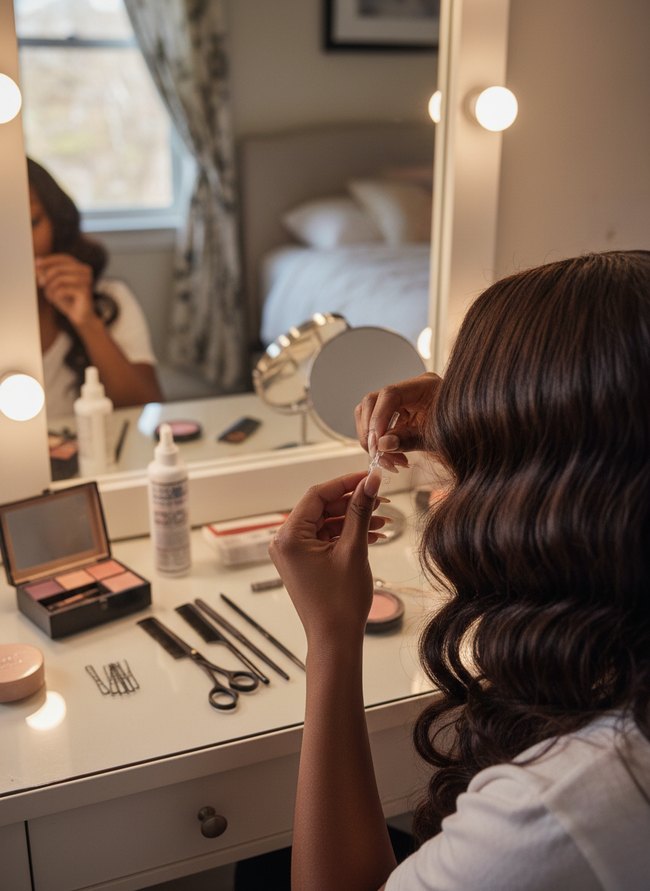
    Two hands hold a short, brown wig, revealing its light beige lace front for inspection. A second brown wig with long, wavy hair rests on a white table, showing its sheer lace front, ready for a try-on. A laptop displays an article comparing a glueless wig vs lace front options, helping you make an informed choice for your personal style.

    3. Pre-Plucked Glueless Option

    Pre-Plucked Glueless Option

    Dark brown hair with soft, loose waves frames the woman’s face, offering a natural look with a defined part. A pale blonde wig on a mannequin head stands in the background, showing a contrasting hair color and straight texture. The glueless piece offers easy application for beginners.

    4. Invisible Lace Front Seamless

    Invisible Lace Front Seamless

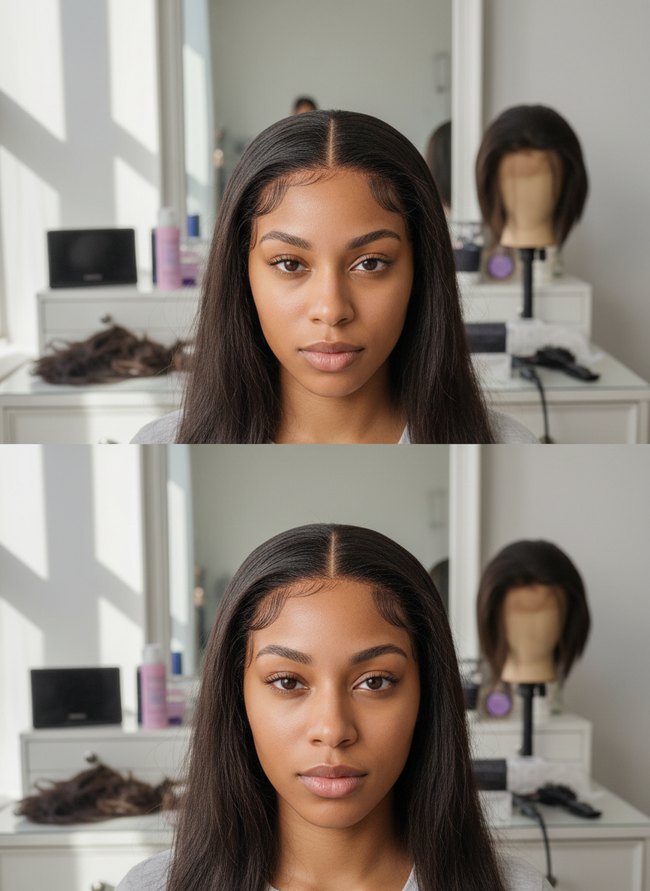
    A dark brown glueless wig with a visible middle part sits directly on the model’s head, showing a natural hairline. The wig’s long, straight hair frames her face, blending smoothly with her skin tone for a realistic look. The style offers a seamless, natural appearance without visible adhesive, making the wig easy to wear.

    5. Headband Glueless Comfort

    Headband Glueless Comfort

    A woman models a glueless wig, featuring thick dark curls and a wide, pale pink fabric headband. Her curly hair falls naturally around her shoulders, showcasing the comfortable, secure fit of the headband. The wig provides an easy, natural look without glues or tapes.

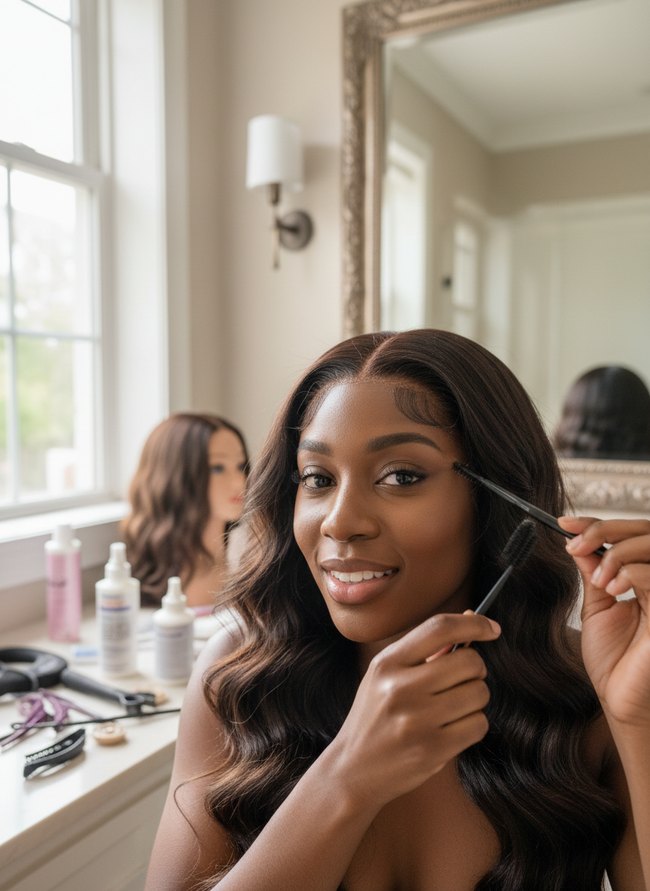
    6. Natural Hairline Lace Front

    Natural Hairline Lace Front

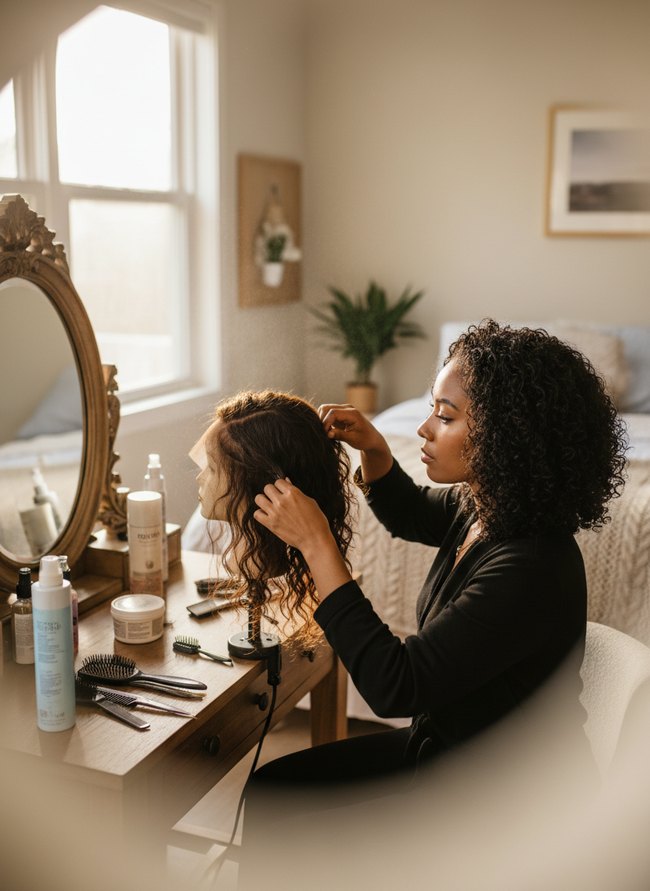
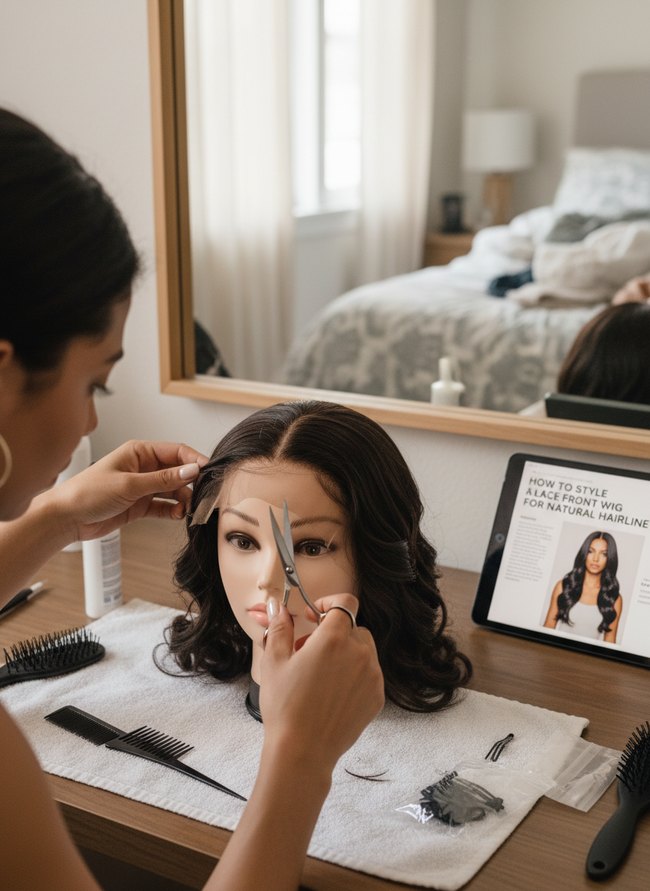
    The dark brown curly wig on the left model shows a delicate lace front panel that blends invisibly with her warm skin. The light brown lace material extends slightly beyond her hairline, which allows for custom trimming to match your exact facial shape. A natural hairline wig creates a seamless edge for a realistic appearance.

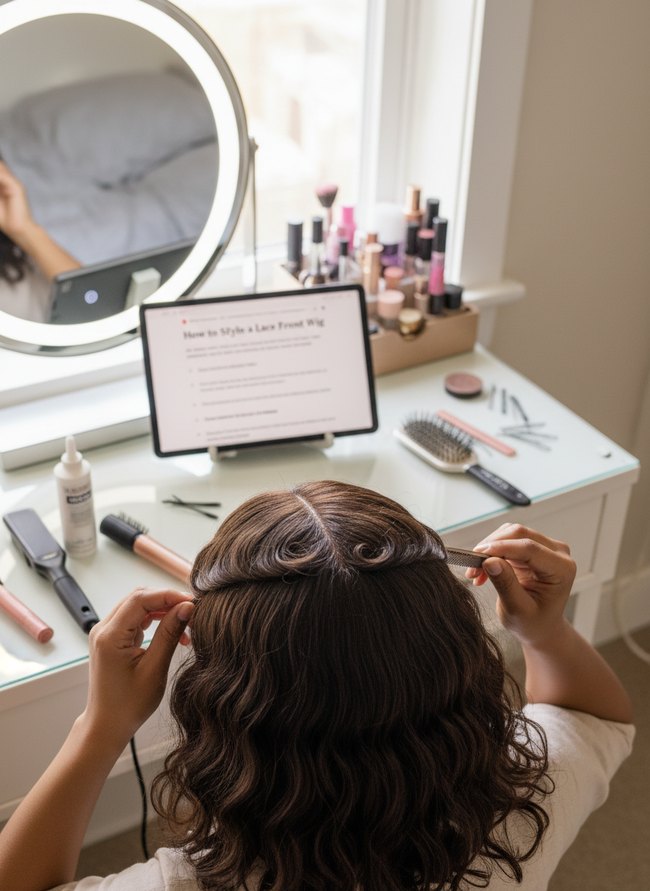
    7. Quick Install Glueless Style

    Quick Install Glueless Style

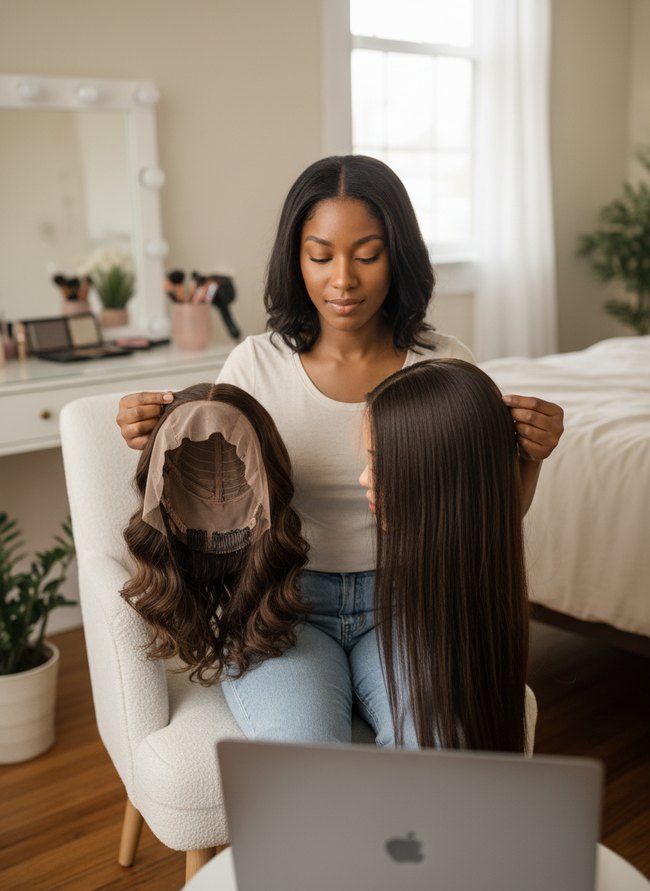
    A woman in a cream shirt holds two brown wigs, showing a wavy glueless wig with its interior cap visible to the left. The wig cap features dark brown netting and thin clips that secure the wig to your head without adhesives. A second straight, long wig sits to the right, demonstrating another style option you can achieve with a simple, quick install.

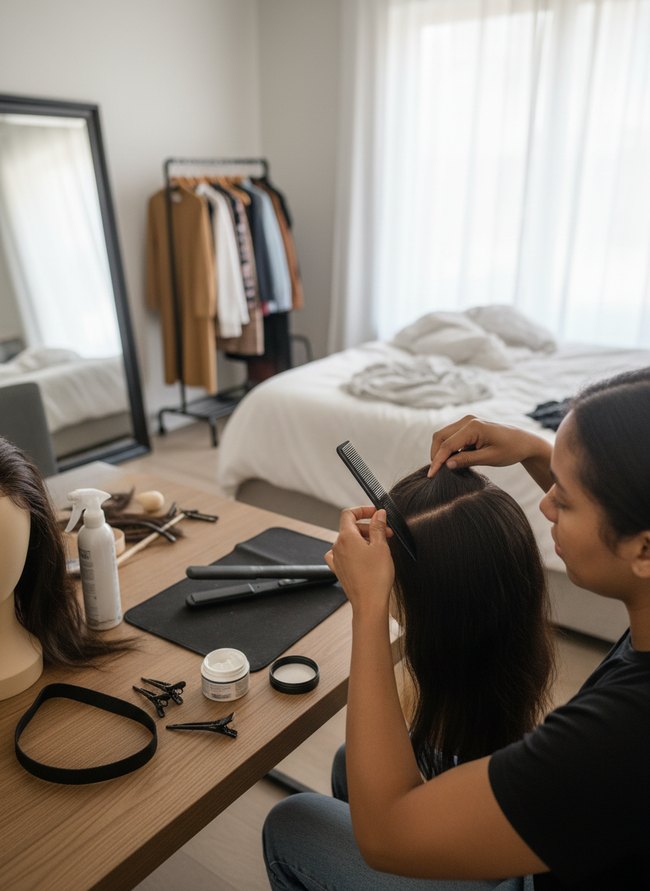
    8. Deep Part Lace Front

    Deep Part Lace Front

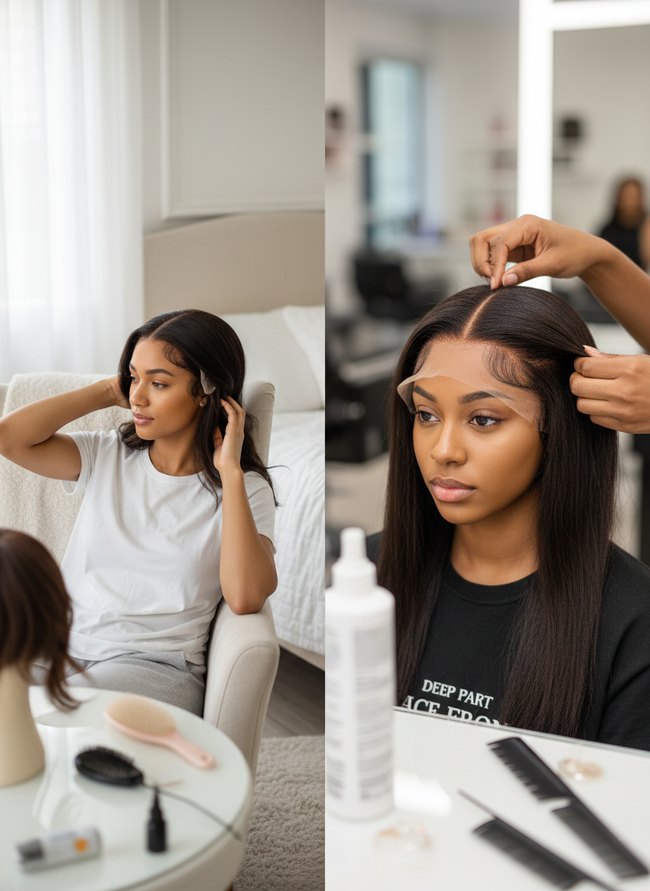
    A dark-haired woman in a cream armchair adjusts her glueless wig, showing its clear lace edge near her temple. Another person carefully fits a lace front wig onto a woman, smoothing the transparent lace against her dark skin for a natural hairline. The deep part offers a realistic look that beginners can easily blend.

    9. Soft Cap Glueless Choice

    Soft Cap Glueless Choice

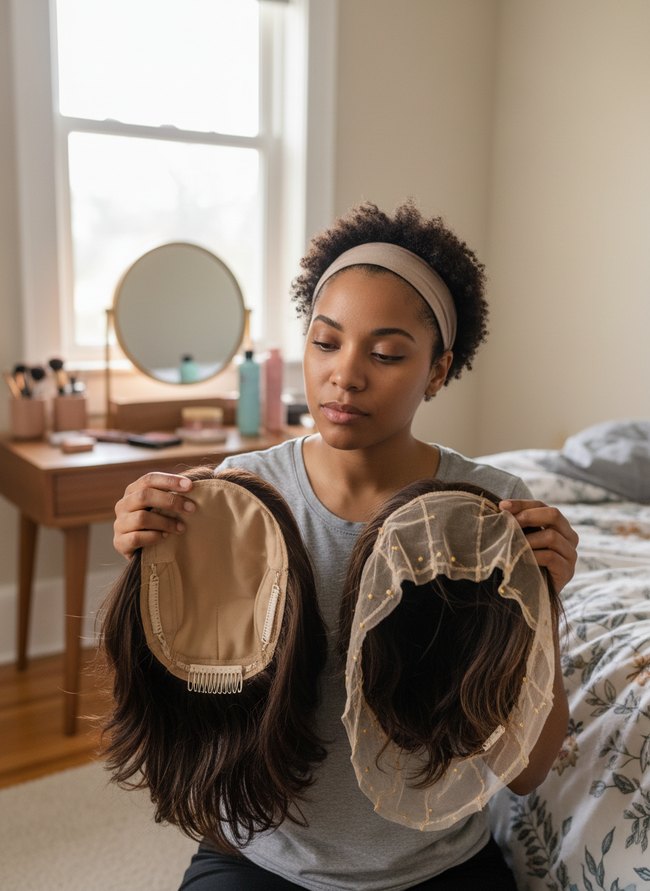
    A woman holds two dark brown wigs, showcasing their inner cap designs. The tan soft cap of the glueless wig on the left features a smooth fabric lining with three attached clips for secure wear. The beige lace front wig on the right offers a sheer, dotted mesh base for a natural hairline appearance. The image highlights the different cap structures of a glueless wig versus a lace front wig, helping you understand their distinct wearing methods.

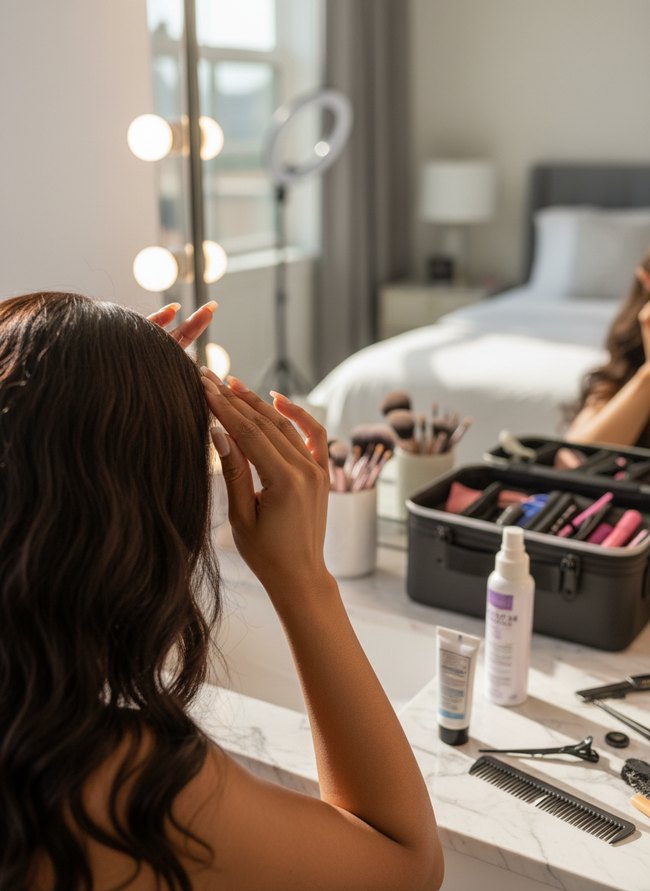
    10. Full Coverage Lace Front

    Full Coverage Lace Front

    The model on the right showcases a dark, straight lace front wig with a deep middle part, showing off the transparent lace along her hairline. Her hands gently press down at her temples, emphasizing the smooth, flat application of the hairpiece. The wig highlights the natural hairline a lace front can give you.

    11. Machine Made Glueless Ease

    Machine Made Glueless Ease

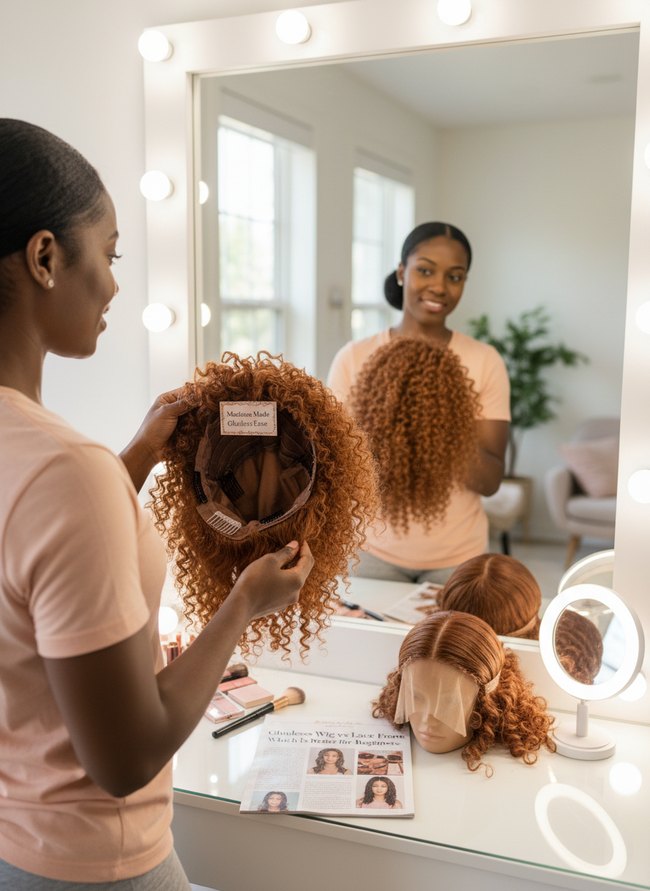
    A person holds a wavy ginger wig, revealing its inner cap construction. The machine-made glueless wig features a brown cap with small, light-colored clips, making the wig simple to put on and take off without adhesives. The easy design provides quick styling for busy individuals.

    12. HD Lace Front Mastery

    HD Lace Front Mastery

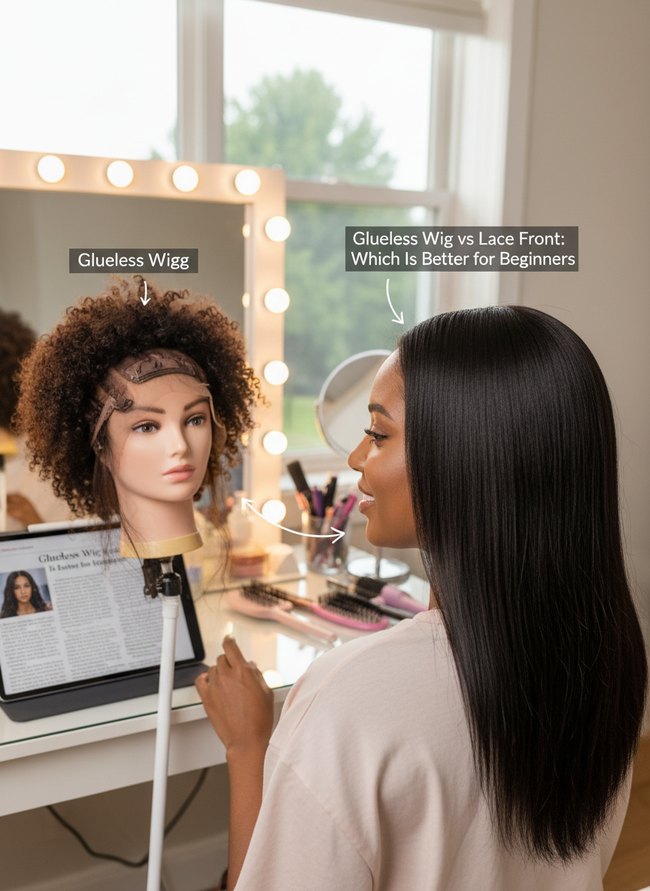
    A mannequin head displays a brown, curly, glueless wig, exposing its light brown lace cap and wefts for easy comparison. The black, straight hair of a model, wearing a light pink shirt, shows the seamless hairline of a lace front wig from a side view. The comparison clearly illustrates the construction differences between the two wig types for a clear understanding.

    Beyond the Basics: Understanding Cap Construction Variations (and Why They Matter for Beginners)

    …a simple cap construction makes all the difference for new wearers. A full lace cap offers the most versatility for a beginner. You can part the dark hair anywhere across the broad, sheer base. Machine-made caps, conversely, provide less airflow. These tightly woven caps often feel warm on your scalp, especially during summer months. Hand-tied sections offer more movement and a natural hairline at the front. A common myth suggests that any glueless wig is easy. Some glueless wigs feature thick, visible tracks near the back. These stiff tracks can poke your neck, causing discomfort throughout the day. A soft, stretchy cap feels better against your skin. You want a cap that molds to your head shape without pulling or bunching. For beginners, a cap with a wide, soft lace front panel offers a seamless transition. This wide panel gives you room to adjust the hairline. Narrow lace strips leave no room for error. Choose a cap design that prioritizes comfort and ease.

    The ‘Hidden’ Cost of Convenience: What Glueless Really Means for Longevity and Maintenance

    Sometimes, the easy way costs you more later, especially with hair. Glueless wigs offer quick changes, but this convenience often means daily removal. Removing hair each night causes more friction on your natural hairline. That daily friction wears down delicate temple hair. A glueless wig’s internal combs and elastic bands also rub against your scalp. Those small, repeated movements weaken natural strands over time. A securely installed lace front wig stays put for weeks. That stable wear protects your edges from constant manipulation. Your natural hair gets a much-needed break underneath a fixed wig.

    Cleaning a glueless unit happens more often, too. Daily wear means daily exposure to oils and sweat. You will wash a glueless wig every few days. A lace front wig needs cleaning less frequently. That longer cleaning cycle preserves your wig’s lifespan. Less washing means less fiber stress. A strong, flexible lace base lasts longer with fewer washes. The durable cap construction of a well-made lace front stands up to regular brushing. This stable attachment truly helps your natural hair grow undisturbed underneath.

    Which Idea Will You Try First?

    That’s 12 different takes on glueless wig vs lace front. The best ideas above are usually the smallest moves — one material, one layout shift, one piece of furniture in the right place. Pick whichever room feels closest to your space and start there before tackling the rest.

    Found an idea worth keeping? Save this post to your Pinterest board so it’s waiting for you when you’re ready to start your own project.

  • How to Style a Lace Front Wig for a Natural Hairline

    How to Style a Lace Front Wig for a Natural Hairline

    The new lace front wig sits on the beige foam head, looking a bit stiff. Many people struggle with creating a smooth, undetectable hairline. A seamless blend between the wig’s fine mesh and your own skin is desired. Achieving a truly natural finish takes a little know-how and some careful work. A few simple tools make a big difference in the final look. We will help you achieve that smooth, undetectable edge. Each step builds on the last, giving the lace a soft, realistic appearance. The quick guide makes styling the lace front wig simple.

    1. Defined Baby Hairline

    Defined Baby Hairline

    A person’s hands gently shape dark brown hair into a defined wave with a fine-tooth comb. The hair shows a clear part down the middle of the scalp, with soft curls sculpted on either side to create a natural hairline. The styling demonstrates how to style a lace front wig, specifically focusing on a defined baby hairline.

    2. Natural Plucked Hairline

    Natural Plucked Hairline

    A person carefully sections a dark brown lace front wig on a light wooden table. Various styling tools, including a black flat iron and white spray bottle, are arranged neatly around the wig head. The setup shows the careful work involved in styling a lace front wig for a realistic hairline.

    3. Invisible Lace Blend

    Invisible Lace Blend

    The model smiles, holding two two black mascara wands near her dark wavy lace front wig, showing a natural hairline. Small, soft baby hairs frame her face, blending seamlessly with her skin tone. You can achieve this smooth transition with careful styling to how to style a lace front wig for an invisible lace blend.

    4. Melted Edge Perfection

    Melted Edge Perfection

    A woman with dark, wavy hair gently touches the hairline of a wig, ensuring the piece sits flat against her skin. Her hands smooth down the dark hair, blending the lace front into her forehead. You can achieve this sleek, natural look by carefully pressing the lace and hair down at the edges.

    5. Seamless Front Customization

    Seamless Front Customization

    A stylist parts dark brown hair on a white foam wig head with a black plastic comb. She carefully combs the hair, showing how to style a lace front wig for a natural-looking part. The hairline is easily customized with careful parting.

    6. Undetectable Knot Bleaching

    Undetectable Knot Bleaching

    A woman with long, dark brown hair sits at a light brown wooden desk, carefully working on the front hairline of a lace front wig. Her black tablet displays instructions on how to style a lace front wig for a natural hairline. Small hair clips hold back some dark hair, showing the detailed work needed for an undetectable finish.

    7. Sculpted Sideburn Integration

    Sculpted Sideburn Integration

    A person with long, dark brown wavy hair sits at a white vanity with a lighted mirror. The individual holds a small clear adhesive strip, preparing to apply the strip near the temple of their lace front wig. Various black combs, scissors, and hairpins are neatly arranged on the white tabletop, demonstrating how to style a lace front wig for a smooth finish. Always use a strong, clear adhesive for an invisible sideburn integration.

    8. Softened Perimeter Styling

    Softened Perimeter Styling

    A woman with dark, curly hair gently adjusts a lace front wig on a mannequin head. She carefully works around the hairline to create a natural, soft look, demonstrating how to style the wig. A realistic finish is achieved by paying close attention to the wig’s perimeter.

    9. Flat Lay Application

    Flat Lay Application

    A light brown wig with soft waves rests on a pink silicone mat, ready for a flat lay application. A hand gently presses the lace front against the mat, showing a crucial step in styling a lace front wig. All styling tools, like scissors and styling cream, can be laid out beforehand to make the process easier.

    10. Secured Glueless Install

    Secured Glueless Install

    A woman gently presses down the lace front wig with both hands at her temple, securing its position. The dark curly wig hair blends seamlessly with her natural hairline, demonstrating how to style the wig for a natural look. Various hair styling tools like a small black brush, silver scissors, and hair clips rest on the wooden vanity.

    11. Refined Hairline Trimming

    Refined Hairline Trimming

    A person trims a tan lace front wig with small, sharp silver scissors, carefully shaping the hairline on a mannequin head. Dark wig hair falls in soft waves over the mannequin’s shoulders while a black tablet sits nearby, displaying instructions on how to style the wig. Precise cutting tools achieve a natural hairline.

    12. Custom Tinted Lace

    Custom Tinted Lace

    Black gloved hands carefully press a clear lace front wig onto a tan mannequin head. The light brown wig hair features soft, cascading waves that frame the mannequin’s face. A realistic hairline is achieved by custom tinting the lace to match your skin tone.

    Troubleshooting Common Lace Front Styling Challenges

    A light layer of foundation powder, matched to your skin tone, blends the sheer lace into your forehead. You can use a small makeup brush to tap the powder onto the wig’s front edge. Sometimes a transparent lace front wig still shows a fine mesh. A brow pencil, one shade darker than your scalp, draws tiny hair-like strokes along the front edge, mimicking new growth. This simple trick adds depth. Lifting edges, a common frustration, often happen because of oily skin. Clean your skin thoroughly before applying any adhesive. A skin prep solution, containing witch hazel, removes excess oil and creates a grippier surface for the wig glue. Secure the wig with a thin, even coat of skin-safe adhesive. Press the lace down firmly for a full minute. An unnatural parting line on a lace front wig can look stiff and artificial. Pluck a few strands of hair, one by one, along the wig’s part with fine-tipped tweezers. This careful plucking creates a softer, more scattered hair growth pattern. Use a rat-tail comb to zigzag the part slightly, disrupting a perfectly straight line. A bit of styling mousse on your fingertips tames any flyaways near the part.

    Choosing the Right Wig Density and Lace Type for Your Desired Look

    Wig density directly changes how much hair sits on your head. A lower 130% density offers a light, airy movement around your shoulders. Conversely, a 180% density creates a thick, full curtain of hair. You must pick a density that matches your own natural hair volume. Thin hair on your head needs a lighter wig. Dense hair on your scalp looks best with a fuller unit.

    Lace type also plays a big role in the final illusion. HD lace, a thin, almost invisible web, blends seamlessly into your skin tone. Transparent lace, a slightly thicker, clear fabric, requires careful makeup application to disappear. Medium brown lace, a darker mesh, works best for deeper skin tones without extra color correction. A light, delicate hairline on a lace front wig depends on the quality of this sheer material. Choose lace that melts into your forehead for a truly undetectable finish.

    Which Idea Will You Try First?

    That’s 12 different takes on how to style a lace front wig. The best ideas above are usually the smallest moves — one material, one layout shift, one piece of furniture in the right place. Pick whichever room feels closest to your space and start there before tackling the rest.

    Found an idea worth keeping? Save this post to your Pinterest board so it’s waiting for you when you’re ready to start your own project.