Tag: mistakes

  • 6 Cornrow Mistakes That Cause Frizz and Tension

    6 Cornrow Mistakes That Cause Frizz and Tension

    Fresh cornrows look sharp. Loose strands and scalp bumps often pop up after a short time. Small problems mess up your whole look. Your hands will want to fix flyaways, but that just makes frizz worse. Real talk, you can avoid cornrow mistakes. Learning some key steps keeps braided styles tight and edges smooth. A good foundation makes all the difference for long-lasting braids. Your hair will thank you for the gentle touch. The list shows the most common slip-ups people make.

    1. Tight Edge Pull Tension
    Tight Edge Pull Tension

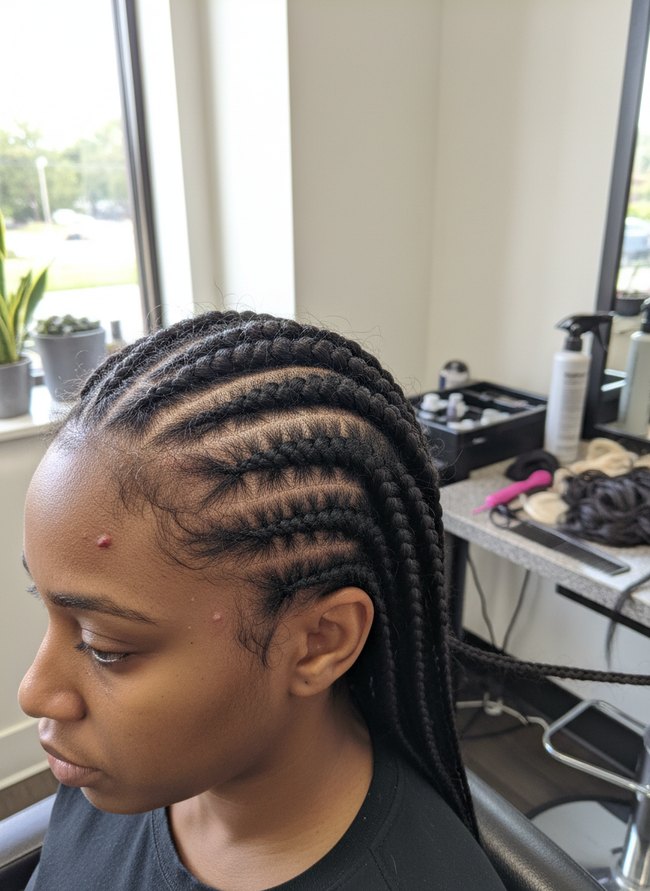
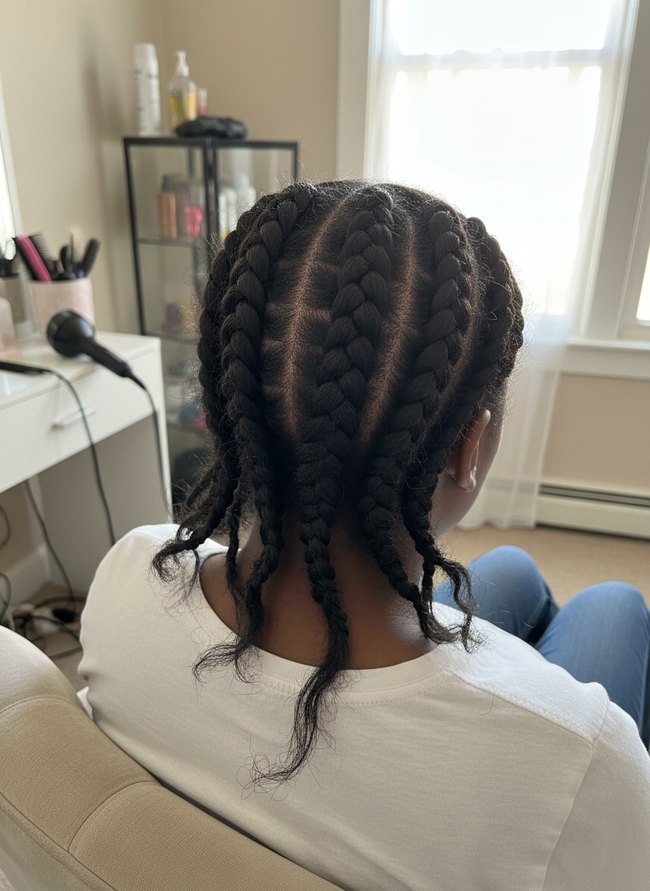
    Dark braided hair shows visible scalp tension along the cornrow lines, especially near the forehead. The tight braids pull at the skin, creating red marks and bumps on the scalp. Cornrows should always feel comfortable without painful pulling.

    2. Uneven Braid Pattern
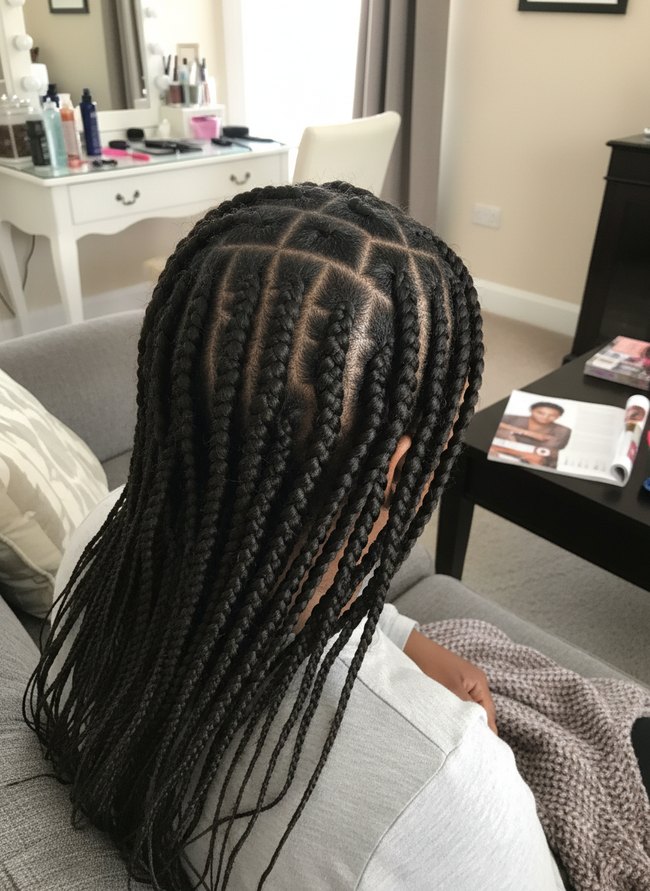
    Uneven Braid Pattern

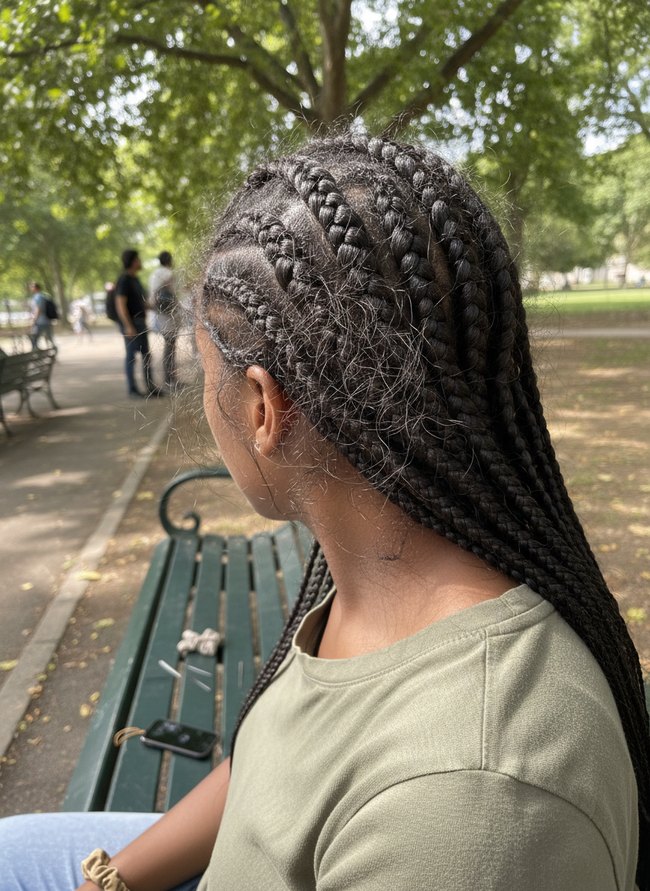
    Small, dark braids on the person’s head show varied sizes and shapes in the neat parting lines. Square sections on the crown are much bigger than others on the sides, creating an uneven cornrow pattern. Hair sections should always be similar in size for a balanced look.

    3. Product Buildup Residue
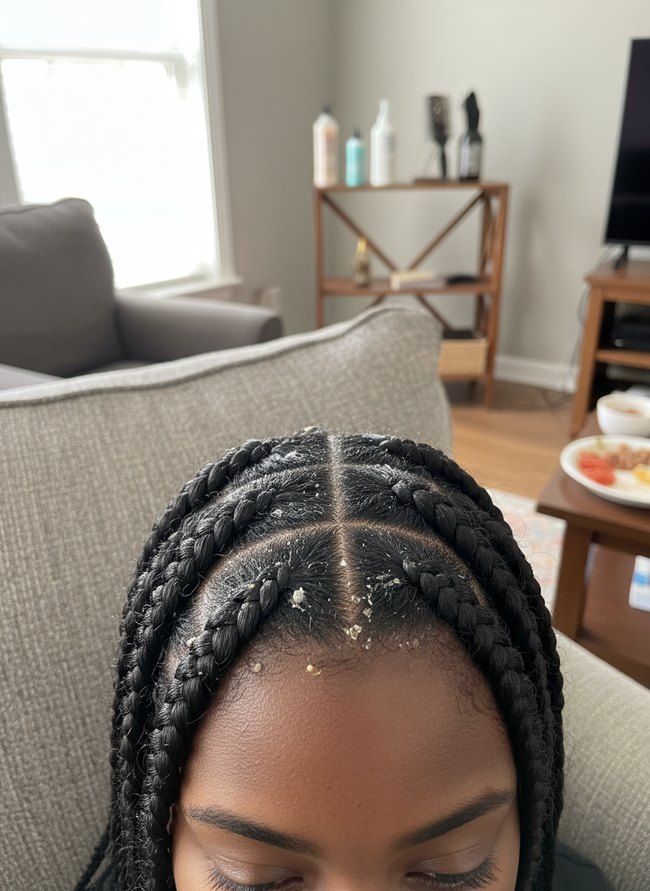
    Product Buildup Residue

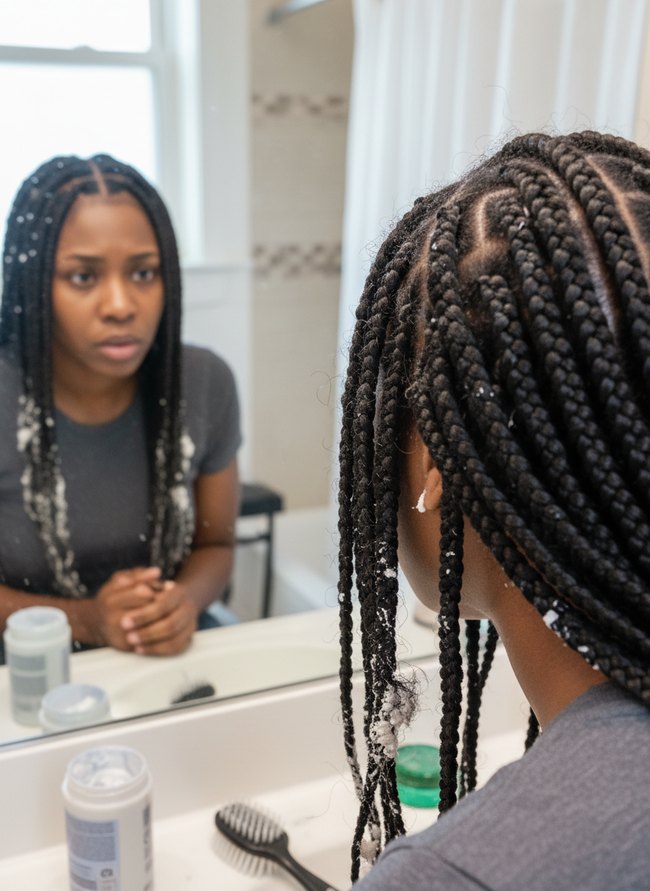
    White flakes of product residue cling to the dark braided cornrows and part lines. Heavy buildup causes irritation and can clog the scalp. Always use light products when styling hair.

    4. Improper Sectioning Width
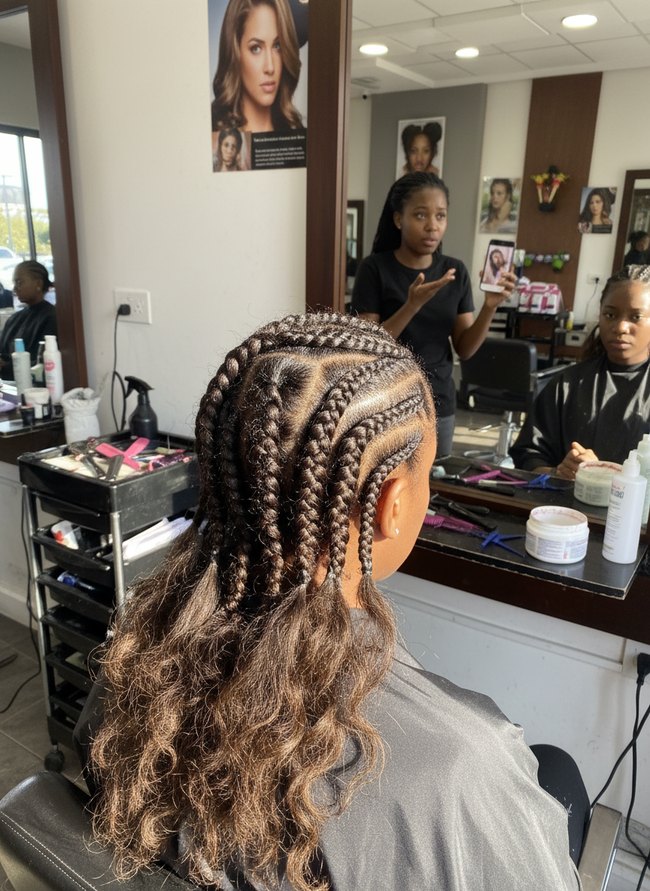
    Improper Sectioning Width

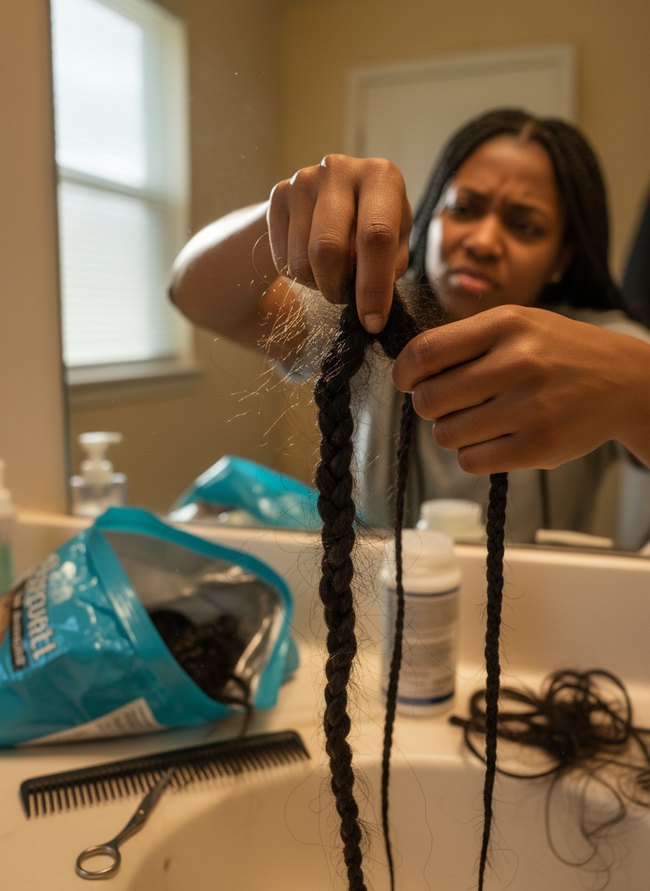
    Dark brown cornrows show inconsistent widths and uneven tension across the scalp. Several braids appear thin, while others are noticeably thicker, creating an unbalanced pattern. Consistent, even sections ensure strong, healthy cornrows.

    5. Inconsistent Braid Pressure
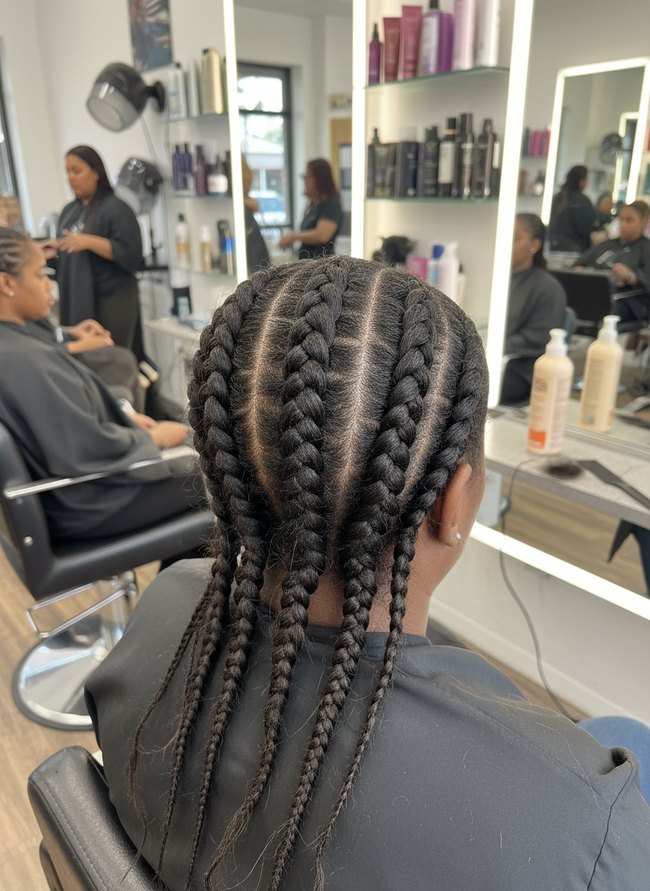
    Inconsistent Braid Pressure

    Loose black braids show uneven tension where they leave the scalp. The cornrow mistakes here feature some braids pulling tightly, while others hang with less pressure, causing discomfort. Braiding each strand of hair requires a steady, gentle hand to avoid uneven pulling.

    6. Neglected Scalp Preparation
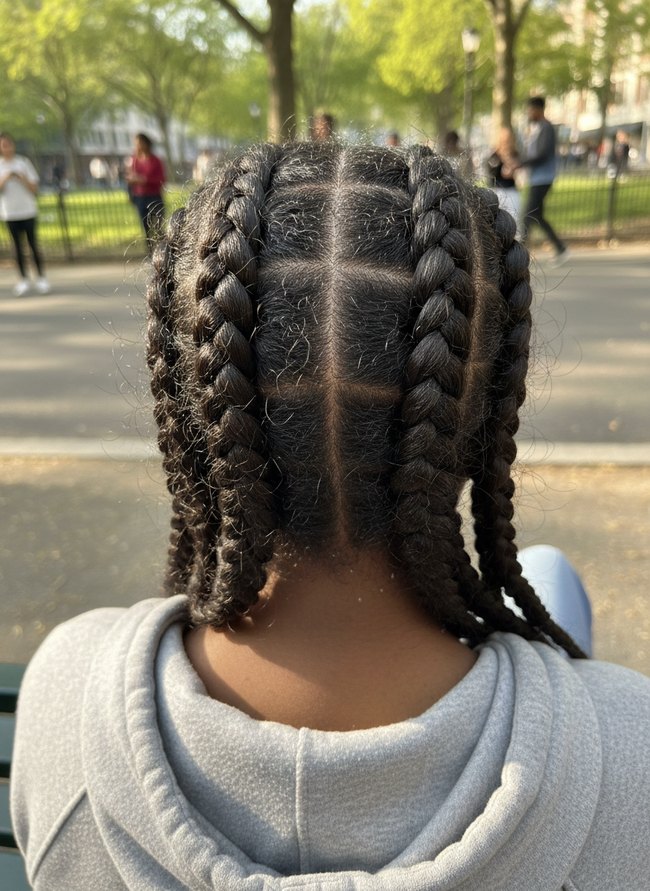
    Neglected Scalp Preparation

    Dark cornrows show loose hair strands and white flakes on the scalp, pointing to dry skin. The scalp needs moisture before braiding to prevent tension and frizz. Always moisturize the entire scalp thoroughly before creating cornrow mistakes.

    Why Does My Scalp Feel So Tight Even After Loosening The Braids?

    Most people believe loosening the braid solves all scalp issues. Many home stylists tug at cornrows hoping to relieve pressure. A tight braid near your hairline still pulls. That tiny knot of hair at the base of each cornrow causes problems.

    You must address the root of the issue. Many stylists pull hair too taut against the scalp during the initial braid construction. This creates invisible, painful stress points even with a slightly looser final braid. A gentle hand during the braiding process prevents much discomfort.

    Folks often grab hair in big sections, then try to smooth it down. A smaller section of hair lets you control tension better. Use a metal rattail comb to divide hair into clean, half-inch rows before you start. This careful partitioning prevents accidental tugging on neighboring follicles.

    Many people also neglect scalp preparation. A dry scalp has less give. Using a light hair oil, like golden jojoba, before braiding adds a protective barrier. Massage a pea-sized amount directly onto your scalp. This simple step can prevent much future soreness.

    Aftercare also plays a role. Most stylists just tie their hair down and go to bed. A silk pillowcase reduces friction on your delicate strands. This smooth fabric prevents tiny hairs from catching and pulling during sleep. Always protect your cornrows at night.

    My Cornrows Look Great At First, But They’re Frizzy By Day Two – What Am I Doing Wrong?

    Many people think tight braids stop frizz. Hair pulled too tight causes tiny hairs to break free. Those broken hairs create a fuzzy halo, a cottony halo around your dark cornrows. Loose, gentle braiding prevents this hair damage. Each cornrow needs a gentle hand, not a strong tug.

    Some believe a fresh wash and dry is enough. Wet hair actually stretches. Wet strands shrink back when dry, loosening the braid. Braiding damp hair makes shiny, sleek cornrows. Your textured hair benefits from slight moisture.

    Most people skip product application. Dry hair gets frizzy fast. A lightweight gel or mousse locks individual strands. This clear product forms a soft barrier, holding your small braids in place. Apply a dime-sized amount of product to each section before braiding.

    Lots of folks finish and forget. Satin bonnets are not optional. A smooth bonnet protects your cornrows from rough pillowcases. This silky fabric prevents friction, keeping your neat pattern intact. Wear a black satin bonnet every night for lasting neatness.

    Which Idea Will You Try First?

    That’s 6 different takes on cornrow mistakes. The best ideas above are usually the smallest moves — one material, one layout shift, one piece of furniture in the right place. Pick whichever room feels closest to your space and start there before tackling the rest.

    Found an idea worth keeping? Save this post to your Pinterest board so it’s waiting for you when you’re ready to start your own project.


  • 7 Natural Hair Care Mistakes That Stunt Growth

    7 Natural Hair Care Mistakes That Stunt Growth

    Your curls feel dry, crunchy to the touch, no matter how much golden shea butter you smooth onto each strand. Frizz appears before you even leave the front door. A new product offers no different result; your hair still feels brittle. Many women encounter these frustrations as they nurture their coils. Natural hair mistakes often hold back healthy growth. Common errors can prevent thick, dark hair from reaching its full potential. We explore seven ways to avoid these missteps and help your curls thrive.

    1. Over-Shampooing Dry Scalp

    Over-Shampooing Dry Scalp

    A young woman’s hand gently touches her medium brown curly hair near her ear. Her scalp shows light, natural hair growth with no visible irritation. A clean window and a green potted plant appear blurred in the background. The image shows a calm moment, suggesting the importance of gentle hair care.

    2. Rough Towel Drying

    Rough Towel Drying

    Dark curly hair shows many tiny water droplets flying off the strands, illustrating a common natural hair mistake. A thick beige towel held against the cheeks and neck absorbs some moisture, but the forceful water motion suggests damage to delicate curls. The image clearly shows how rough towel drying can harm your natural hair.

    3. Excessive Heat Styling

    Excessive Heat Styling

    The woman’s dark brown curly hair displays a soft, natural texture with individual spirals. Her light pink t-shirt provides a simple backdrop, allowing the hair to stand out. The image reminds you to avoid excessive heat styling to keep your curls healthy.

    4. Ignoring Deep Conditioning

    Ignoring Deep Conditioning

    The woman’s dark curly hair shows some dryness on the ends, a common natural hair mistake when one skips deep conditioning treatments. Her shiny skin and healthy lips contrast with the slightly frizzy hair texture. Regular deep conditioning helps hair stay soft and strong, avoiding breakage.

    5. Protective Style Neglect

    Protective Style Neglect

    Dark locs on the young woman show new hair growth at the roots, indicating a need for maintenance. Her beige knitted sweater provides a soft visual contrast to the textured hair, highlighting the difference between older locs and fresh new growth. The image reminds us that even protective styles require regular care to prevent damage.

    6. Inconsistent Trim Schedule

    Inconsistent Trim Schedule

    Loose brown curls frame a woman’s face, showing some frizz and uneven ends. Long strands of hair fall around her shoulders, suggesting a need for a fresh trim. The visible texture helps you spot a common natural hair mistake.

    7. Detangling Dry Strands

    Detangling Dry Strands

    Dark curly hair appears dry and tangled, showing a common natural hair mistake. A small black comb catches several broken strands, indicating hard detangling of the dry hair. The image clearly shows the damage caused by combing hair without moisture, helping you avoid this problem.

    Beyond the Product Label: Understanding Your Hair’s Porosity and Why It Matters (More Than You Think)

    Still, your hair’s porosity changes everything, giving you the real secret to growth. A strand of dry hair floats on water when it has low porosity, resisting moisture entry. Conversely, high porosity hair sinks quickly, acting like a thirsty sponge. Medium porosity hair sits in the middle, staying submerged for a few minutes before sinking. Understanding your unique hair texture helps you pick the right products. Heavy shea butter creams block low porosity cuticles, leaving strands greasy and unmoisturized. Instead, light almond milk rinses penetrate easily, delivering deep hydration without buildup. Many people avoid silicones, thinking all are bad. However, some water-soluble silicones create a thin protective film on high porosity hair, preventing precious moisture loss. That thin film saves your hair from breakage. Thick gels with strong hold often contain drying alcohols. Those harsh ingredients strip your hair’s natural oils, making it brittle. Opt for aloe vera-based stylers; these products provide soft hold and rich moisture. Your hair’s health depends on these small, targeted choices.

    The Silent Killer: How Hard Water Sabotages Your Natural Hair Journey and Simple Fixes

    Most people miss hard water’s impact on healthy hair. Mineral deposits like white lime scale build up on your strands, leaving them stiff and brittle. Hard water makes your hair dry. A simple shower filter removes those harsh minerals, making your water soft. Your hair needs soft water. Chelating shampoos contain agents that grab onto metal ions, then rinse them away with water. This process cleanses old mineral layers from hair. Many people use apple cider vinegar rinses to clarify hair. That common advice sometimes falls short. Vinegar only loosens mineral deposits; it doesn’t remove them. For true mineral removal, follow a vinegar rinse with a strong chelating shampoo. Your hair becomes much softer. This two-step method prevents breakage, leading to longer, stronger strands.

    Which Idea Will You Try First?

    That’s 7 different takes on natural hair mistakes. The best ideas above are usually the smallest moves — one material, one layout shift, one piece of furniture in the right place. Pick whichever room feels closest to your space and start there before tackling the rest.

    Found an idea worth keeping? Save this post to your Pinterest board so it’s waiting for you when you’re ready to start your own project.

  • 6 Twist Mistakes That Cause Frizz and Slippage

    6 Twist Mistakes That Cause Frizz and Slippage

    Hands work hard on hair. A fresh set of twists feels amazing, but sometimes neat coils unravel too fast. Nobody wants loose hair or frizzy patches after hours of careful effort. Common twist mistakes often sabotage your style. Hands might know the routine, but small errors create big problems. Thin hair might need more product, while thick strands absorb less. Many guides skip real talk about what goes wrong during the styling process. Six common pitfalls help keep twists tight and shiny. Let’s get into it.

    1. Uneven Sectioning Slip

    Uneven Sectioning Slip

    Small, uneven sections of dark hair lead to frizzy, loose twists. Hair should always be divided into equally sized parts for a clean, long-lasting style. A fine-tooth comb should always be used to create neat, consistent square sections.

    2. Product Overload Frizz

    Product Overload Frizz

    Many dark brown curls show frizz and product residue. The white bottle on the porcelain sink has thick brown product dripping down its side and pooling on the counter. Too much product weighs hair down and makes twists look messy.

    3. Loose Base Tension

    Loose Base Tension

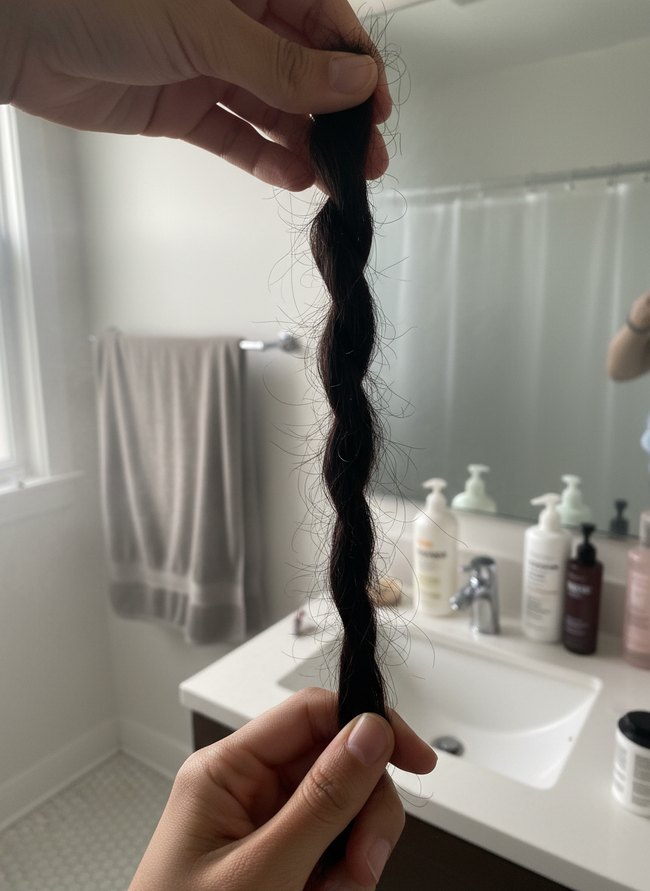
    Loose dark hair strands show a weak twist that unravels at the base. Hair stylists avoid this common twist mistake by twisting hair firmly from the root down. Hair stylists pull the hair taut as they start each new twist.

    4. Improper Directional Pull

    Improper Directional Pull

    Loose, dark hair strands stick out from the main twist, creating a fuzzy texture. Many small hairs escape the dark twist. Avoid pulling hair in different directions when creating the style.

    5. Inconsistent Twist Size

    Inconsistent Twist Size

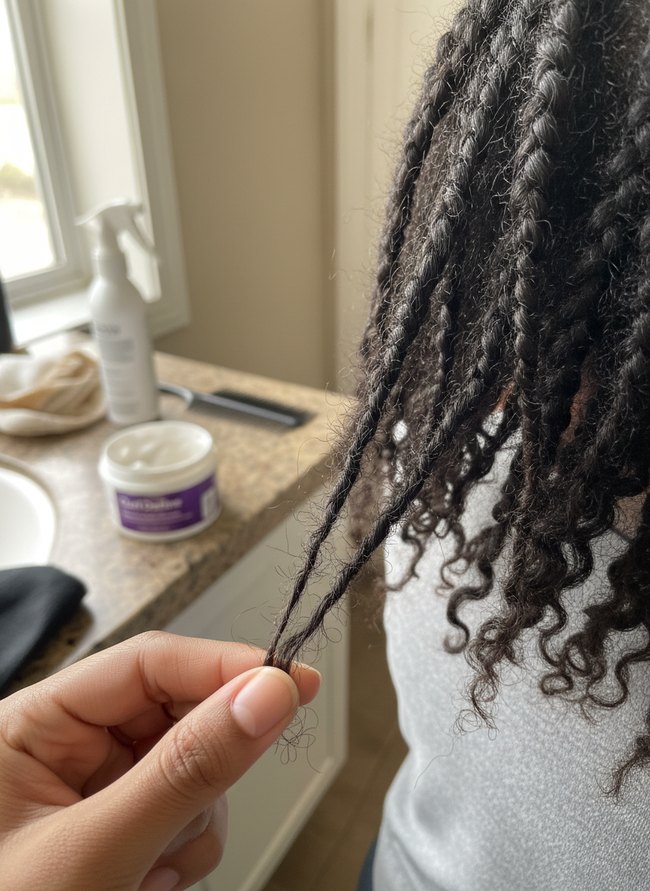
    One dark hair twist is notably thinner than the other dark twists. Many small hairs around the twist show frizz and flyaways. Uniform twist sizes create a neat, lasting style.

    6. Skipped Edge Blending

    Skipped Edge Blending

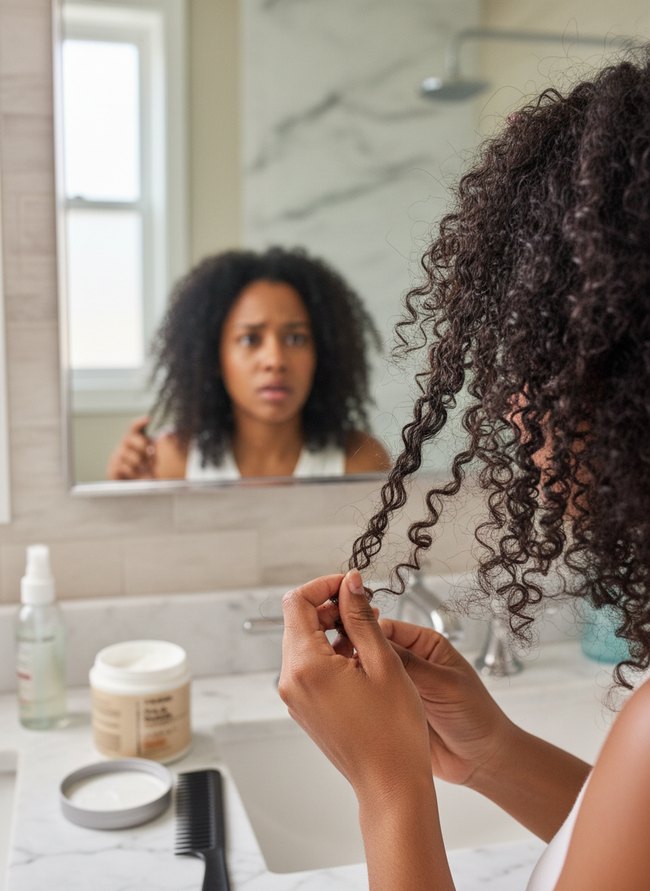
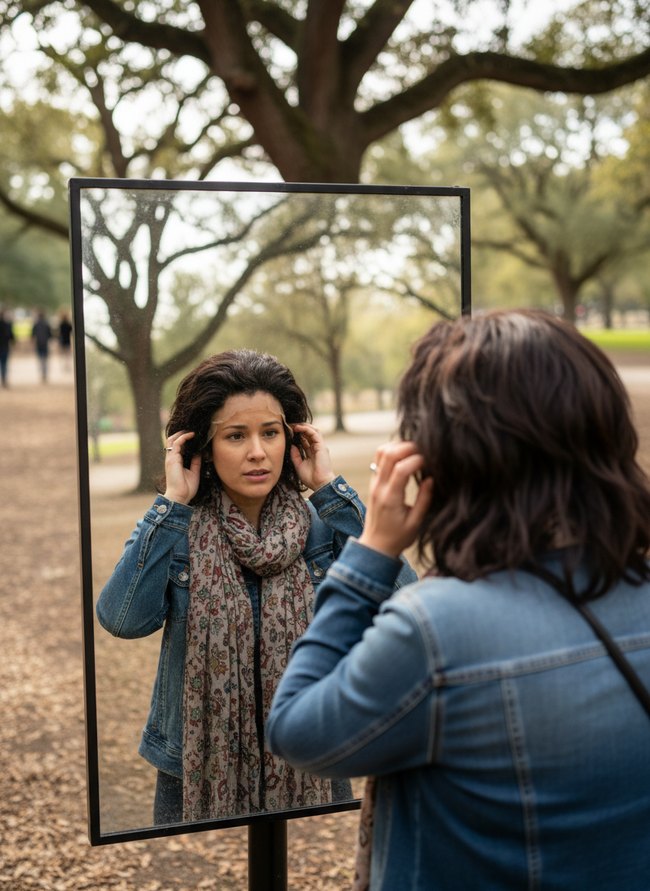
    Skipped edge blending creates frizz around the hairline. The woman in the mirror has a loose, unblended hairline, showing a common twist mistake. Smooth down edges with a gentle gel before twisting to prevent this issue.

    Why Your Perfectly Twisted Curtain Rods Keep Sagging (Even With “Heavy Duty” Brackets)

    Many homeowners believe thick metal rods and sturdy wall anchors prevent curtain rod sag. Those heavy-duty brackets sometimes still allow a long metal rod to droop, especially over wide windows. The real problem often lies in how you twist the curtain rod into its supports. Most people twist a rod into the bracket, applying force straight down. This common action puts all the weight on the bracket’s bottom edge, twisting the bracket itself over time. A better method involves twisting the rod into the top of the bracket first. Then you gently lower the rod into the bracket’s bottom groove. This two-step process distributes the weight across the bracket’s full height. Your curtain rod will remain level, holding even heavy, lined linen curtains without a downward curve. This small change makes a big difference for your window treatments.

    The ‘Tight is Right’ Myth: How Overtightening Your Twist-and-Lock Shelf Units Leads to Instability

    Many people believe a firm twist makes a shelving unit stronger. You might think twisting a white plastic connector until your hand aches secures a tall gray shelf. However, over-tightening threaded components often strips the internal grooves. A brass screw, forced too hard, can chew through soft particle board. This damage weakens the connection, making the entire structure wobbly, not solid. Most homeowners crank down on dark metal bolts, hoping for extra stability. A better method involves tightening each connection point until you feel slight resistance. After the initial snugness, apply a small quarter-turn with a flat hand. This gentle action prevents thread damage on the light wood shelves. Instead of brute force, use finesse for a truly sturdy setup. You want connections to be secure, not strained. A properly assembled black metal shelf unit stands firm and steady. Too much force causes future wobble and collapse.

    Which Idea Will You Try First?

    That’s 6 different takes on twist mistakes. The best ideas above are usually the smallest moves — one material, one layout shift, one piece of furniture in the right place. Pick whichever room feels closest to your space and start there before tackling the rest.

    Found an idea worth keeping? Save this post to your Pinterest board so it’s waiting for you when you’re ready to start your own project.

  • 6 Mistakes Parents Make With Kids’ Natural Hair

    6 Mistakes Parents Make With Kids’ Natural Hair

    Rough brushing causes lasting damage to young, delicate strands. Most hair care advice overlooks the specific challenges of styling children’s hair textures. Six common kids hair mistakes highlight repeated patterns you likely miss. Harsh elastic bands snap fine hairs, creating short, frizzy patches near the temples. Improper product application leaves thick residue, attracting dirt and dulling natural shine. Wet hair stretches easily, making detangling a risky venture for fragile roots. Fingernails might inadvertently cause scalp irritation during shampooing. Incorrect drying techniques lead to excessive frizz, making daily styling a frustrating chore for both parent and child. Your child’s healthy hair growth depends on gentle care.

    1. Overly Tight Braids

    Overly Tight Braids

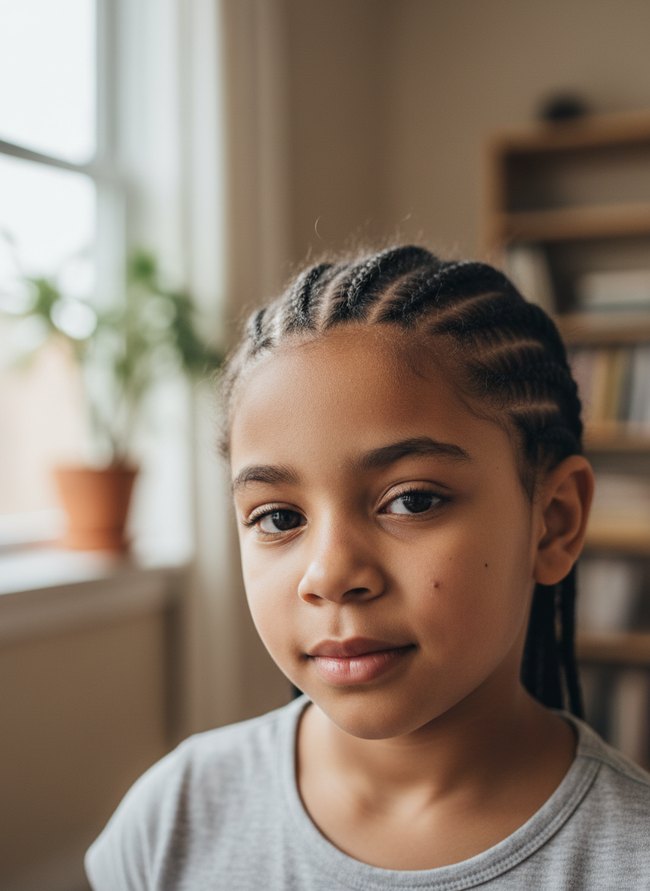
    The child’s dark braids show no pulling or redness at the hairline. Careful styling avoids common kids hair mistakes like overly tight braids, preventing pain and damage. Her smooth scalp and soft expression suggest comfortable natural hair care. Look for gentle tension when styling your child’s hair.

    2. Skipping Moisture Routine

    Skipping Moisture Routine

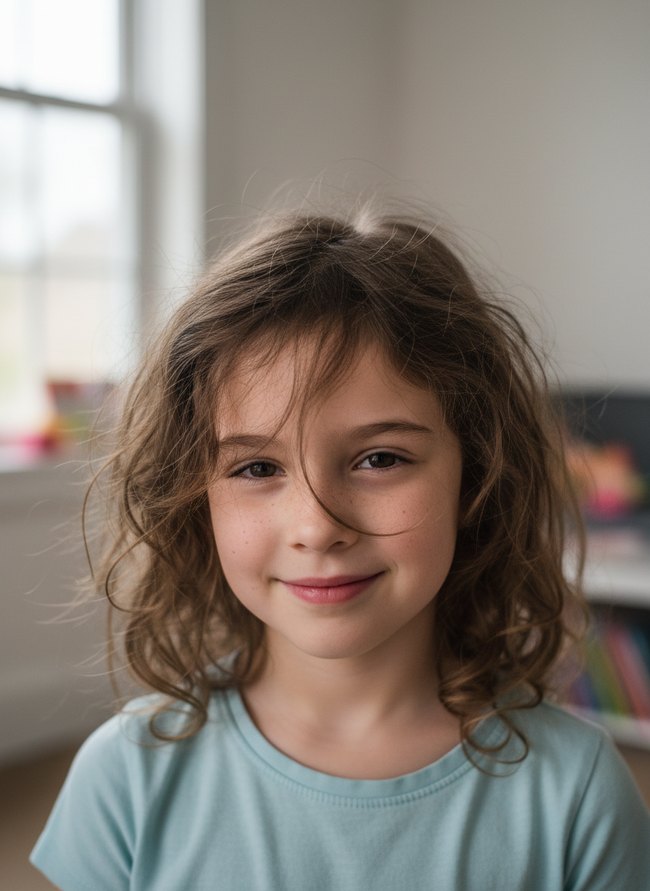
    The child’s light brown hair appears dry and frizzy, showing a clear lack of moisture. Loose strands stand out from the head, suggesting you missed a key step in preventing common kids hair mistakes. Skipping a regular moisturizing routine causes this dry, unkempt texture.

    3. Ignoring Detangling Process

    Ignoring Detangling Process

    The girl’s messy brown curls show clear signs of skipped detangling. Dry hair strands fly around her head, creating a fuzzy, undefined look. Parents can prevent kids’ hair mistakes by taking time to comb out tangles gently.

    4. Using Wrong Products

    Using Wrong Products

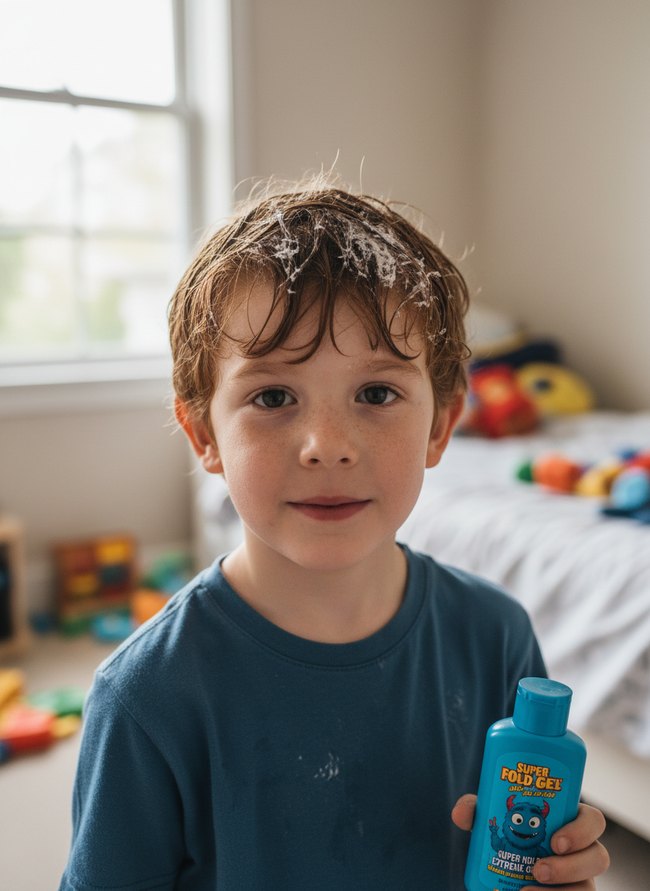
    The child’s red hair shows white, flaky residue, illustrating a common problem with kids’ hair. Visual evidence clearly demonstrates how certain products can leave unwanted buildup, especially on fine, short strands. A small blue bottle of “Super Hold Gel” in the child’s hand suggests the product causing the issue. Avoid products that create visible flaking.

    5. Rough Towel Drying

    Rough Towel Drying

    A child’s wet brown hair shows signs of rough towel drying, with individual strands tangled and frizzy. The texture indicates friction against the thick ivory towel, which causes damage to delicate hair cuticles. The child’s facial expression reveals no discomfort; however, you want to avoid unnecessary hair damage. Always blot wet hair gently.

    6. Excessive Heat Styling

    Excessive Heat Styling

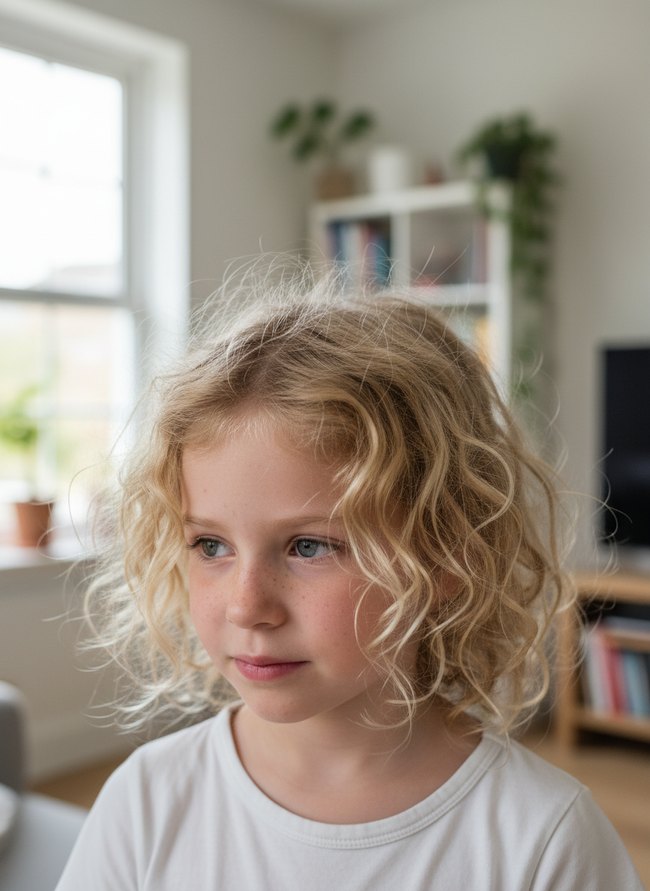
    The child’s light blonde hair shows damage from heat styling, with frizz disrupting the natural curl pattern. Delicate strands float outward, indicating dryness and breakage caused by excessive heat. A light white t-shirt offers little contrast to the bright hair. Avoid excessive heat styling to keep the hair healthy.

    The Biomechanical Implications of Tension Distribution in Natural Hair Fiber Alignment

    Uneven tension during detangling causes microscopic damage to a child’s delicate hair strands. A single hair fiber, with its outer cuticle scales, stretches and frays under too much localized force. Parents often pull a wide-tooth comb through a large section of thick, curly hair, believing bigger sections save time. However, this technique concentrates pulling pressure on a small number of strands at the comb’s leading edge, not distributing the load across the entire section. Those few stressed hairs bear the full brunt of the detangling effort. Instead, smaller, finger-width sections allow the comb’s plastic teeth to glide through with uniform resistance. Each individual hair strand receives a more even, gentle pull, preserving the natural hair’s structural strength. Consistent, distributed tension prevents the tiny cracks and weakened points that lead to breakage later on. Your child’s hair will show fewer split ends and less overall thinning with this careful approach.

    Optimizing Hydration Retention: A Substantive Analysis of Emollient and Humectant Synergy in Pediatric Hair Care Regimens

    Water stays inside your child’s coarse hair strands with proper layering. Coconut oil, a thick natural emollient, seals the outer layer of each dark brown curl. You need to apply a humectant first; glycerin-based leave-in conditioners pull moisture from the air into the hair shaft. This two-step process creates a flexible, protective barrier on delicate hair. Applying a heavy oil before a lighter, water-attracting product blocks the humectant from reaching the inner hair structure. That common error leaves fine natural hair feeling dry and brittle to the touch. Your child’s coiled hair maintains its soft texture and prevents breakage with this careful routine. Consistent layering keeps the hair hydrated, reducing frizz and tangles throughout the week. Proper moisture retention ensures healthy hair growth.

    Which Idea Will You Try First?

    That’s 6 different takes on kids hair mistakes. The best ideas above are usually the smallest moves — one material, one layout shift, one piece of furniture in the right place. Pick whichever room feels closest to your space and start there before tackling the rest.

    Found an idea worth keeping? Save this post to your Pinterest board so it’s waiting for you when you’re ready to start your own project.
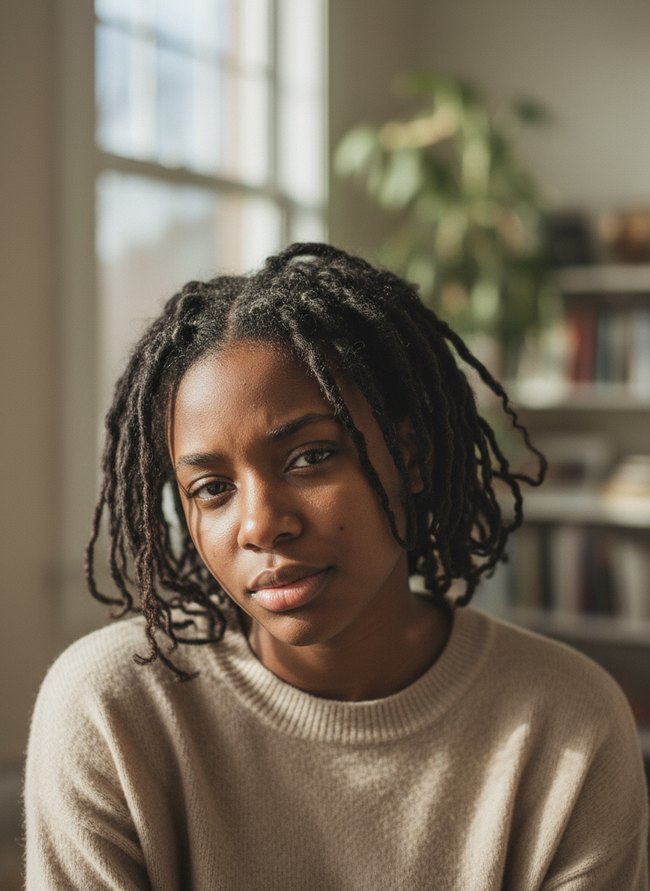
  • 7 Wig Mistakes That Give You Away

    7 Wig Mistakes That Give You Away

    A synthetic lace front, with its shiny fiber, creates a familiar plastic sheen on the hair. Many guides on wigs suggest complex blending techniques or expensive styling products for this common issue. Instead, the real problem often lies not with the wig’s material but with your application technique and daily wear habits. Small alignment errors or a slightly visible wig cap can instantly transform a natural look into a costume piece. Subtle choices betray your secret. Seven common wig mistakes highlight the difference between a natural appearance and an obvious illusion, focusing on simple adjustments for a polished outcome.

    1. Unblended Lace Front

    Unblended Lace Front

    The blonde lace front material sits unblended against the woman’s dark skin, creating an obvious color difference. The light beige fabric contrasts sharply with her deep brown forehead, making the wig easily detectable. Hair stylists always blend the wig’s lace to match natural skin tone.

    2. Mismatched Hairline Density

    Mismatched Hairline Density

    The transparent lace wig front stands out against the woman’s darker skin, creating a visible line. Her dark, wavy hair provides volume, but the hairline density appears too thin at the temples. The exposed lace reveals the wig’s edge.

    3. Incorrect Cap Size

    Incorrect Cap Size

    The dark curly wig fits the woman’s head snugly, creating a natural look. Her hairline shows soft baby hairs, making the wig blend into her skin seamlessly. A small croissant and white coffee cup rest on a light wooden table beside her. Match your wig cap size to your head for a natural fit.

    4. Improper Wig Placement

    Improper Wig Placement

    The wig on the main woman shows a clear hairline seam. The visible seam suggests a wig mistake, indicating improper wig placement. Other customers sit around wooden tables in the sunlit cafe. Always hide your wig’s hairline.

    5. Visible Track Lines

    Visible Track Lines

    The visible lace front on the blonde wig immediately signals a wig mistake. The clear plastic edge sits on the woman’s forehead, not blending into her skin. People at other tables on the wide city street wear casual clothes. Avoid a noticeable edge to your wig by selecting the correct shade of lace.

    6. Over-Styled Synthetic Shine

    Over-Styled Synthetic Shine

    The dark wavy hair shows an unnatural, plastic shine, a common wig mistake. Heavy, blunt bangs lie flat against the forehead, creating a rigid line. Light wood tables in the blurred background suggest a café setting. You can steal the idea to choose wigs with a matte finish.

    7. Unnatural Parting Creation

    Unnatural Parting Creation

    The dark brown wig shows a clear, wide lace front panel. The visible panel creates an unnatural parting, making the wig obvious on the woman’s head. Her long, straight hair falls past her shoulders, blending with her white collared shirt and light blue jeans. The distinct edge of the lace material is easily visible.

    The ‘Density-to-Facial-Structure’ Mismatch: An Analysis of Perceptual Disruption in Novice Wig Application

    Hair density must match your facial structure for a believable wig look. A heavy, thick wig on a small, delicate face creates an immediate visual discord. Imagine a tiny porcelain doll wearing a voluminous charcoal wig; the scale feels wrong. Conversely, a sparse, thin wig can get lost on a broader, more angular face. You need to consider your own bone structure.

    Some people ignore these proportions. A high-density, jet black wig might overwhelm fine, narrow features, making a wearer’s natural contours disappear. Think of a tiny, antique wooden birdcage with a massive, woven sisal rope around it. That contrast jars the eye. A lower-density, honey-toned wig, however, complements a petite face by allowing your skin and bone to show through. This careful balance prevents the “wiggy” appearance many beginners dread. Selecting a wig with appropriate hair volume makes your new style appear organic.

    Substrate-to-Scalp Adhesion Dynamics: Quantifying the ‘Floating Hairline’ Phenomenon

    Your wig’s front edge must lie flat against your skin. A lifted lace panel creates a visible gap. Many wearers misjudge the correct tension for a snug fit. The lace material should gently hug your forehead curve. Some apply too little adhesive, causing the wig to shift. A detached front edge gives the impression of a wig floating above your scalp. Incorrect sizing also contributes; a wig too large will never sit flush. You can use a strong, clear liquid adhesive for a firm bond. Conversely, a wig too small can pull and pucker, also creating space between the wig and your hairline. A well-adhered wig hairline melts seamlessly into your natural skin tone. Failing to trim excess lace close to the knots leaves a thick, visible border. Proper preparation of your skin surface with an alcohol wipe removes oils that weaken adhesion.

    Which Idea Will You Try First?

    That’s 7 different takes on wig mistakes. The best ideas above are usually the smallest moves — one material, one layout shift, one piece of furniture in the right place. Pick whichever room feels closest to your space and start there before tackling the rest.

    Found an idea worth keeping? Save this post to your Pinterest board so it’s waiting for you when you’re ready to start your own project.

  • 6 Crochet Hair Mistakes That Ruin the Natural Look

    6 Crochet Hair Mistakes That Ruin the Natural Look

    Your scalp feels a bit itchy, a few loose strands escape their neat rows. You glance in a shiny mirror, a tiny frown etching between your brows. A stray loop of cinnamon yarn pokes straight out, refusing to blend with other smooth pieces. You wanted an easy, natural flow, a soft frame for your face. Instead, the crochet hair looks a little…off. Other people’s styles seem to sit so perfectly, a dark, rich cascade framing their faces. Common frustration happens to many of us as we learn new hair techniques. Understanding typical crochet hair mistakes saves you time and keeps the style looking fresh. Avoiding these six common errors will help keep your protective style looking neat, not noticeably artificial.

    1. Unblended Braiding Base

    Unblended Braiding Base

    The dark, curly hair shows an unblended braiding base with visible cornrows along the woman’s scalp. The tight braids create a clear grid pattern, making the crochet hair mistakes obvious. The crochet style will look more natural when the base braids disappear underneath the added hair.

    2. Visible Knot Attachment

    Visible Knot Attachment

    The woman’s light brown crochet hair shows visible, bulky knots near her scalp. Noticeable connections indicate common crochet hair mistakes that detract from a natural appearance. A smoother, more blended look can be achieved by hiding attachment points.

    3. Incorrect Hair Texture Match

    Incorrect Hair Texture Match

    Long brown braids with a distinct wavy pattern flow down a woman’s shoulders. The crown features tightly braided hair, while the ends show a loose, curly texture that does not match the straight braiding. The texture mismatch creates a noticeable crochet hair mistake.

    4. Overly Tight Installation

    Overly Tight Installation

    Dark cornrow braids pull tautly at the woman’s scalp, creating visible tension. Her exposed skin shows small red bumps around the hairline, indicating irritation from a tight crochet hair installation. Common crochet hair mistakes can lead to discomfort and damage your natural hair.

    5. Unnatural Parting Placement

    Unnatural Parting Placement

    The woman’s dark crochet hair forms a deep, slightly off-center part, creating an unbalanced look. Her natural hair on the right side appears tightly braided at the scalp, pulling the curls away from the face. The uneven distribution of hair highlights a common crochet hair mistake, making the style seem less natural.

    6. Improper Hair Color Blending

    Improper Hair Color Blending

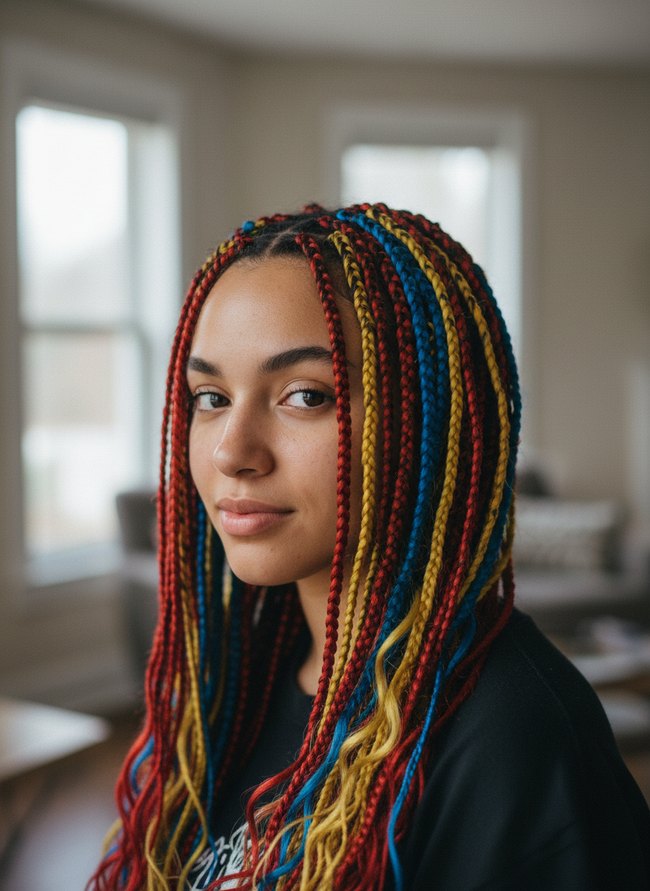
    Bright red, yellow, and blue crochet braids fall across the woman’s dark shirt. Many individual strands show a stark contrast against the dark natural hair color at the roots. Poor color blending can lead to crochet hair mistakes that make the style look less natural.

    The ‘Invisibraid’ Illusion: Why Your Cornrows Are Your Foundation’s Downfall (and How to Fix It)

    Still, cornrows lay the groundwork for a truly natural crochet install. Many people think tiny braids disappear. Actually, bulky braids under your crochet hair show through. A single wide braid across the front leaves a noticeable ridge where your scalp should look smooth. Your cornrows need a flat, even surface across the entire head.

    Each braid must sit snugly against your scalp, not too tight. Tight braids pull on your own hair, causing damage and discomfort. Loose braids shift, creating bumps and exposing the braid itself. A small, neat braid helps the crochet hair blend seamlessly. Your braider needs to create a consistent, flat pattern for the best results.

    Some stylists suggest braiding straight back. This approach often leaves gaps on the sides of your head. Gaps mean more bulk as you try to cover them with crochet loops. A circular or beehive pattern better follows your head’s shape. This method allows the crochet hair to drape naturally around your face and neck. The braids should feel secure but gentle against your skin.

    Density Debacle: How Too Much (or Too Little) Hair Per Braid Is Betraying Your Scalp’s Natural Part

    A heavy crochet braid on a fragile edge can pull too hard. Many people add too much hair to each loop, making your scalp show unevenly. A wispy, natural look needs careful hair placement along your hairline. Placing too many dark bundles on a single cornrow creates a stiff, unnatural line. You want the hair to move. Adding fewer strands to the front perimeter braids helps them blend with your face. This makes your forehead look softer. Some stylists recommend packing each crochet knot with hair. That method often creates a bulky, helmet-like shape that does not fool anyone. Instead, a lighter touch around the temple area makes your style appear grown from your own head. Your natural hair growth pattern shows lighter density around the face. Matching this pattern with your crochet strands avoids a wiggy effect. Sparse patches also cause problems. Too little hair per loop leaves noticeable gaps. These gaps reveal the cornrow braids underneath. A medium amount of hair in each loop gives a full yet flexible result. This prevents both an overloaded feel and a thin, patchy appearance.

    Which Idea Will You Try First?

    That’s 6 different takes on crochet hair mistakes. The best ideas above are usually the smallest moves — one material, one layout shift, one piece of furniture in the right place. Pick whichever room feels closest to your space and start there before tackling the rest.

    Found an idea worth keeping? Save this post to your Pinterest board so it’s waiting for you when you’re ready to start your own project.

  • 6 Mistakes to Avoid With Short Natural Hair

    6 Mistakes to Avoid With Short Natural Hair

    The fresh haircut gleams under bright bathroom lights. You grab a favorite cream, eager to define tight coils. Hours later, dry strands stand stiff like tiny copper wires. Perhaps a different product promised bouncy curls on the package’s glossy photo. Many women navigating their short natural hair journey meet small frustrations. The guide aims to smooth out those bumps. We will pinpoint common short natural hair mistakes. Knowledge of these pitfalls helps you avoid wasted product and disappointing styles. Prepare to discover simpler ways to care for your textured crop.

    1. Over-Washing Dry Scalp

    Over-Washing Dry Scalp

    White flakes dot dark curly strands near the woman’s forehead, showing a common short natural hair mistake. Light gray fabric covers her shoulders. A soft focus background shows a green houseplant and a gray pillow.

    2. Ignoring Regular Trims

    Ignoring Regular Trims

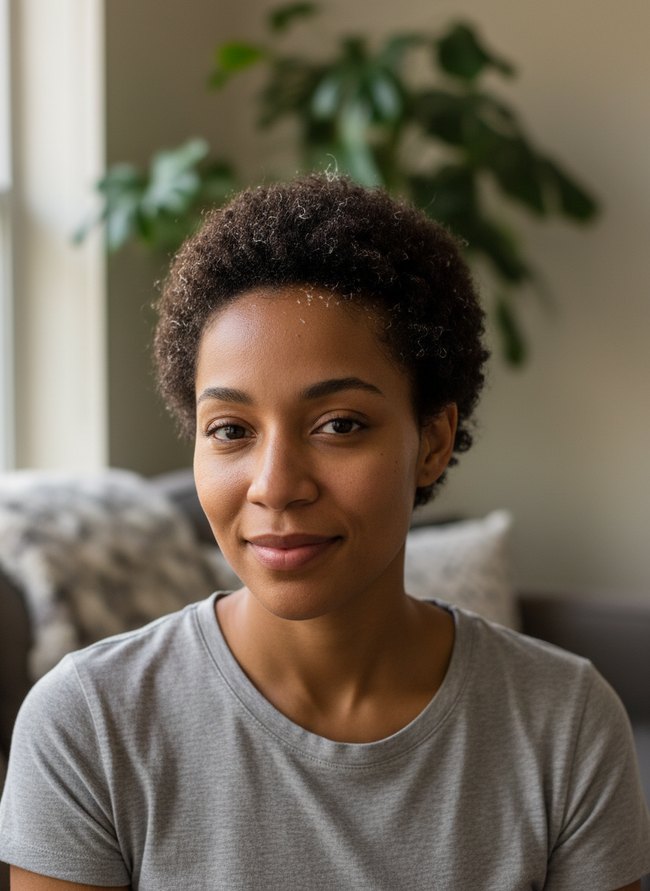
    Dark brown curls frame the woman’s face, displaying a uniform texture and clean edges from proper maintenance. Her short natural hair sits neatly above her ears, showing off a well-kept cut. The image perfectly illustrates how consistent trims keep short natural hair looking fresh and defined.

    3. Skipping Deep Conditioning

    Skipping Deep Conditioning

    Dark brown hair coils tightly, showing some frizz around the edges. Natural hair needs regular deep conditioning treatments to keep tiny curls soft and defined. The image clearly shows how skipping deep conditioning can leave short natural hair looking dry and less vibrant.

    4. Using Harsh Products

    Using Harsh Products

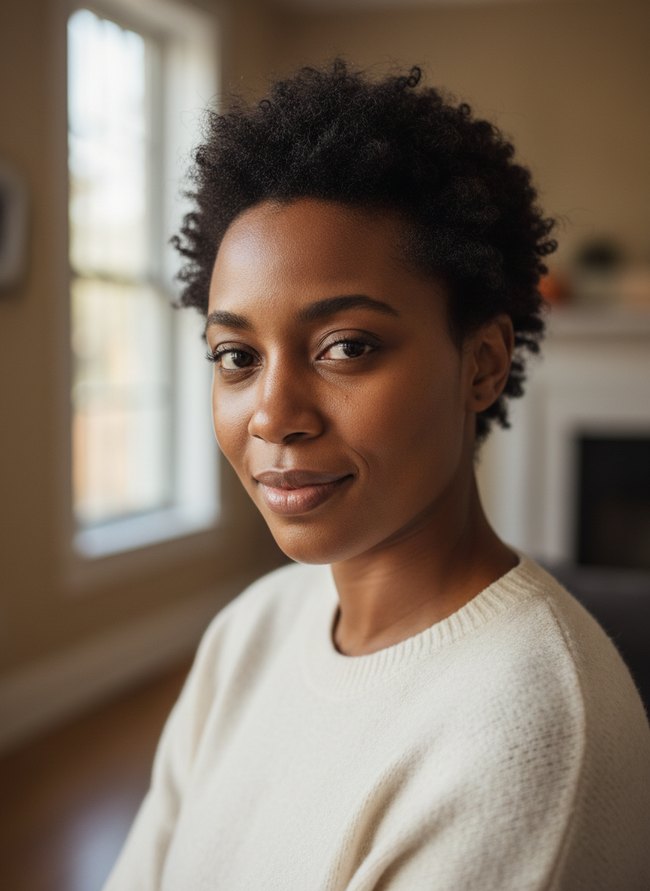
    The woman’s dark curls show off a natural texture. Her healthy short hair appears well-moisturized, a sign of gentle care. The image encourages you to choose kind, nourishing products for your own short natural hair.

    5. Rough Towel Drying

    Rough Towel Drying

    Wet dark curls frame a woman’s face as she dries her hair with a thick white towel. Her right arm lifts the towel over her head, creating friction against the short natural hair. The rough towel rubs the delicate strands, demonstrating one of the common short natural hair mistakes.

    6. Neglecting Night Protection

    Neglecting Night Protection

    Dark brown curls frame the woman’s face with a soft texture. Her short natural hair has a slightly messy, undefined shape, suggesting a lack of night protection. Neglecting proper care can leave the hair frizzy and unkempt, creating styling mistakes you want to avoid.

    Beyond Moisture: The Protein/Moisture Balance Your Short Coils Crave (and How to Achieve It)

    Then, a shiny oak table needs more than just a quick wipe-down. That solid wood furniture demands specialized care. Your family room’s worn leather sofa might feel soft, but without regular conditioning, it will crack. Many homeowners mistakenly believe simple dusting is enough. However, a deep cleaning routine protects your household investments.

    A large brass lamp will dull without proper polish. Dust settles in the textured fabric of plush velvet throw pillows, becoming grimy. You want your living space to always look its best. Hardwood floors require gentle cleansers to keep their rich color. Over time, fingerprints and smudges build up on stainless steel appliances.

    A sparkling chrome faucet needs a vinegar solution to remove hard water spots. Delicate antique mirrors show every speck of dust. Your kitchen’s granite countertops, though durable, absorb stains if not sealed annually. Every surface in your home benefits from a tailored cleaning method. A small woven rug collects dirt deep within its fibers.

    The ‘Invisible’ Enemy: How Your Pillowcase and Towel Are Sabotaging Your Short Strands

    Rough cotton pillowcases truly snag short natural hair, causing frizz and breakage. Your smooth, styled coils need a slick surface. A charcoal gray satin pillowcase lets hair glide freely through the night. The delicate hair cuticle stays flat. Cotton towels also absorb too much moisture, leaving strands dry and brittle. This thirsty fabric strips essential oils from your scalp and hair.

    Many people think vigorous towel rubbing dries hair faster. That rough action creates tiny knots and splits your delicate strands. Instead, gently blot your hair with an old soft t-shirt. The soft jersey cotton absorbs excess water without harsh friction. Your short hair keeps its natural curl pattern. Traditional terrycloth loops grab individual hairs. A smooth microfiber towel works wonders too. These soft fabrics reduce breakage significantly. You will notice less hair on your bathroom floor.

    Which Idea Will You Try First?

    That’s 6 different takes on short natural hair mistakes. The best ideas above are usually the smallest moves — one material, one layout shift, one piece of furniture in the right place. Pick whichever room feels closest to your space and start there before tackling the rest.

    Found an idea worth keeping? Save this post to your Pinterest board so it’s waiting for you when you’re ready to start your own project.
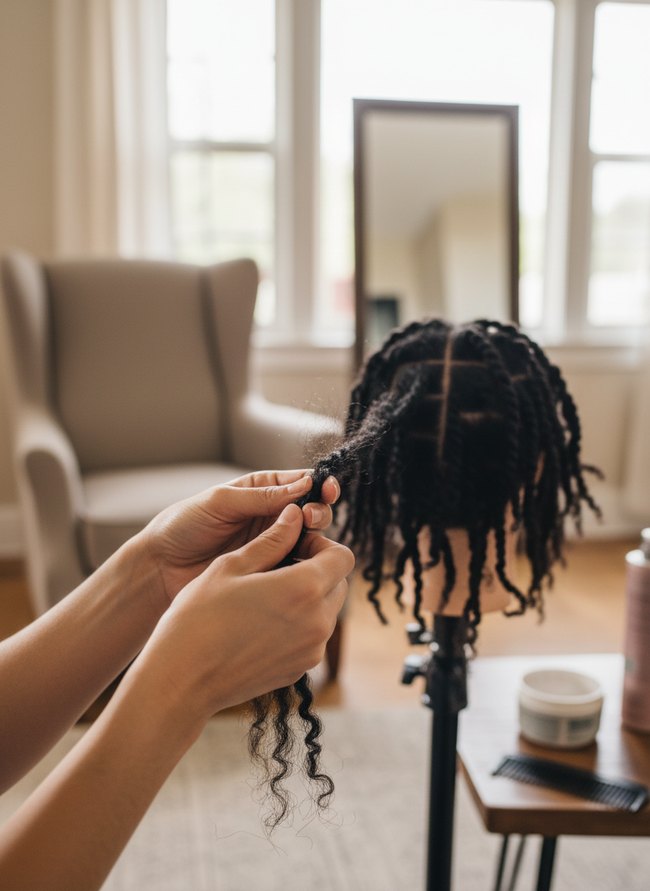
  • 6 Loc Mistakes Beginners Make in the First Year

    6 Loc Mistakes Beginners Make in the First Year

    Many new loc wearers fear product buildup, yet over-washing hair causes more damage. An early loc journey requires careful handling of new growth. Finger-sized sections of dark brown hair often unravel at the scalp, disrupting uniform cylindrical patterns. Some people twist the locs too tightly, creating thin spots near the roots. Incorrect drying methods leave damp locs prone to musty odors, a common problem. Your first year with the style introduces specific challenges. Careful attention to these subtle mistakes prevents bigger problems, maintaining the neat appearance of your new protective style. Common errors often surprise new loc wearers, but understanding them helps avoid setbacks.

    1. Over-Moisturized Product Build-up

    Over-Moisturized Product Build-up

    White product residue on dark brown locs shows a common styling mistake. Locs need breathable moisture, not heavy product that clumps on hair strands. A small white towel draped over a black t-shirt catches falling flakes. Avoid this loc mistake by using lighter, water-based products.

    2. Under-Washing Scalp Neglect

    Under-Washing Scalp Neglect

    A dark scalp shows visible white flakes, a common loc mistake. Dark locs show new growth at the root. A white sink and a white window frame behind the person provide a bright background. A clean scalp avoids this common problem.

    3. Immature Loc Over-Styling

    Immature Loc Over-Styling

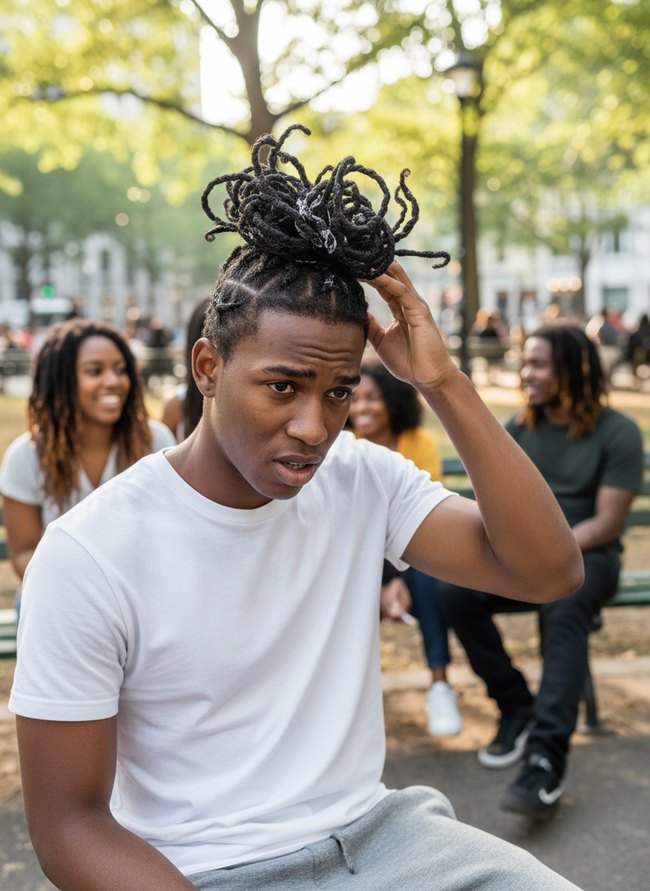
    The young man’s black locs are piled high, creating a large, round shape. Individual locs twist tightly, making a full top knot. The style shows one of many common loc mistakes that beginners make, as the locs appear stiff and over-manipulated. Avoid over-styling young locs.

    4. Improper Sectioning Grid

    Improper Sectioning Grid

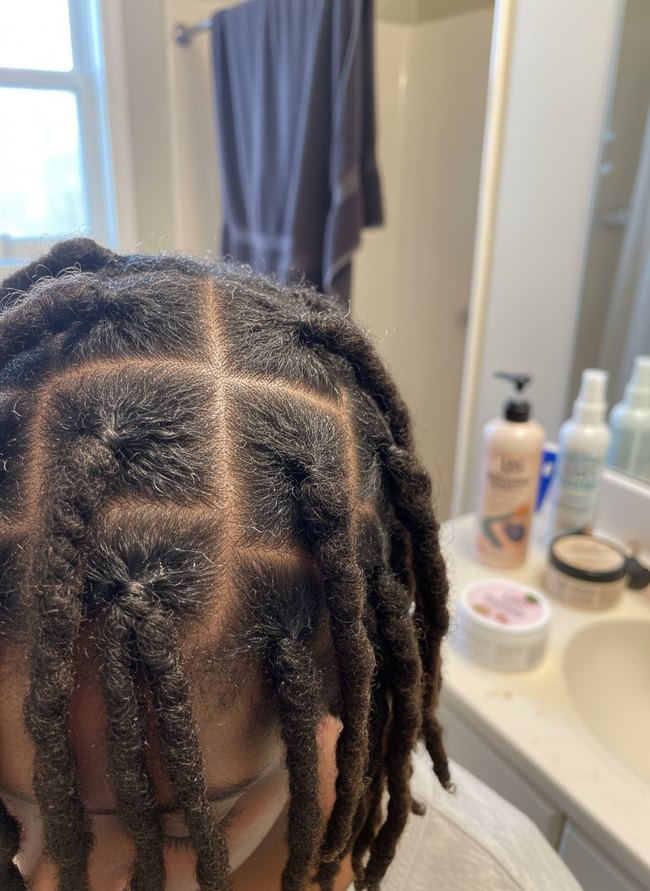
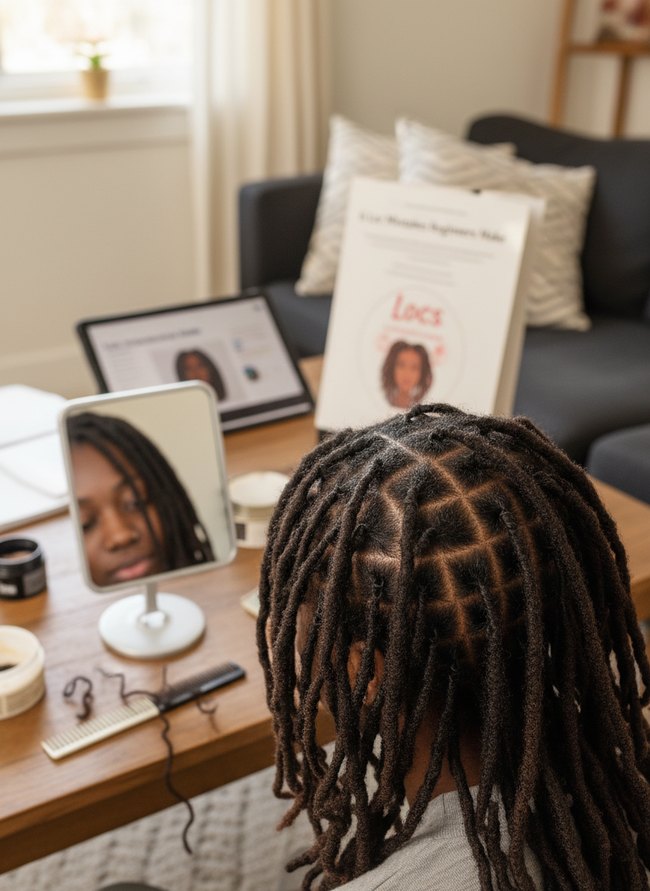
    The clean, crisp grid of square sections on the dark hair ensures an even foundation for loc development. Careful initial partitioning avoids common loc mistakes, promoting uniform growth and easy maintenance for the hair. A small white mirror on the wooden table allows you to check your work. Emulate the precise, consistent sectioning.

    5. Frizzy New Growth Neglect

    Frizzy New Growth Neglect

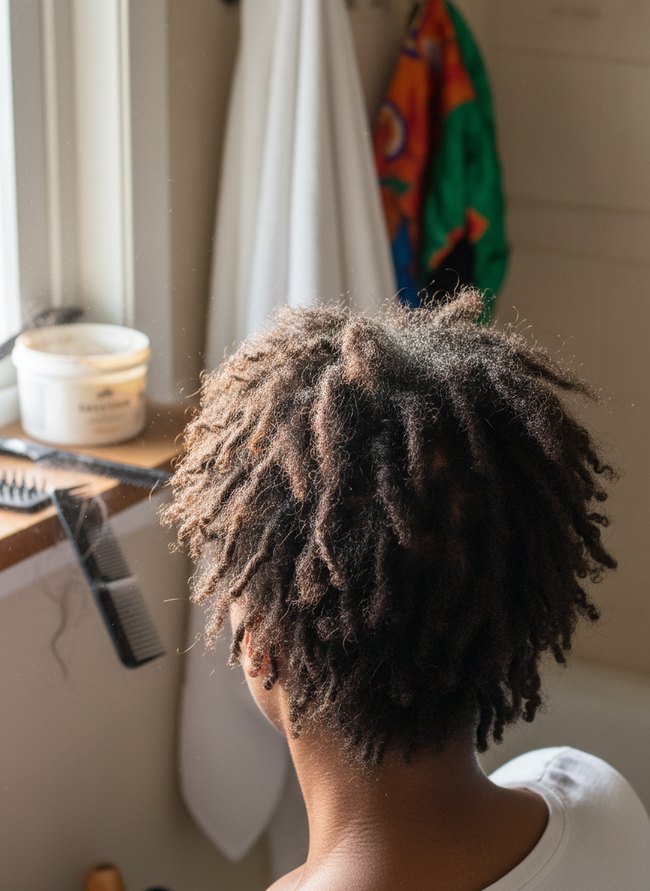
    Brown locs show significant frizzy new growth, needing a fresh retwist or styling. A white jar of hair product and two black combs sit on the wooden counter surface. The image plainly illustrates common loc maintenance mistakes.

    6. Tight Re-Twist Tension

    Tight Re-Twist Tension

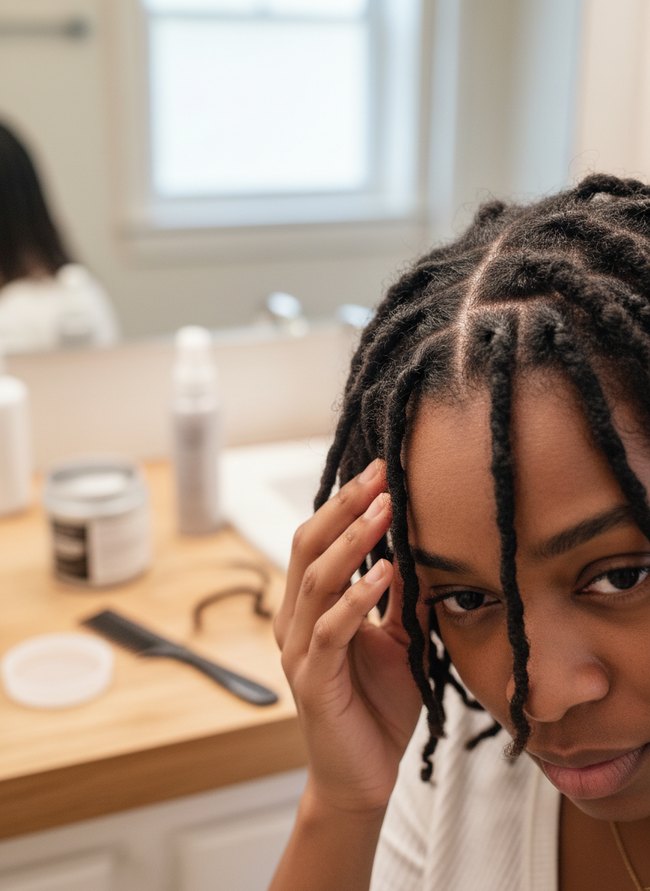
    Tight scalp tension around the dark locs creates an uncomfortable look. White skin stretches from the base of the twisted hair. The wooden counter holds a black comb and a silver jar. Avoid high tension at the loc base.

    The ‘Over-Accessorization Coefficient’: Quantifying Visual Noise in Home Decor

    The “Over-Accessorization Coefficient” measures visual clutter based on object density and focal points. A single dark walnut credenza against a pale cream wall should anchor a room with clear purpose. Many beginners misinterpret the idea of layering, adding one too many small, decorative items. You might place a trio of brass giraffes on the credenza, then a chunky terracotta vase filled with dried eucalyptus stems. Another common error involves layering a patterned runner over a jute rug, creating visual noise.

    Home styling thrives on deliberate blank space, allowing each piece to breathe. Imagine a whitewashed brick fireplace, its mantel holding just one large, hand-thrown ceramic bowl. This simple arrangement provides a restful moment for your eyes. Conversely, a mantel crowded with various framed photos, a collection of tiny souvenir spoons, and a flickering LED candle becomes a busy jumble. Your brain struggles to process all these competing elements.

    Careful curation ensures every object earns its place, contributing to the overall harmony. A knee-high fiddle leaf fig plant in a woven seagrass basket offers vibrant green texture without demanding excessive attention. Too many small, colorful cushions on a neutral linen sofa fight for recognition, diminishing their individual impact. Smart design prioritizes impact through restraint, showcasing fewer items with greater intention.

    Asymmetric Balance vs. Perfect Symmetry: A Psychometric Analysis of Perceived Stability in Interior Arrangements

    Asymmetrical balance creates visual interest and feels more organic than strict symmetry. A single wide oak coffee table offset by two charcoal velvet armchairs on one side and a tall, slender brass floor lamp on the other demonstrates this principle. Stiff, identical arrangements, like matching ivory ceramic lamps on either end of a short pine console, often feel static and lifeless. Your brain actually works harder to find connections in a perfectly mirrored setup, leading to a sense of unease.

    One tall, green potted fern plant standing next to a narrow, white painted bookcase offers a pleasing counterpoint to a wide, low-slung sofa. This natural, flowing composition offers your eyes a varied path to follow. Rigidly pairing an identical fern on the opposite side of the same sofa, however, creates a predictable, less engaging scene. You want your home to feel welcoming and lived-in, not like a showroom display. A single mustard yellow throw pillow placed on one end of a long, gray sectional sofa brings a pop of color without needing a twin on the other end.

    Which Idea Will You Try First?

    That’s 6 different takes on loc mistakes. The best ideas above are usually the smallest moves — one material, one layout shift, one piece of furniture in the right place. Pick whichever room feels closest to your space and start there before tackling the rest.

    Found an idea worth keeping? Save this post to your Pinterest board so it’s waiting for you when you’re ready to start your own project.
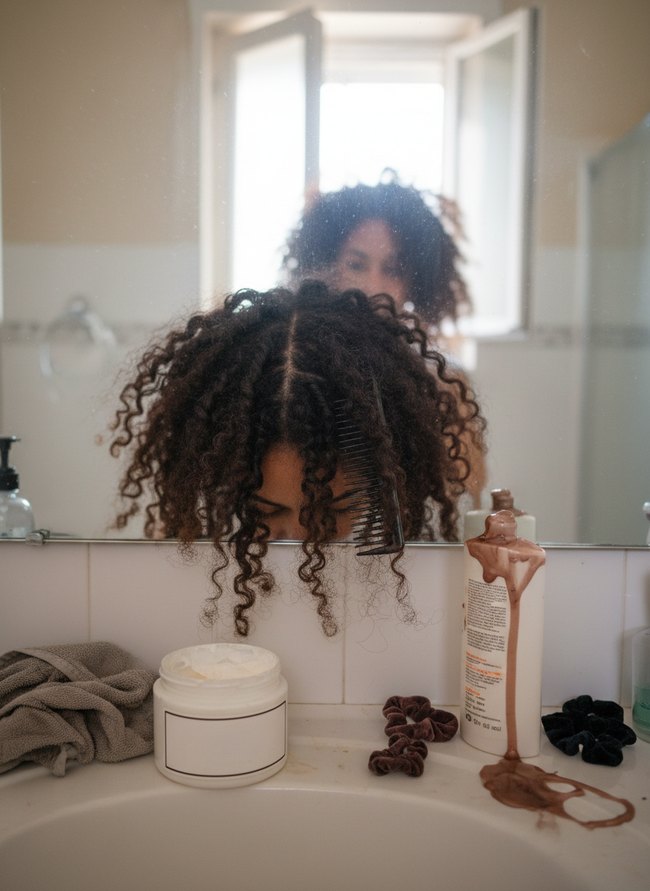
  • 7 Wedding Hair Mistakes Natural Brides Should Avoid

    7 Wedding Hair Mistakes Natural Brides Should Avoid

    Wedding days hold bright sunshine and big expectations for hair. Many brides dream about soft curls or a sleek bun. Most articles skip the gritty details about what can go wrong with hair on such a big day. Honest truth, some folks make common wedding hair mistakes with their natural texture. A bride’s natural coils deserve careful planning and a steady hand. My sister learned the hard way about trying too many new products right before the ceremony. Her dark brown hair got frizzy, not shiny. We will talk about seven big pitfalls.

    1. Unrealistic Hair Extension Blending

    Unrealistic Hair Extension Blending

    The model’s natural brown hair shows at her roots, contrasting sharply with bright blonde hair extensions. Careful color matching for wedding hair avoids obvious lines between natural hair and added pieces. Extensions should closely match your hair color from root to tip.

    2. Ignoring Weather Impact

    Ignoring Weather Impact

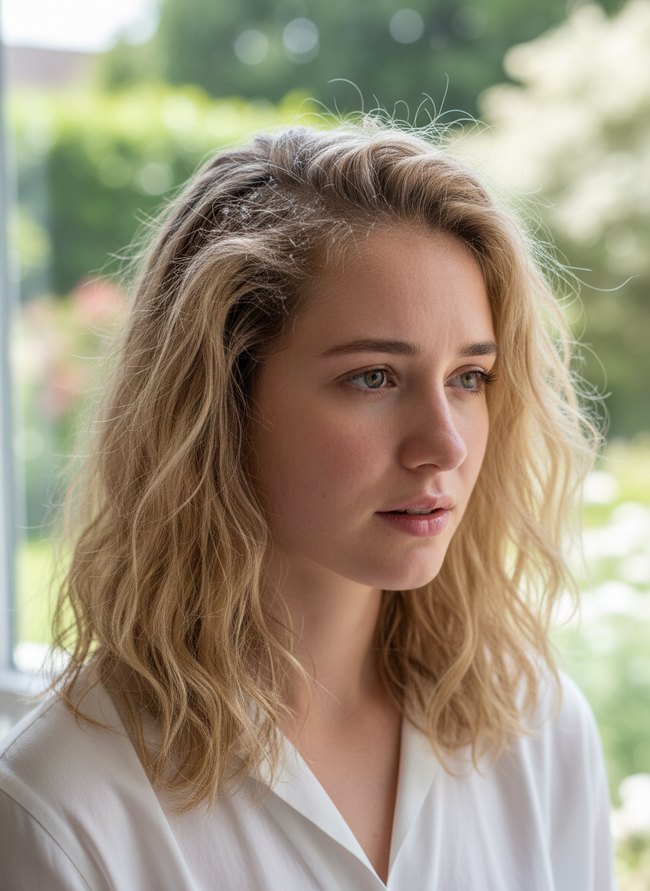
    Loose brown curls frame the woman’s face, with tiny flyaway hairs visible around her forehead. Carefully styled hair can easily frizz or fall flat without proper weather planning. Humidity levels and wind should be considered for outdoor wedding hair.

    3. Last-Minute Style Change

    Last-Minute Style Change

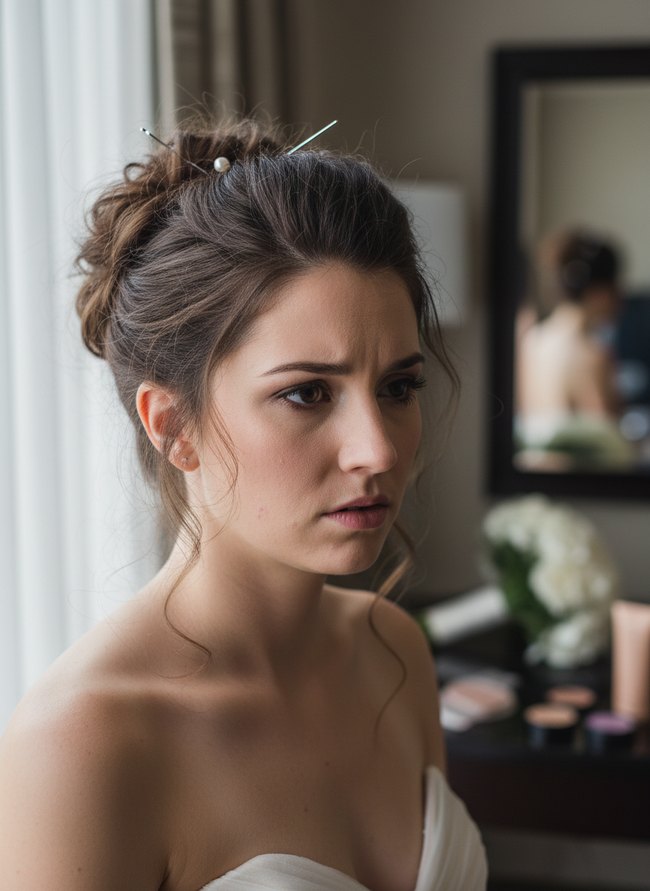
    The bride’s dark brown hair is pulled back into a messy bun with a few loose strands framing her face, creating a soft, romantic look. Her expression shows worry, reflecting the stress of last-minute style changes on a big day. Always decide on your wedding hair look well before the wedding to avoid unnecessary anxiety.

    4. Over-Styling Fragile Strands

    Over-Styling Fragile Strands

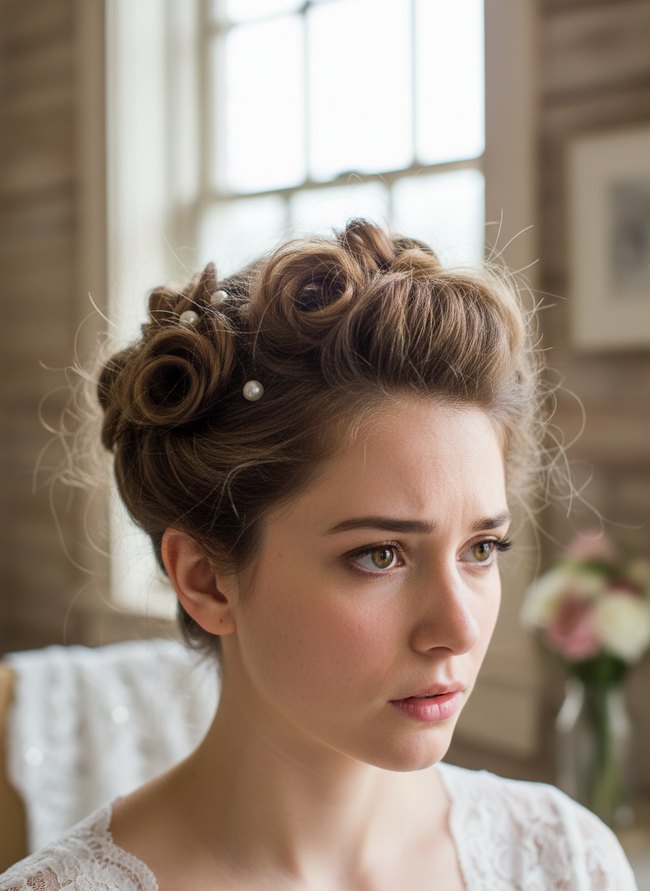
    Frizzy strands stick out from the model’s light brown curled hair, despite the pearl hairpins securing the style. Over-styling fragile hair can lead to breakage and a messy look on your wedding day. Excessive heat and harsh products can damage natural texture.

    5. Neglecting Scalp Prep

    Neglecting Scalp Prep

    Tiny white flakes cling to blonde hair strands near the scalp, creating a visible contrast against darker roots. Scalp health directly affects hair appearance on your wedding day, so plan specific treatments. Always wash hair with a clarifying shampoo a day or two before your event.

    6. Improper Product Application

    Improper Product Application

    White powder dusts the young woman’s dark brown hair and forehead. Visible residue from a styling product creates one of many common wedding hair mistakes. Always test hair products on a small hidden section of your hair first.

    7. Skipping Hair Trial

    Skipping Hair Trial

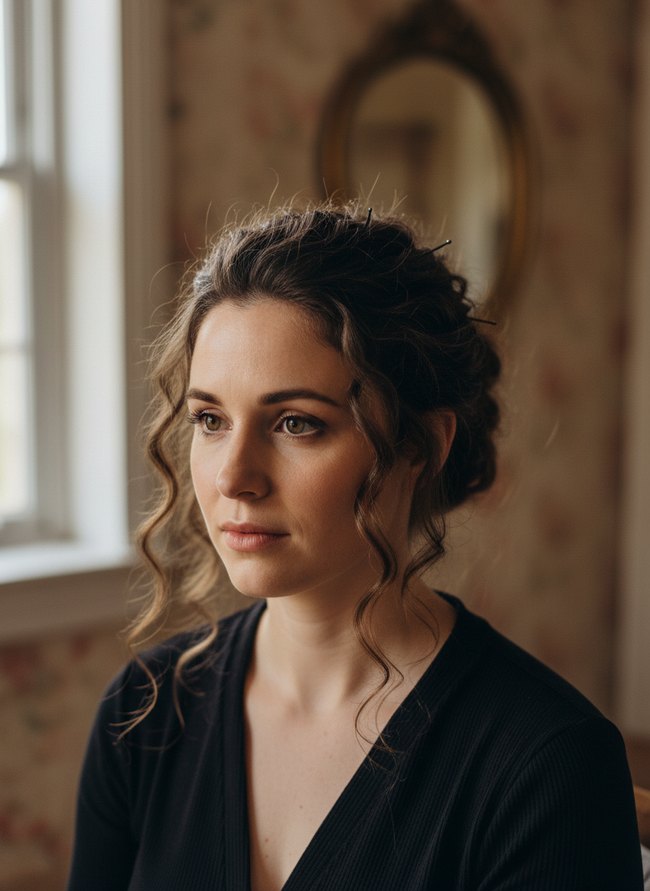
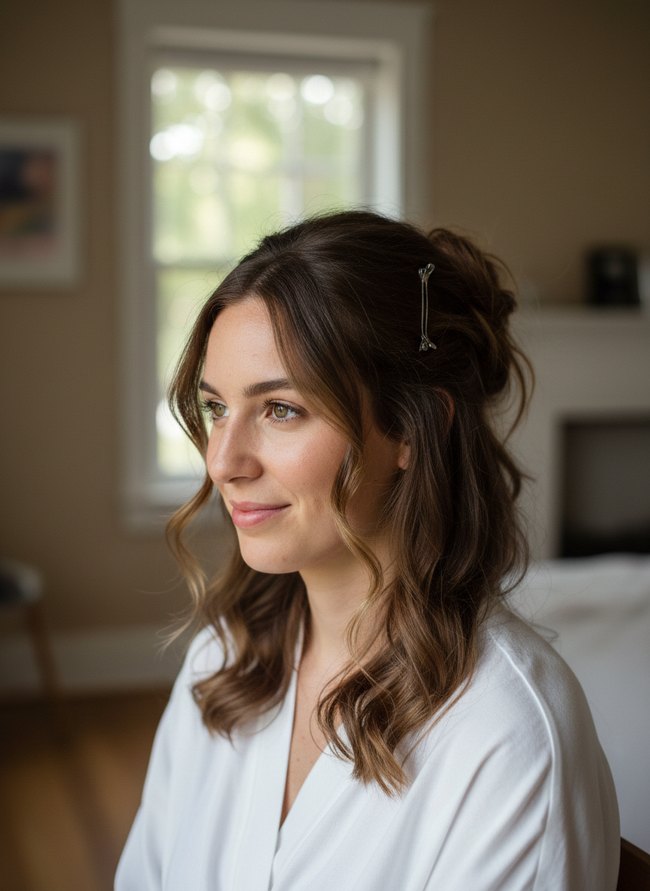
    The woman’s light brown hair features soft, loose waves around her face and a silver barrette holding back a small section. A wedding hair trial helps test different looks and products beforehand. Always schedule a trial run for the style to prevent last-minute surprises on the big day.

    Mistake #1: Ignoring Your Home’s Existing Decor Style

    Many people believe wedding hair should stand alone, a single statement apart from everything else. A bride’s overall look, however, always works best when it flows with her home’s established visual language. Some brides choose a towering, intricate updo without considering their relaxed, honey-toned farmhouse interior. That high style creates a jarring disconnect against rustic wooden beams and soft linen drapes. Instead, consider your home’s existing decorative elements.

    A deep emerald green velvet sofa in your living room suggests a rich, classic style for your wedding hairstyle. Perhaps a soft chignon with a pearl comb would complement that opulent furniture. Most people pick a wedding hairstyle based on current trends, ignoring their personal sanctuary. Your actual home reflects your true taste. A minimalist white kitchen with brushed nickel pulls means clean lines and simple elegance often suit your personal style. For you, a sleek, low ponytail or a simple, smooth bun with a few delicate white flowers might be the perfect choice. This approach creates visual harmony, making your wedding day aesthetic feel truly cohesive. Consider your home’s existing decor when planning your bridal coiffure. A careful choice makes your entire wedding day picture feel authentic and truly *yours*.

    Mistake #2: Forgetting About Furniture Placement During Styling

    Many people think a grand armchair or a carved wooden headboard defines a room. Others say a tall vase on a narrow console table is the key to a polished look. You should instead consider how your chosen wedding hair will interact with these objects. Most brides style their hair without a single thought for sitting down, but a high bun can catch on a four-poster bed. A long, loose braid might tangle in a sturdy oak chair back.

    Instead, take pictures of your reception space. Note the height of your favorite velvet settee. Bring these images to your hairstylist. A low chignon sits much better against a padded bench. A sleek ponytail avoids snagging on a crystal chandelier. Consider how your hair will look from all angles, especially when seated. Your stylist can suggest styles that flatter your face and also navigate the room’s features. This smart planning prevents awkward moments and keeps your hair looking fresh.

    Which Idea Will You Try First?

    That’s 7 different takes on wedding hair mistakes. The best ideas above are usually the smallest moves — one material, one layout shift, one piece of furniture in the right place. Pick whichever room feels closest to your space and start there before tackling the rest.

    Found an idea worth keeping? Save this post to your Pinterest board so it’s waiting for you when you’re ready to start your own project.
  • 6 Box Braid Mistakes That Damage Your Edges

    6 Box Braid Mistakes That Damage Your Edges

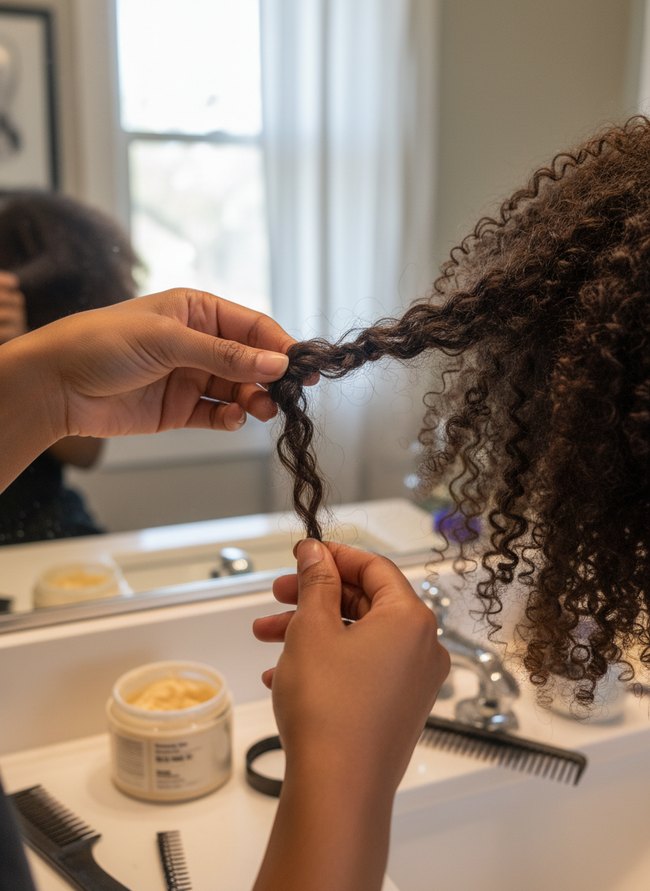
    Plastic braiding hair feels different in your hands than natural strands. Thin brown edges, delicate baby hairs around the forehead and temples, suffer silently from rough handling. Many people want to keep their hair healthy, but they make common box braid mistakes that cause real trouble. New braiders often pull too tight, creating painful tension on scalp skin. Tight braids at the hairline can lead to lasting damage to fine hairs. You work hard on your hair, so knowing what to watch for helps a lot. The guide points out six common missteps that hurt delicate edges.

    1. Over-Tight Root Pull

    Over-Tight Root Pull

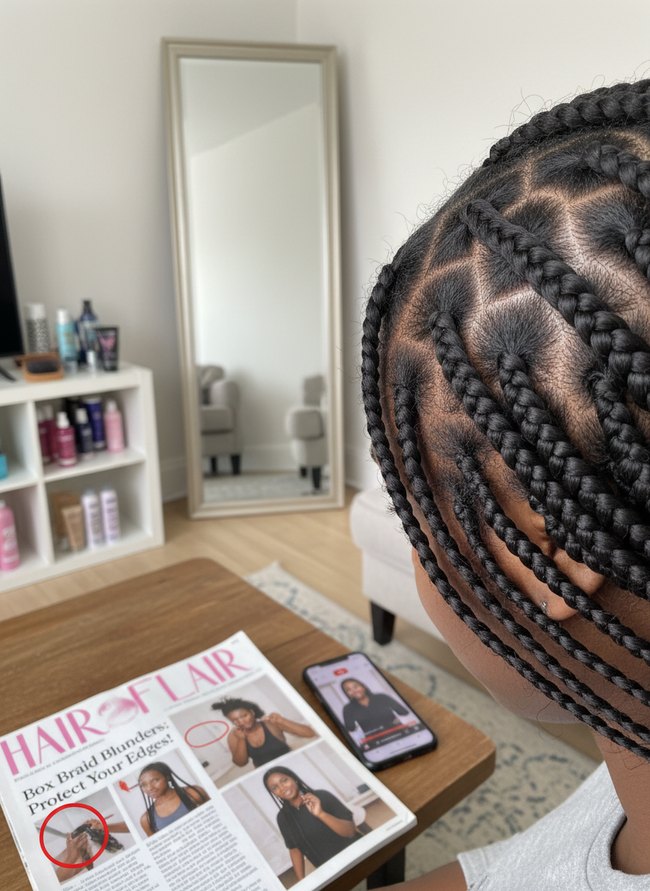
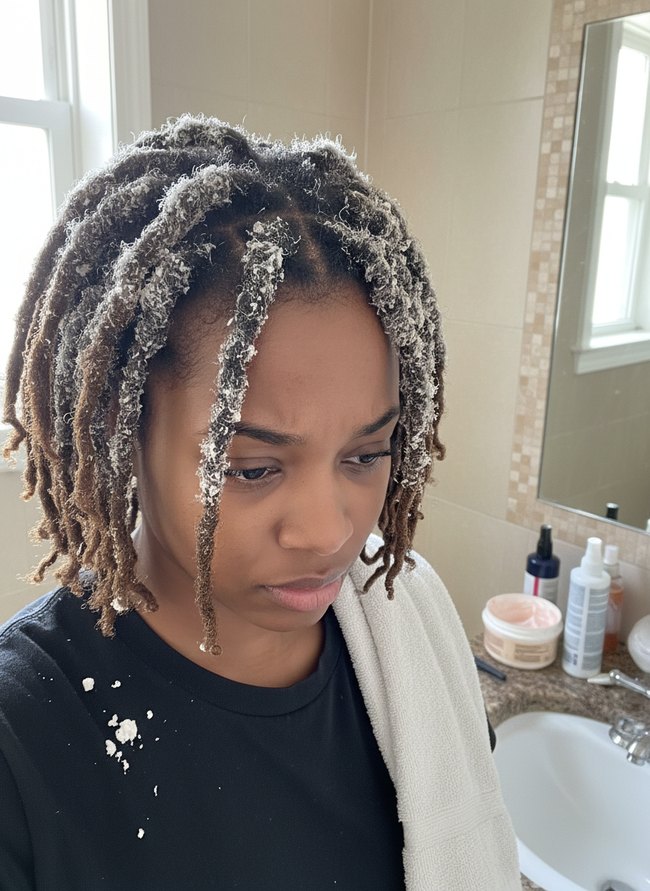
    The close-up on the scalp shows visible tension from tightly pulled black braids. Hair stylists recommend avoiding pulling hair too tightly when creating box braids. Excessive tension can damage delicate edges.

    2. Under-Sectioned Hair Strand

    Under-Sectioned Hair Strand

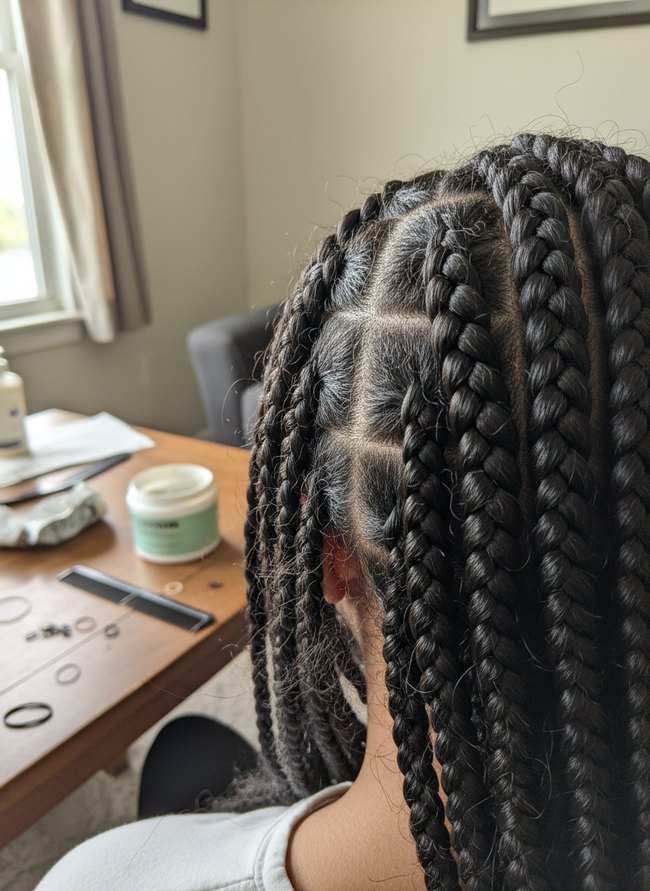
    Dark hair shows thin sections pulled into box braids, revealing scalp through tight parts. Many braids hang down the back, some with loose strands escaping the neat weave. Each section of hair must be thick enough to hold the braid without pulling too hard on the scalp.

    3. Prolonged Style Retention

    Prolonged Style Retention

    Tiny hairs around the hairline show new growth, indicating the dark box braids have been in for too long. The scalp needs a break from constant tension to stay healthy. Remove braids after six to eight weeks.

    4. Neglected Edge Care

    Neglected Edge Care

    Fine white hairs around dark braids show visible breakage and frizz. Small, flyaway strands indicate a common box braid mistake. Gentle handling and moisturizing products protect delicate edges.

    5. Improper Take-Down Technique

    Improper Take-Down Technique

    Loose strands of dark hair stick out from a braided section held by brown hands, showing a common problem. You must gently separate natural hair from the braid extensions. Always take down box braids slowly to prevent damage.

    6. Excessive Product Buildup

    Excessive Product Buildup

    White product flakes heavily coat the dark braided hair strands, showing too much styling gel. Clumps of white product stick to the black box braids. Keep product use light to avoid this common box braid mistake.

    My Braid’s Too Tight! How Do I Fix It Without Starting Over?

    Many braiders believe a tight braid means a neat braid. Loose braids seem messy. Actually, a painfully tight box braid strains your hairline. You might think you need to take down the whole style. However, that lengthy process is not your only option.

    A thin rattail comb offers precise relief. Most people just tug at the braid body. Instead, slide the slim comb handle under the offending cornrow section near your scalp. Gently lift the cornrow base upward. This small movement creates tiny breathing room for tender hair follicles. Repeat this careful action around your entire hairline, one braid at a time. The black plastic handle provides good grip.

    Alternatively, warm water can soften hard hair gel. Many braiders apply thick gel directly to the root. But gel hardens like concrete. Try filling a spray bottle with tepid, not hot, water. Lightly mist the tight areas along your temple lines and nape. The warm moisture helps the gel release its strong hold. This method avoids disturbing the main braid pattern. Then pat the damp areas with a soft cotton cloth.

    Finally, a light oil works wonders. Some stylists suggest heavy pomades. Instead, use a few drops of golden jojoba oil or clear argan oil. Rub the oil between your fingertips. Then gently massage the oil into your scalp where the tension lives. The natural oil lubricates the hair shaft, reducing friction and pulling. This simple step comforts your scalp and protects your delicate edges.

    Can I Still Get Box Braids If My Edges Are Already Thin?

    Many people think thin edges mean you can never wear box braids again. This belief is common, but it misses key details about hair health. You can still enjoy braided styles with careful planning. Most stylists will suggest skipping braids entirely, which limits your styling choices.

    Actually, a skilled braider focuses on protecting your delicate hair. A good braider will leave out your fragile hairline entirely, stopping each braid behind the hairline. This technique keeps tension off your small hair follicles. Others might try to braid tiny sections of baby hair, pulling on the delicate strands. Instead, ask for thicker braids around your face, which spread out the weight. Thinner braids create more pulling on each individual hair. Your natural hair needs gentle care.

    Another option is knotless braids, which start with your natural hair before adding braiding hair. This method reduces pulling compared to traditional knot braids. Many individuals with fine hair choose these. Small hair extensions can still cause damage. Avoid heavy, long extensions if your hairline feels weak. Choose lighter, shoulder-length braids to reduce the total weight. Your scalp will thank you.

    Which Idea Will You Try First?

    That’s 6 different takes on box braid mistakes. The best ideas above are usually the smallest moves — one material, one layout shift, one piece of furniture in the right place. Pick whichever room feels closest to your space and start there before tackling the rest.

    Found an idea worth keeping? Save this post to your Pinterest board so it’s waiting for you when you’re ready to start your own project.